Home / Blog / Sustainability & Compliance
Repairing Instead of Replacing
Repairing a dry bag instead of replacing it typically saves 60 to 75% of the money and about 85% of the material. A patch kit costing 12 that buys three more years from a 55 bag works out at roughly 4 per year of use, against about 18 per year if you buy a replacement every three years. The carbon arithmetic points the same way: a mid-size welded TPU bag carries roughly 6 to 9 kg of embodied carbon dioxide equivalent, and a repair that avoids one purchase saves almost all of it.
The caveat is that not every fault is worth fixing, and guessing wastes more than it saves. This guide gives the cost-per-year maths, a decision tree you can run in two minutes, hands-on methods for punctures, seams, hardware and closures, an honest list of faults that should be refused, and the design features that make a bag repairable in the first place. Read it with the bag in front of you: most decisions come down to where the damage sits relative to the fold line.
- The arithmetic of repair versus replacement
- Carbon payback: how little use justifies a repair
- A two-minute decision tree for any damaged bag
- Patching a puncture in TPU laminate
- Seams: re-welding, re-taping and when to stop
- Buckles, straps and valves: the fast fixes
- Closures that no longer seal
- Faults to refuse
- Downtime, spares and keeping kit in service
- Designing a bag so repair is possible
- Tools, workspace and skills
- Warranty, spare parts and the repair question
- When replacement really is the better answer
The arithmetic of repair versus replacement
The comparison that matters is cost per year of remaining service, not the price of the repair in isolation. A 55 bag expected to last eight years costs 6.90 per year if it survives, but most bags do not reach their expected life: they are retired at around five years because of a specific fault. If a 12 repair returns that bag to full function for three more years, the marginal cost is 4 per year, which is less than a third of buying new.
Two adjustments make the arithmetic honest. First, deduct the risk that the repair fails: a fix with a 70% chance of lasting three years is worth 5.70 per year of expected value, not 4. Second, count your time at whatever rate is realistic for you, because a repair that takes 45 minutes is not free. Even at 25 an hour, a one-hour repair on a mid-price bag still beats replacement by a wide margin, and the gap widens with every year the fix holds.
| Option | Upfront cost | Years gained | Expected cost per year | Verdict |
|---|---|---|---|---|
| Patch a puncture | 12.00 | 3 | 4.00 | Repair |
| Replace a buckle | 4.50 | 4 | 1.10 | Repair |
| Re-tape 120 mm of seam | 9.00 | 2 | 4.50 | Repair |
| Replace a dry zip | 22.00 | 3 | 7.30 | Marginal |
| Buy a new 20 L bag | 55.00 | 5 | 11.00 | Only if refused |
| Buy a new 40 L bag | 95.00 | 6 | 15.80 | Repair first |
Carbon payback: how little use justifies a repair
A welded dry bag is mostly polymer, and polymer carries embodied emissions from raw material through extrusion, lamination, welding and freight. A 10 L bag sits around 3 kg of carbon dioxide equivalent, a 20 L bag around 6 kg, and a 60 L expedition bag around 14 kg. A repair consumes between 0.05 and 0.4 kg depending on whether it needs heat, solvent or a new metal fitting, so the payback is immediate in almost every case.
That is worth stating plainly, because the intuitive objection is that a repair is negligible against a manufacturing footprint. It is negligible as an emission, and that is exactly the point: the repair avoids the 6 kg, and the only way to avoid the 6 kg is to not buy the replacement. The EPA materials management hierarchy ranks reuse and repair above recycling for precisely this reason, and the ISO life cycle assessment standards are the framework used to calculate the figures.
The second environmental argument is less obvious but often larger. Most dry bags are retired with 60 to 70% of their abrasion life remaining, and the retired bag then becomes a waste handling problem that costs money rather than a resource. Keeping a bag in service for three extra years delays that cost, and if the bag is eventually handed on rather than thrown away, the delay becomes a permanent saving.
A two-minute decision tree for any damaged bag
Run four questions in order. One: does the bag still hold air? Close it with three folds, inflate by mouth and leave it ten minutes; a bag that goes soft has a leak you have not found yet, and no repair should start until the leak is located. Two: is the damage within 60 mm of the primary fold line? Damage in that zone has a poor prognosis. Three: is the damage on a flat panel or at a weld? Flat panels repair well; welds are variable.
Four: is there a spare part for it? A buckle, strap or valve that a brand still supplies is a five-minute fix; one that has to be fabricated is not worth the time. If the answers are yes, no, flat panel and yes, repair it. If any answer is the other way, weigh the cost against the replacement price and be prepared to walk away. This is the same logic used to triage returns at scale, described in our second-life programme guide.
| Fault location | Within 60 mm of the fold | Typical repair cost | Expected years gained | Decision |
|---|---|---|---|---|
| Flat side panel puncture | No | 12.00 | 3-6 | Repair |
| Flat base panel abrasion | No | 12.00 | 2-4 | Repair |
| Straight seam, under 80 mm | No | 9.00 | 2 | Repair |
| Corner weld opened | No | 9.00 | 0.5 | Usually retire |
| Mouth stiffener creased | Yes | 0.00 | 1 | Reshape, then test |
| Crack at the fold line | Yes | 12.00 | 0.2 | Retire |
| Hardware torn from panel | No | 3.00 | 0.3 | Retire |
Patching a puncture in TPU laminate
A puncture on a flat panel is the most satisfying repair in the category, because a good patch is permanent. Cut a patch of the same film with rounded corners at least 30 mm larger than the hole in every direction, so a 6 mm hole gets a patch about 70 mm across. Round the corners to a radius of 10 mm or more, because a square corner is where a patch starts to lift.
- Clean the area with isopropyl alcohol and let it flash off for two minutes.
- Dry the bag completely; any moisture in the laminate will boil under heat.
- Cut a rounded patch 30 mm larger than the damage in every direction.
- Bond with a TPU contact adhesive in two thin coats, each dried for five minutes.
- Press from the centre outward with a roller, then leave it 24 hours before use.
- Air test the bag for ten minutes before it goes back in the water.
Heat welding gives a stronger bond than adhesive if you have the equipment: a household iron on a medium setting with a silicone sheet over the patch, eight seconds of contact and 30 seconds of pressure under a weight, produces a joint approaching the strength of the original film. Adhesive bonds reach roughly 60 to 70% of that and are more than adequate for a panel. Either way, the patch is stiffer than the surrounding laminate, which is why this method does not transfer to creases.
Seams: re-welding, re-taping and when to stop
A seam that has opened over a short length can be closed again. If the bag is welded TPU, a short section under about 80 mm can be re-welded with a hot wedge or a hand-held impulse sealer set to the film specification; if the bag is stitched and taped, the equivalent repair is a new length of seam tape applied from the inside with the seam pressed flat. Both need the area absolutely dry and free of detergent residue.
The prognosis depends on where the seam is. A straight run along a side panel repairs well, with about three repairs in four still holding after two seasons. A corner weld does not, because the geometry that caused the original failure is still there and the local strain is higher than anywhere else on the bag. If a corner has opened, treat it as a retirement signal rather than a repair job, and read our seam tear guide before you spend an hour on it.
Buckles, straps and valves: the fast fixes
Hardware is where repair pays best and takes least time. A side-release buckle is usually held by a webbing loop or a welded tab, and either can be swapped in under five minutes with no tools beyond a lighter to seal cut webbing. Replacement buckles cost 2 to 5 and are standardised by webbing width, so carry the width rather than the brand name when you order.
| Part | Typical cost | Time | Tools | Skill level |
|---|---|---|---|---|
| Side-release buckle, 25 mm | 2.00-5.00 | 5 min | Lighter or needle | Beginner |
| Cam buckle, 25 mm | 3.00-6.00 | 6 min | Screwdriver | Beginner |
| Webbing strap, 500 mm | 2.50-4.50 | 12 min | Scissors, lighter | Beginner |
| Purge valve | 4.00-8.00 | 10 min | Spanner or wrench | Intermediate |
| D-ring with weld patch | 1.50-3.00 | 20 min | Heat press | Intermediate |
| Dry zip, 400 mm | 18.00-26.00 | 50 min | Seam ripper, press | Advanced |
Two practical notes. Seal every cut webbing end by melting it, or it will fray within a month and the buckle will pull through. And buy two of everything: the second buckle costs the same to post and will be needed, because hardware failures cluster once a bag is past five years. Our buckle replacement guide covers the measurement and the swap in detail.
Closures that no longer seal
A roll-top that will not seal is usually a geometry problem rather than a fabric problem. If the stiffening band at the mouth has lost its shape, the fold will not lie flat and the closure leaks however many times you roll it. Soaking the band in warm water at about 50 °C for two minutes and reshaping it by hand restores enough stiffness on most bags; on a bag where the band has creased permanently, no repair holds.
Check the fold zone for grit before assuming anything is broken. A single grain of sand in the crease creates a capillary path, and a closure that leaks slowly is almost always this rather than a split film. Rinse the fold with fresh water, run a thumb along the line, and re-test with the air method before ordering any parts. If the film at the fold has a crack that opens when flexed, the closure is finished, and that is the point at which replacement becomes the honest answer.
Faults to refuse
Four faults should be declined every time. A crack running through the film at the fold line, because a patch is stiffer than the laminate and the crack reappears 10 to 20 mm away within weeks. Delamination wider than about 60 mm, because the bond has failed across an area rather than at a point. Hardware torn out of the panel, because the fabric around the attachment has already exceeded its tear strength. And any contamination by fuel or solvent, which cannot be removed from the film.
Refusing those four is not laziness, it is what makes the rest of the repair practice credible. A repair that fails in the field costs more than an honest retirement: the contents get wet, the trip is lost, and the owner loses confidence in every other patch they have made. Our retirement guide sets out the visual criteria, and the service life figures give realistic expectations by material.
Downtime, spares and keeping kit in service
For anyone whose work depends on dry kit, the real cost of a failure is downtime. A guide service running 30 bags loses about 240 in revenue if three bags fail during a week with no spares on hand. A small spares drawer removes almost all of that: six buckles in the two widths used, four metres of webbing, a patch kit, a tube of contact adhesive and two valves cost under 70 and cover the overwhelming majority of field failures.
- Keep six buckles in each webbing width used across the fleet, not one spare per bag.
- Store four metres of webbing and a lighter so a strap can be rebuilt on the spot.
- Hold one patch kit per five bags, with film blanks, adhesive and a roller.
- Label every bag with a service date so wear is tracked rather than guessed at.
- Run an air test on every bag at the start of each month of the season.
- Retire on a written criterion, not on a feeling, so decisions are consistent.
Designing a bag so repair is possible
Repairability is a design outcome, and four choices drive it. Replaceable buckles on webbing loops rather than welded-on hardware. A flat, unreinforced fold zone with no welds within 30 mm, so a crease crack is not inevitable. Panels large enough to take a 70 mm patch without crossing a weld. And a single film specification throughout, so one patch stock and one welding temperature cover the whole bag.
The commercial version of the same idea is spare-part availability. A programme that stocks buckles, valves and straps for six years after a model ends keeps bags in service for years beyond the point where most brands would have written them off. It is also cheap: holding spares for a model line typically costs under 0.4% of the line revenue, and it is the single highest-return sustainability measure available to a bag brand.
Tools, workspace and skills
A capable home repair bench costs under 60 and fits in a shoebox. Isopropyl alcohol, lint-free cloths, a rotary cutter or sharp scissors, a silicone pressing sheet, a seam roller, a tube of TPU contact adhesive, a lighter and a set of spare buckles cover everything except zipper replacement. Add a household iron if you plan to weld patches rather than glue them.
The workspace requirements are modest but not optional: dry, warm, well lit and ventilated. Adhesives need temperatures above 15 °C to cure properly and dry film to bond to, and solvent use needs moving air. Repair cafes and local mend groups are a good alternative for anyone who does not want to kit up, and most will handle a bag patch in under half an hour for a donation.
Warranty, spare parts and the repair question
Before repairing a bag that is still under warranty, check whether opening it voids the cover. Most warranties on welded bags cover seam and weld failures for two to five years and exclude punctures, abrasion and UV damage, so a puncture repair is usually safe to attempt while a weld failure should go back to the brand. Photograph the fault first and keep the photograph, because it is the evidence if the same fault recurs.
Ask the brand two direct questions when you buy: are spare buckles and valves available, and for how long after the model is discontinued? A brand that answers both specifically is telling you something true about how long it expects the bag to last. That question is now part of standard sustainability due diligence, and it appears in the buying checklist in our sustainable buying guide.
When replacement really is the better answer
Three situations justify buying new. The bag has a fold-line crack or broad delamination, the repair is refused, and the bag is at or beyond its realistic service life of eight to twelve years for weekend TPU use. Continuing to patch a bag past that point is false economy, because the film is ageing everywhere at once and the next failure will be somewhere you cannot reach.
The fourth situation is a change in use. A 10 L bag that was right for day paddles cannot be patched into a 40 L expedition bag, and a worn bag being pressed into a job it was never specified for will fail regardless of repair quality. In that case the old bag still has value: hand it on, cut it into mats and patch blanks, or route it into a take-back scheme. Only after those three should material recovery be considered.
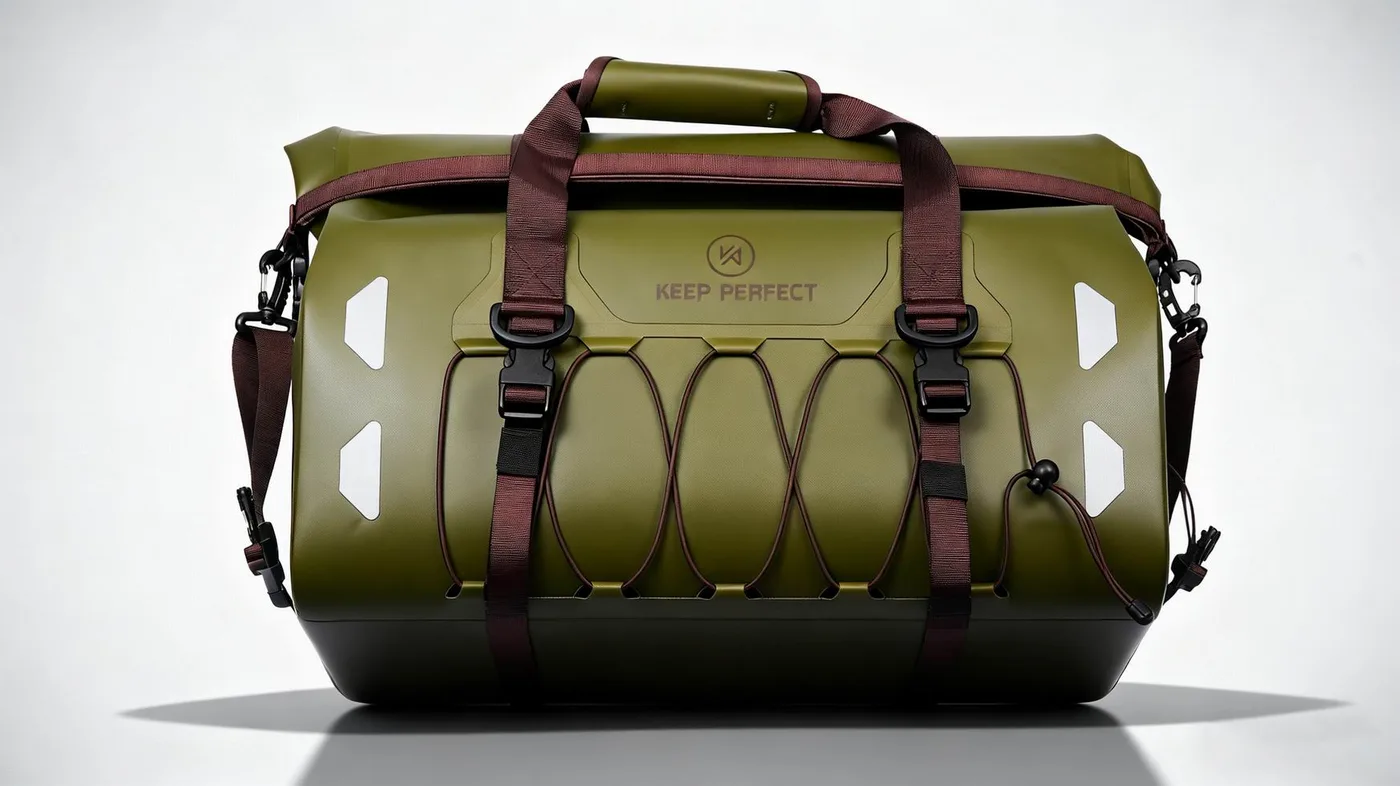
For anyone specifying bags for a fleet or a retail range, the repair case is also a design brief. Welded construction, replaceable hardware, a clear fold zone and published spare-part availability turn a disposable product into a serviceable one, and they cost almost nothing at the specification stage. Waterproof bags have been produced on our line since 2014 in an SGS-verified 4,950 m2 facility, with a 500-piece minimum, sampling in 6 to 10 working days and bulk in 35 to 50 days.Compare repairable constructions against the eco-friendly dry bag range, and keep a patch kit assembled before you need it.
Frequently asked questions
Q1. Is it worth repairing a dry bag instead of replacing it?
Usually yes. A 12 patch that buys three more years from a 55 bag costs about 4 per year of use, against roughly 11 per year for a replacement. Refuse the repair only for fold-line cracks, broad delamination and torn-out hardware.
Q2. How much does it cost to repair a dry bag?
Buckle replacement runs 2 to 5 and takes five minutes, a puncture patch about 12 in materials, and re-taping 120 mm of seam around 9. A full dry zipper replacement at 18 to 26 is the one repair that is often marginal against a new bag.
Q3. Can you patch a TPU dry bag?
Yes, on flat panels. Cut a rounded patch 30 mm larger than the hole in every direction, bond with TPU contact adhesive in two thin coats, roll from the centre outward, and leave it 24 hours before use. Heat welding gives a stronger joint.
Q4. Why do patches fail at the fold line?
Because the patch is stiffer than the surrounding laminate, so flexing concentrates strain at the patch edge and a new crack opens 10 to 20 mm away, usually within weeks. Fold-line damage is a retirement signal, not a repair job.
Q5. Can a welded seam be repaired at home?
A straight section under about 80 mm can be re-welded with a hand impulse sealer or re-taped from the inside on stitched bags. Three of four such repairs still hold after two seasons; corner welds are a different matter and usually fail again.
Q6. How do I know if a dry bag is beyond repair?
If it has a crack through the film at the fold line, delamination wider than about 60 mm, hardware torn out of the panel, or fuel contamination. In all four cases repair success is low and a field failure costs far more than a new bag.
Q7. How long does a repaired dry bag last?
A patched flat panel typically lasts as long as the rest of the bag, three to six more years of weekend use. A re-taped seam averages two seasons, and a replaced buckle usually outlasts the bag it is fitted to.
Q8. Can I replace a dry bag buckle myself?
Yes, in about five minutes. Buckles are standardised by webbing width, so order by width rather than brand. Melt the cut webbing end to seal it, or it will fray and the buckle will pull through within a month.
Q9. Does repairing save much carbon?
A repair consumes 0.05 to 0.4 kg of carbon dioxide equivalent and avoids the 3 to 14 kg embodied in a replacement bag, so the saving is almost the entire manufacturing footprint of the new bag.
Q10. How much embodied carbon is in a dry bag?
Roughly 3 kg of carbon dioxide equivalent for a 10 L bag, 6 kg for a 20 L bag and 14 kg for a 60 L expedition bag, covering raw material, lamination, welding and freight.
Q11. Will repairing my bag void the warranty?
Usually not for a puncture, because warranties on welded bags typically cover seam and weld failure for two to five years and exclude punctures and abrasion. Photograph the fault first and send weld failures back to the brand rather than opening them.
Q12. What should a dry bag spares kit contain?
Six buckles in each webbing width used, four metres of webbing, a lighter, patch blanks, TPU contact adhesive, a seam roller and two valves. The whole kit costs under 70 and covers most field failures.
Q13. Can I repair a bag that smells of fuel?
No. Petroleum residue absorbed into the film cannot be removed, and no adhesive will bond to a contaminated surface. Retire the bag, keep the hardware as spares, and cut clean panels into mats or patch blanks.
Q14. Do repair cafes fix dry bags?
Most will, and a panel patch takes under half an hour. Bring the bag clean and completely dry, because adhesives need a dry surface and most repair sessions do not have time to wait for drying.
Q15. What design features make a bag repairable?
Replaceable buckles on webbing loops, no welds within 30 mm of the fold line, panels large enough for a 70 mm patch, and a single film specification throughout so one patch stock and one welding temperature work everywhere.
Q16. Should I repair or hand the bag on?
Repair it if the fault is a buckle, strap, valve or flat-panel puncture. Hand it on if you cannot use it but it still passes an air test. Cut it up if it fails the air test, and only send cracked or delaminated laminate to recovery.
People also ask
Is it cheaper to repair or replace a dry bag?
Repair, in most cases. A 12 patch giving three more years costs about 4 per year of use against roughly 11 per year for a new 55 bag. Only zipper replacement, at 18 to 26, is close to marginal.
How do you repair a hole in a dry bag?
Clean with isopropyl alcohol, dry fully, cut a rounded patch 30 mm larger than the hole, apply TPU contact adhesive in two thin coats, roll from the centre outward, leave 24 hours, then air test for ten minutes.
Can you weld TPU at home?
Yes, with a household iron on medium, a silicone pressing sheet, eight seconds of contact and 30 seconds of pressure under a weight. Heat-welded patches approach the strength of the original film; adhesive patches reach about 60 to 70%.
When should you throw away a dry bag?
When it has a crack through the film at the fold line, delamination wider than about 60 mm, hardware torn out of the panel, or fuel contamination. Also at eight to twelve years, when the film is ageing everywhere at once.
Are dry bags worth repairing for environmental reasons?
Yes. A repair uses 0.05 to 0.4 kg of carbon dioxide equivalent and avoids the 3 to 14 kg embodied in a replacement, so it saves almost the whole manufacturing footprint while delaying a waste handling cost.
What spare parts should you keep for dry bags?
Six buckles per webbing width, four metres of webbing, a lighter, patch blanks, TPU contact adhesive, a seam roller and two valves. Under 70 in total, and it covers the large majority of failures in the field.
Need this in production volume?
QUANZHOU JUNYUAN BAGS has produced waterproof bags since 2014 in an SGS-verified 4,950 m2 facility in Fujian, China. Minimum order 500 pieces, sampling in 6–10 working days, bulk in 35–50 days, FOB Xiamen — write to service@junyuanbags.com with your spec and target market.