Replacing a Broken Dry Bag Buckle
Most dry bag buckles can be replaced in about fifteen minutes with a 6 mm screwdriver, a lighter and a replacement part that matches the webbing width to the millimetre. A standard 25 mm side-release buckle costs very little, carries 180 to 250 N of straight pull and restores the closure to full function, whereas a welded tab that has torn out of the film needs a different approach entirely. The first ten minutes should be spent working out which of those two situations you are in.
This guide covers the four ways a buckle is attached to a dry bag, how to tell a failed buckle from a failed weld, the threading and tension check that makes a repair trustworthy, and the load ratings that matter when the buckle is holding a rolled closure under pressure. It also sets out the small hardware kit worth carrying on any trip longer than a day, and the handful of cases where replacement is the wrong answer and the bag should be retired.
- How a dry bag buckle is attached in the first place
- Diagnosing the failure: buckle, webbing or weld
- The parts and tools worth having before you start
- Matching a replacement to the webbing and the load
- Replacing a side-release buckle on sewn webbing
- Replacing a buckle on a welded tab
- The five-minute job: swapping a ladderlock slider
- Dealing with a torn webbing tail
- Threading, tension and the lock-back test
- Salt, sand and why buckles fail early
- When a buckle cannot be replaced
- Spare parts worth stocking, by bag size
- Preventing the next failure
How a dry bag buckle is attached in the first place
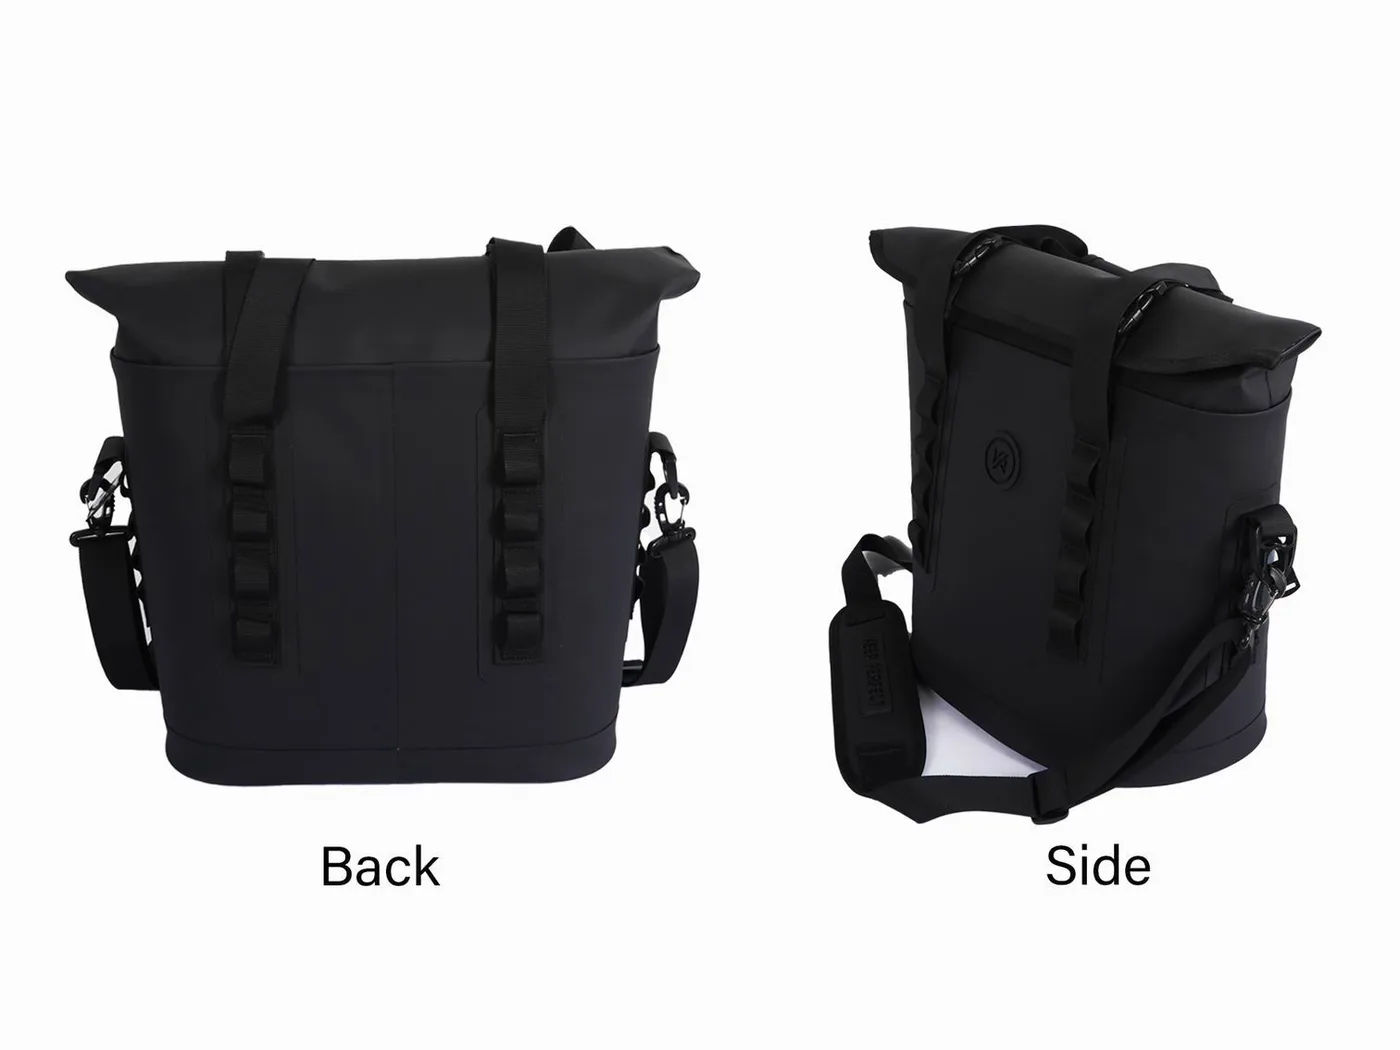
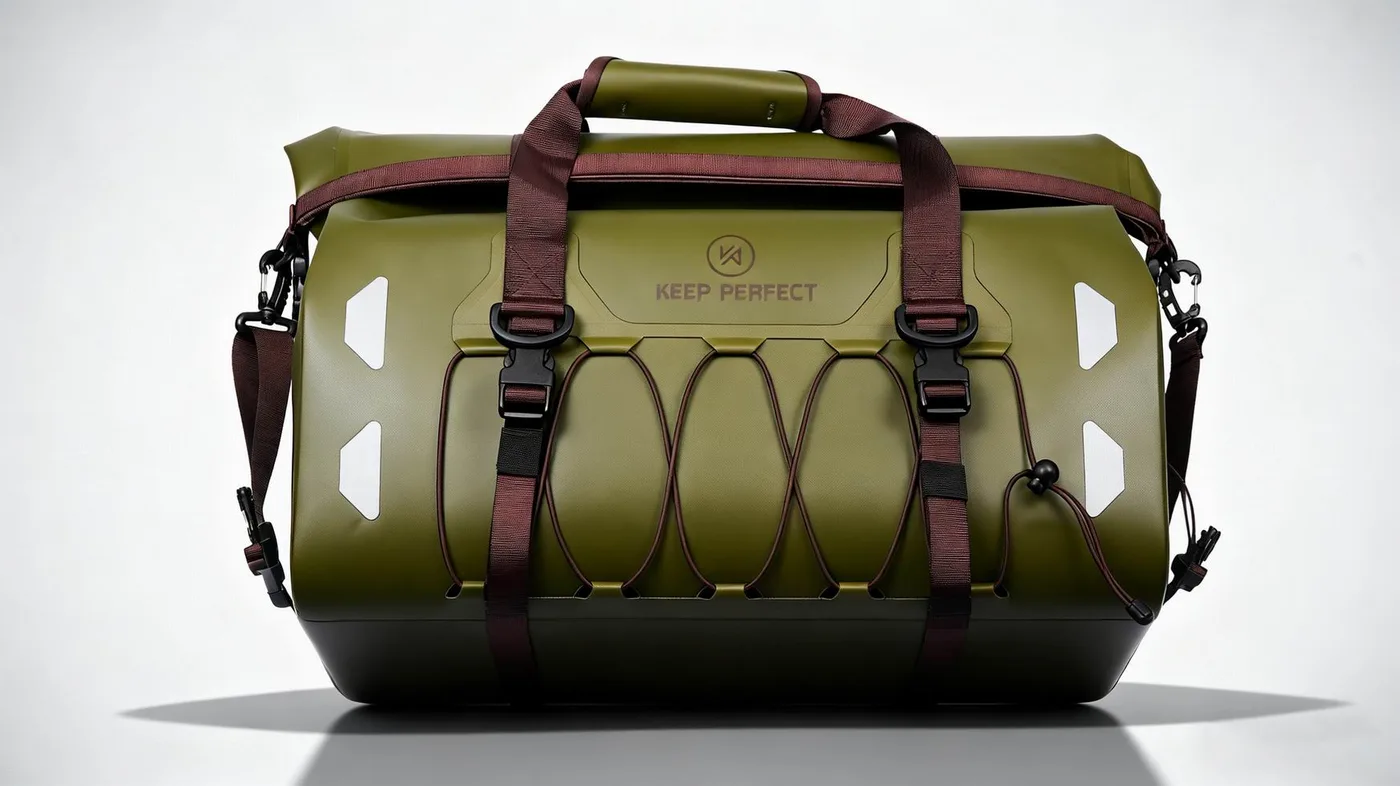
There are four attachment methods on a waterproof bag and each fails differently. The most common is a webbing tail sewn or welded to the bag, with the buckle threaded onto it and retained by a sewn bar-tack or by the friction of the threading itself. The second is a welded tab: a small TPU patch bonded to the body with a D-ring or a buckle half anchored to it. The third is a ladderlock slider on a continuous strap. The fourth is a moulded buckle integrated into the closure bar itself.
Only the first three are realistically replaceable at home. A buckle moulded into a closure bar is part of a compression-moulded component, and replacing it means replacing the bar, which on most bags means a warranty claim rather than a repair. Before you order a part, look at how the failed piece is joined to the bag: if you can see a webbing tail or a screw, you have a repair; if you see only film, you have a different problem.
| Attachment type | How it fails | Replaceable at home | Tools needed | Time |
|---|---|---|---|---|
| Webbing tail, sewn bar-tack | Buckle cracks, stitching holds | Yes | Seam ripper, needle, thread | 20 min |
| Webbing tail, welded to film | Buckle cracks or weld peels | Yes, if weld intact | Lighter, screwdriver | 15 min |
| Welded TPU tab with D-ring | Tab peels from body | Partly | TPU patch, adhesive | 24 h cure |
| Ladderlock slider on strap | Slider cracks or slips | Yes | None | 5 min |
| Moulded closure bar buckle | Bar cracks at the hinge | No | Warranty claim | N/A |
Diagnosing the failure: buckle, webbing or weld
Start by separating the three possible faults, because they need completely different work. A cracked buckle shows a visible fracture line, usually across the female box near the release button or at the point where the male prongs enter. Failed webbing shows fraying, a thinned section where it passes over a hard edge, or a tear at the sewn bar-tack. A failed weld shows lifting at the edge of a tab, often with a white stress mark in the film around it.
The diagnostic test takes thirty seconds. Hold the bag by the body and pull the buckle firmly away from it at about 45 degrees. If the buckle moves but the attachment stays put, the buckle is the fault. If the attachment moves relative to the bag, you have a weld or stitch failure. If the webbing stretches or shows a tear, the strap itself has gone and a new buckle alone will not fix it.
The parts and tools worth having before you start
A basic kit covers almost every buckle failure. You need a replacement buckle of the correct webbing width, a small flat screwdriver or a seam ripper to unpick a bar-tack, a lighter or a hot knife to seal cut webbing, and a pair of pliers with a smooth jaw for pressing a stubborn male prong. A 20 mm length of heat-shrink tube is useful for tidying a sealed webbing end, and a few cable ties act as an emergency closure if the part does not arrive in time.
Buy two of each size rather than one. Buckles fail in pairs more often than people expect, because both halves have been through the same number of cycles, the same salt and the same UV. Replacing one and leaving the other is the most common reason a repair is followed by a second failure three weeks later. Keep the spares in a small pouch with the other repair items listed in our travel repair kit guide.
Matching a replacement to the webbing and the load
Buckles are sized by the webbing they accept, and the tolerance is tight. A 25 mm buckle on 25 mm webbing has about 1 mm of slack; a 25 mm buckle on 20 mm webbing lets the strap twist and slip under load. Measure the webbing with a ruler across its flat width, not the bag specification, because strap width and bag size are independent. Then check the rated load, which is where cheap parts fail.
| Webbing width | Typical use on a dry bag | Rated straight pull | Rated with shock load | Recommended minimum |
|---|---|---|---|---|
| 15 mm | Small 2L pouches, PFD lash | 90-120 N | 45-60 N | 100 N |
| 20 mm | 5L and 10L roll-tops | 140-180 N | 70-90 N | 150 N |
| 25 mm | 20L to 35L closures | 180-250 N | 90-125 N | 200 N |
| 38 mm | Shoulder straps, duffels | 320-450 N | 160-225 N | 350 N |
| 50 mm | Expedition lash straps | 500-700 N | 250-350 N | 550 N |
Shock loading is the figure that matters in the field. A bag dropped 300 mm onto a hard surface while lashed generates a brief load several times its static weight, and a 10 kg bag can momentarily apply well over 300 N at the buckle. Choose a part rated at least twice the static load you expect, and avoid unbranded acetal copies of unknown origin, which typically fail 30 to 40% below the figure printed on the bag.
Replacing a side-release buckle on sewn webbing
- Photograph the original threading before you cut anything; strap routing is easy to get wrong.
- Unpick the bar-tack with a seam ripper, working from the back where the thread is exposed.
- Slide the broken buckle off the tail and thread the replacement on the same way round.
- Sew a new bar-tack with bonded polyester thread, six to eight passes through both layers.
- Seal the raw webbing end with a lighter, then press it flat while still warm.
- Pull hard along the strap axis and confirm the buckle does not slide on the webbing.
Threading direction is the detail most people get wrong. A side-release buckle has a fixed end and an adjustable end: the fixed end has a bar with no slot, the adjustable end has a slot that lets webbing slide through for tension. Reverse them and the strap will not hold tension at all. The adjustable end normally sits on the strap that runs away from the bag, so you can pull it tight towards your body.
The bar-tack is doing more work than it looks. Eight passes of bonded polyester through both layers gives roughly 400 N of holding force, which is above what a 25 mm buckle will see. Six passes of ordinary sewing cotton gives about 120 N and will pull out within a season. If you do not have bonded thread, a short length of 1 mm cord whipped through both layers and sealed is a better field substitute than cotton.
Replacing a buckle on a welded tab
A welded tab attaches the hardware to the film rather than to a strap, so the replacement is usually the tab, not just the buckle. The clean approach is to weld or bond a new TPU tab over the old one, which requires either an RF machine or a solvent-based polyurethane adhesive and a 24 hour clamp. The field approach is simpler: thread the new buckle onto a short webbing loop, then bond that loop to the bag with a TPU patch large enough to spread the load.
Load spreading is the whole problem here. A point attachment puts all the force on maybe 15 mm of film, and film tears at that scale. A patch of 60 mm by 80 mm spreads the same force across a perimeter of roughly 280 mm, which is why a patch repair often outlasts the original tab. Round the corners of the patch before bonding; square corners are where patches peel first.
The five-minute job: swapping a ladderlock slider
A ladderlock is the flat rectangular slider used to tension shoulder straps and compression cords, and it is the easiest part on any bag to replace. It has no fixed orientation and no sewn retention: the webbing simply passes over one bar, under the middle bar and back over the third. Slide the old one off the free end of the strap and thread the new one in the same sequence, then pull the strap to set the friction.
The failure to watch for is a cracked centre bar, which lets the strap slip a few millimetres every time the bag is lifted. That slip is easy to miss on a shoulder strap because the strap still works, just slightly lower each time. If you find yourself re-tensioning a strap more than once an hour, the centre bar is almost certainly cracked rather than the strap stretching.
Dealing with a torn webbing tail
If the webbing itself has torn, replacing the buckle is only half the job. Cut the strap back to sound material, at least 15 mm beyond the last sign of fraying, and seal the cut end immediately with a lighter or a hot knife so it cannot unravel. A 25 mm polyester strap sealed this way loses about 10 mm of usable length but retains essentially all of its tensile strength.
If cutting leaves the strap too short to thread, splice in a new length. Overlap the old and new webbing by 50 mm, box-stitch the overlap with bonded thread on all four sides, then seal both cut ends. A spliced strap is slightly stiffer through the repair zone, which is worth knowing if the strap passes through a ladderlock slider, because the stiff section may not feed through cleanly.
Threading, tension and the lock-back test
A repair is only trustworthy once it has been loaded. Thread the strap, pull it to the tension you would use on the water, then perform the lock-back test: pull the two halves apart with a steady increasing force for five seconds, release, and repeat ten times. A correctly threaded, correctly rated buckle shows no slip and no change in the threading after ten cycles.
Then test it in the state that actually matters: with the bag closed and under pressure. Roll the bag three times, clip the buckle, squeeze the bag so the closure is loaded, and watch for the buckle creeping open. A buckle that holds a static load but creeps under closure pressure is either under-rated or the strap is threaded through the wrong side of the adjustable bar.
Salt, sand and why buckles fail early
Buckle failure is rarely fatigue in the ordinary sense; it is usually contamination. Salt crystals form in the gap between the male prong and the female box, and they jam the release mechanism so you push harder, which cracks the box. Sand does the same thing with more abrasion. A buckle rinsed in fresh water after every saltwater trip typically lasts five to eight years; the same buckle left salty often cracks in under two.
| Condition | Typical service life | First symptom | Prevention |
|---|---|---|---|
| Rinsed after every trip | 5-8 years | Slight stiffness | Keep rinsing |
| Rinsed monthly | 3-5 years | Gritty release | Rinse more often |
| Never rinsed, saltwater | 1-2 years | Cracked box at the button | Rinse, work the mechanism wet |
| Stored wet and folded | 1-3 years | White stress marks | Dry open, store loose |
| High UV, tropical | 2-4 years | Chalky surface | Store shaded |
The rinse has to be done properly to help. Dunk the buckle, work the release five or six times while it is still wet so the crystals dissolve out of the gap, then let it dry open. A buckle rinsed on the outside only still has salt in the mechanism, which is why some bags crack on a schedule that looks random. Our sand and buckle guide covers the same ground for grit.
When a buckle cannot be replaced
Three situations call for retirement rather than repair. The first is a closure bar that has cracked across the hinge: that component carries the full closure load and no field repair restores it. The second is a weld that has peeled along more than 30 mm, because a patch over that length will still be fighting the film it is bonded to. The third is a bag where two or more hard points have failed, which usually means the film itself has degraded.
There is also an economic line. If the bag is five years old, has chalky film and has lost two buckles, replacing hardware is treating a symptom. A bag showing UV chalking has lost enough plasticiser and enough tensile strength that the next failure will be a tear rather than a buckle, and a tear in the body cannot be repaired to an immersion rating. Our retirement guide gives the inspection sequence.
Spare parts worth stocking, by bag size
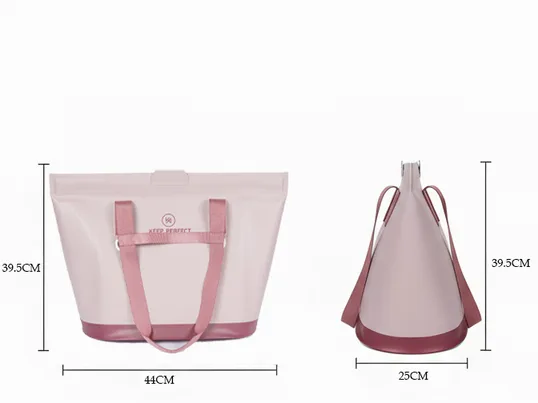
A small spares pouch covers almost every hardware failure a trip can produce. For a two-bag system, carry one 20 mm and one 25 mm side-release buckle, one 25 mm ladderlock, 300 mm of spare 25 mm webbing, a lighter, a seam ripper, eight cable ties and a 60 by 80 mm TPU patch. All of that weighs under 90 g and fits in a 0.5 L pouch, which is small enough to live permanently inside a 20L bag.
| Bag size in the system | Buckle widths to carry | Webbing length | Extra items | Kit weight |
|---|---|---|---|---|
| 2L and 5L only | 15 mm, 20 mm | 150 mm | Cable ties, lighter | 35 g |
| 10L plus 20L | 20 mm, 25 mm | 300 mm | Ladderlock, TPU patch | 70 g |
| 20L plus 35L | 25 mm, 38 mm | 450 mm | Bonded thread, needle | 110 g |
| Full 5L to 90L range | 20, 25, 38, 50 mm | 600 mm | Spare D-ring, adhesive | 180 g |
| Rental fleet bench | All widths, 10 each | 5 m | Bar-tack machine, heat knife | Bench stock |
For a rental operation or a club store the kit becomes a bench rather than a pouch. The two additions that pay for themselves fastest are a bar-tack machine, which turns a twenty-minute hand-sewn repair into a ninety-second one, and a hot knife, which seals webbing cleanly instead of leaving a melted blob that will not pass through a slider. Both are cheaper than the bags they save.
Preventing the next failure
- Rinse every buckle in fresh water and work the release while it is wet.
- Store bags dry, open and out of direct sun; UV is the second biggest cause.
- Do not over-tension a closure; a drum-tight bag loads the buckle from inside.
- Check hard points monthly during a season, flexing each tab by hand.
- Carry one spare buckle of each webbing width on any trip over two days.
- Replace both halves at once; they have aged identically.
- Avoid unbranded acetal copies rated below twice the expected static load.
- Log the failure date so you can spot a pattern across a fleet.
The pattern-logging habit matters for anyone running a fleet rather than a single bag. Ten rental bags that all lose the same buckle at around fourteen months are telling you something specific about that component, and a production partner can act on it by changing the part or moving the attachment point. Ten bags failing at random intervals are telling you about use conditions instead. Both are cheap to fix once identified, and both are invisible without a record.
For programmes where hardware failure is a warranty issue rather than a nuisance, specify it properly from the start. Name the buckle grade, the rated load, the webbing width and the number of cycles the part must survive in a salt-spray test. Our production line has built waterproof bags since 2014 in an SGS-verified 4,950 m2 facility, with sampling in 6 to 10 working days and bulk in 35 to 50 days, and hardware is one of the few components where spending 30% more removes most field returns.
Two standards bodies publish the test language used in serious hardware specifications. The ASTM catalogue covers tensile and salt-spray procedures for hardware and webbing, and the ISO catalogue covers the corrosion and cycle-testing vocabulary that appears on most spec sheets. Quoting a standard rather than an adjective is the single cheapest way to make a hardware claim enforceable.
Related reading helps with the parts of this job that are not about buckles. Our buckle types and load ratings guide covers the hardware families in detail, our corrosion resistance guide explains why some finishes survive salt and others do not, and our patch kit guide lists what to carry for film damage. The construction options across the range are on our product line page, and longer technical notes sit in the academy section.
Frequently asked questions
Q1. Can you replace a broken dry bag buckle?
Yes, in most cases. If the buckle is threaded onto a webbing tail or a welded tab that is still sound, a matching replacement can be fitted in about fifteen minutes with a screwdriver, a lighter and, for sewn attachments, bonded thread.
Q2. What size buckle do I need?
Measure the flat width of the webbing with a ruler, not the bag specification. Common dry bag sizes are 20 mm for 5L and 10L bags, 25 mm for 20L to 35L closures and 38 mm for shoulder straps.
Q3. How much load should a replacement buckle carry?
At least twice the static load you expect. A 25 mm buckle rated at 200 N straight pull suits a 10 kg load, because a 300 mm drop can momentarily apply over 300 N at the hardware.
Q4. Why does my buckle keep cracking?
Usually salt or sand inside the release mechanism. Crystals jam the button, you push harder and the female box cracks. Rinse the buckle and work the release five or six times while it is still wet.
Q5. Can I repair a buckle welded to the film?
Partly. Thread a new buckle onto a short webbing loop and bond that loop to the bag with a TPU patch of at least 60 by 80 mm, with rounded corners so it does not peel.
Q6. What is the bar-tack for on a buckle strap?
It stops the buckle sliding along the webbing under load. Eight passes of bonded polyester thread give roughly 400 N of holding force; ordinary sewing cotton gives about 120 N and pulls out quickly.
Q7. How do I stop cut webbing from fraying?
Seal the cut end immediately with a lighter or a hot knife, then press it flat while it is still warm. You lose about 10 mm of length and keep essentially all of the tensile strength.
Q8. Which way round does a side-release buckle go?
The fixed end has a solid bar, the adjustable end has a slot for tensioning. The adjustable end normally sits on the strap running away from the bag so you can pull it tight towards you.
Q9. Can I use a cable tie instead of a buckle?
As an emergency only. A cable tie through the rolled closure holds for a short carry but it cuts into the film under shock load and it cannot be tensioned safely with wet hands.
Q10. How do I test a replacement buckle?
Thread it, tension it, then pull the halves apart ten times with increasing force. Then close the bag, squeeze it so the closure is loaded, and watch for the buckle creeping open.
Q11. When should I retire the bag instead?
When the closure bar has cracked across the hinge, when a weld has peeled along more than 30 mm, or when two or more hard points have failed and the film is chalky.
Q12. Do both buckle halves need replacing together?
Yes. Both halves have seen the same salt, UV and cycles, so the one you leave will usually fail within weeks. Buy spares in pairs.
Q13. Does UV damage buckles?
Yes. Acetal and nylon hardware chalks under sustained UV and loses impact strength, which is why a tropical bag can crack a buckle in two to four years against five to eight in a temperate climate.
Q14. What thread should I use for a bar-tack?
Bonded polyester or bonded nylon of at least Tex 40. Cotton and ordinary sewing thread absorb water, lose strength when wet and pull out of the stitch line within a season.
Q15. Can I replace a moulded closure bar buckle?
No. That buckle is part of a compression-moulded component carrying the full closure load. It is a warranty claim rather than a repair.
Q16. How long does a replacement buckle last?
Five to eight years if the bag is rinsed after saltwater use and stored dry and shaded, and one to two years if it is left salty and never rinsed.
People also ask
How do you fix a broken buckle on a dry bag?
Confirm whether the buckle, the webbing or the weld has failed, buy a replacement that matches the webbing width and exceeds twice your expected load, thread it the same way round as the original, then load-test it ten times.
Can you buy replacement buckles for dry bags?
Yes. They are standard parts sized by webbing width: 15, 20, 25, 38 and 50 mm. Buy from a hardware or webbing specialist and choose a branded acetal part with a published load rating.
Why do dry bag buckles crack?
Mostly salt crystals and sand inside the release mechanism, followed by UV chalking. Both make the release stiff, and the extra thumb pressure needed to open it cracks the female box.
Do you need to sew a new buckle on?
Only if the strap was bar-tacked. Slip-through buckles on a continuous strap hold by friction and need no stitching, but a fixed end should be bar-tacked with six to eight passes of bonded thread.
How do you stop a buckle slipping on webbing?
Thread the adjustable end correctly so the slot grips the strap, then bar-tack the fixed end. If it still slips, the buckle is oversized for the webbing and should be replaced with the right width.
Is it worth repairing an old dry bag?
Yes if the film is still supple and only the hardware has failed. No if the film is chalky, a weld has peeled more than 30 mm, or the closure bar itself has cracked.
Need this in production volume?
QUANZHOU JUNYUAN BAGS has produced waterproof bags since 2014 in an SGS-verified 4,950 m2 facility in Fujian, China. Minimum order 500 pieces, sampling in 6–10 working days, bulk in 35–50 days, FOB Xiamen — write to service@junyuanbags.com with your spec and target market.