Home / Blog / Design & Branding
Printed Dry Bags: Digital vs Screen
On a 500-piece run of 20L roll-top dry bags, digital transfer printing costs roughly USD 0.85 to 1.40 per printed panel with no screens and a one-day set-up, while screen printing needs 4 to 6 screens at USD 18 to 35 each and lands at USD 0.35 to 0.60 per piece once you pass about 800 units. The break-even sits between 600 and 900 pieces for a four-colour mark on a 0.5 mm TPU shell. Choose digital when the artwork carries gradients, more than four flat colours or a variable code; choose screen when the mark is flat, the quantity is high, and the ink has to survive 500 hours of xenon arc exposure and repeated salt-water immersion.
This guide compares the two routes on the variables that decide whether a printed bag still looks right after a season on a boat: ink film thickness, adhesion to TPU and PVC, stretch and crease behaviour at the roll-top fold, colour gamut and Pantone tolerance, cure heat, and the lab tests that predict field life. Every figure below comes from runs on 420D and 500D TPU-laminated shells; PVC-coated bases behave differently and are flagged where it matters. If you are building a whole colour programme rather than a single mark, read this next to our dry bag colour range guide.
- What each print route actually puts on the fabric
- Ink film thickness and the hand feel of a printed panel
- Adhesion on TPU, PVC and coated nylon
- Stretch, crease and the roll-top fold line
- Colour gamut, gradients and fine detail
- Registration, repeat sizing and where artwork can sit
- Cure heat and what it does to the film underneath
- Abrasion, salt water and UV: the durability tests
- Colour matching: Pantone targets and realistic tolerances
- Cost per piece, set-up charges and the break-even point
- Sampling, lead time and revision cycles
- Ink chemistry, compliance and end-of-life
- Choosing a route: a decision matrix
What each print route actually puts on the fabric
Digital printing on soft waterproof shells comes in two practical forms. The first is inkjet printing onto a transfer medium followed by a heat press at 150 to 165 °C for 12 to 20 seconds, which drives the ink into a receptive coating. The second is UV-curable inkjet printed straight onto the panel and cured under a lamp in one to three seconds. Both leave a film of 3 to 8 µm, which is thinner than a human hair and effectively changes nothing about how the panel flexes.
Screen printing pushes ink through a tensioned mesh, typically 110 to 180 threads per centimetre, using a squeegee at 60 to 75 Shore A hardness. Each colour needs its own screen, its own flash cure at 90 to 130 °C, and a final oven cure of 90 to 180 seconds at 150 to 160 °C. The result is a raised layer: 40 to 90 µm for plastisol, 25 to 60 µm for silicone, and up to 120 µm when a puff additive is used.
The physical difference matters more than the visual one. A digital print sits in or on the surface and moves with the film; a screen print sits on top of it as a discrete layer with its own stiffness, its own elongation limit and its own failure mode. Nearly every problem people report with printed waterproof bags, from cracking at the fold to peeling after a salty season, traces back to that distinction rather than to the artwork itself.
| Parameter | Digital transfer / UV inkjet | Screen (plastisol) | Screen (silicone) |
|---|---|---|---|
| Ink film thickness | 3-8 µm | 40-90 µm | 25-60 µm |
| Colour count per pass | Unlimited (CMYK + extended) | 1 per screen, 4-8 typical | 1 per screen, 2-4 typical |
| Set-up before first piece | 0.5-1 day | 1.5-3 days incl. screens | 1.5-3 days incl. screens |
| Mesh count | Not applicable | 120-180 threads/cm | 90-140 threads/cm |
| Cure temperature | 150-165 °C, 12-20 s | 150-160 °C, 90-180 s | 150-170 °C, 120-240 s |
| Smallest legible stroke | 0.15 mm | 0.30 mm | 0.35 mm |
| Ink elongation before crack | 5-25% | 80-150% | 200-450% |
Ink film thickness and the hand feel of a printed panel
Thickness is the first thing to specify because it drives everything else. A 30 x 20 cm digital print adds about 0.4 g to a bag; the same area in plastisol at 70 µm adds 5 to 9 g, and a silicone high-build patch can add 12 g. On a 20L roll-top that weighs 480 g empty, a 9 g print is 1.9% of the bag weight and is felt mostly as stiffness rather than mass.
Stiffness is measurable. Using a cantilever bend test, an unprinted 500D TPU panel gives a bending length of about 21 mm; the same panel with a 70 µm plastisol block rises to 27 to 30 mm. That change is welcome on a carry handle or a base patch, where grip and scuff resistance help, and unwelcome across a closure fold, where the panel has to reverse on itself three times every time the bag is shut.
Hand feel also decides how a printed panel behaves when wet. Silicone inks stay grippy with a coefficient of friction around 0.9 even under water, which is why they are used on grab handles and lash points. Digital prints inherit the friction of the shell underneath, roughly 0.4 to 0.6 on TPU, and become no more slippery when soaked; plastisol sits in between but glazes after a few thousand abrasion cycles.
Adhesion on TPU, PVC and coated nylon
Adhesion is a surface-energy problem before it is an ink problem. Fresh TPU film measures 38 to 42 dyn/cm, which is high enough for most screen inks to bite after a light corona or flame treatment. The trouble starts with PVC-coated bases, where plasticiser migrates to the surface over 6 to 18 months and drops the effective surface energy below 34 dyn/cm, turning a well-cured print into a sheet that lifts at the edges.
Digital inks are more demanding. UV-curable inkjet sets by cross-linking rather than by absorption, so on a low-energy film it needs either a pre-treatment to 44 dyn/cm or a thin adhesion promoter applied by pad or spray. Without one, cross-hatch adhesion per ASTM D3359 drops from 5B to 2B within 72 hours of salt spray, which is the fastest way to lose a whole production run to returns.
The practical rule is to test the ink system against the exact film batch, not against a generic data sheet. Film chemistry varies by grade and by age: a reel that has sat for nine months in a warm warehouse behaves differently from the same specification printed the week it arrived. The standard methods are published by the ASTM for adhesion and by ISO for colour fastness, and both are worth naming in a brief rather than describing subjectively.
| Substrate | Route | Pre-treatment needed | ASTM D3359 before | ASTM D3359 after 72 h salt spray |
|---|---|---|---|---|
| 0.5 mm TPU on 500D | Digital transfer | None | 5B | 4B-5B |
| 0.5 mm TPU on 500D | UV inkjet | Corona to 44 dyn/cm | 5B | 3B-4B |
| 0.3 mm TPU on 420D | Screen plastisol | Flame or corona | 5B | 4B |
| 0.3 mm TPU on 420D | Screen silicone | Primer + corona | 5B | 5B |
| PVC-coated 600D | Digital transfer | Adhesion promoter | 4B | 2B |
| PVC-coated 600D | Screen plastisol | Solvent wipe | 5B | 3B |
| rPET with TPU backer | Digital transfer | None | 5B | 4B |
Stretch, crease and the roll-top fold line
A roll-top closure asks the fabric to bend back on itself and then to sit under pressure. At the first fold, the outer surface of a 0.5 mm TPU laminate stretches by roughly 15 to 25%, and it does that hundreds of times over a season. Any ink on that surface has to stretch by the same amount or it will crack, and the crack will run along the fold line where it is most visible.
This is where the two routes separate sharply. Silicone screen inks elongate 200 to 450% before failure, plastisol 80 to 150%, and a UV-cured digital film only 5 to 25% depending on the ink set and the cure dose. A photographic digital print placed across a fold will craze within a few dozen closures; the same artwork placed 80 mm below the fold will last years.
The test is simple and worth running on every sample: roll the bag shut three times, press it flat, then open it and inspect the fold under 10x magnification for hairline crazing. Repeat 200 times on a jig if you want a number to put in a specification. Most brands settle on a rule of keeping any ink heavier than 20 µm at least 60 to 80 mm clear of the top fold line.
Colour gamut, gradients and fine detail
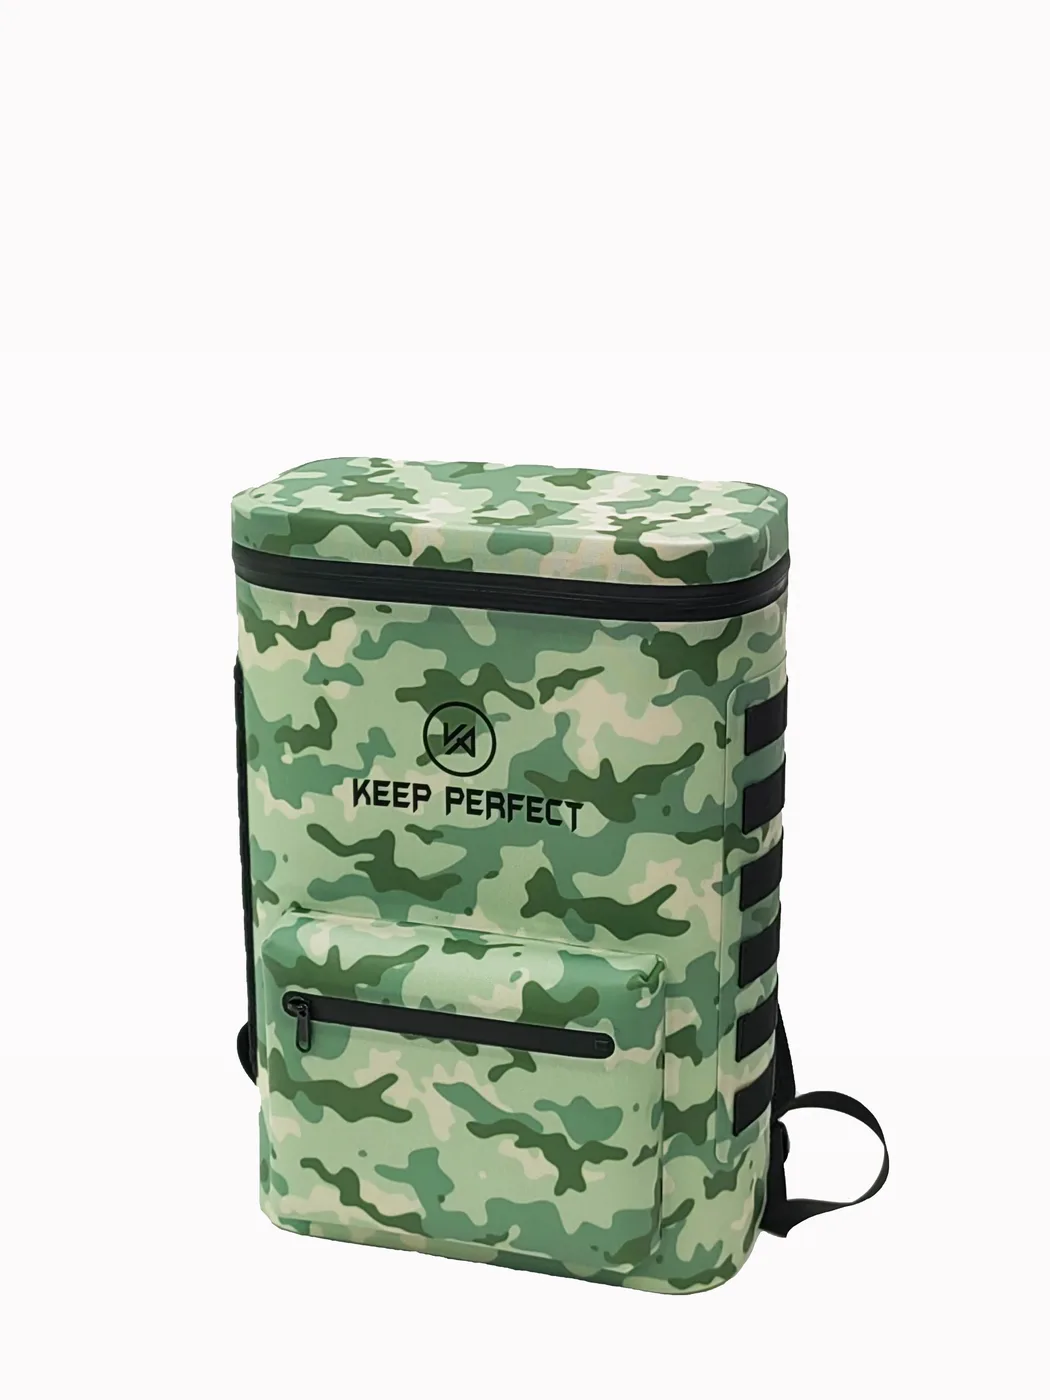
Digital printing reproduces continuous tone. A camouflage pattern, a photographic image, a gradient fade from black to olive, or a sunset print on a beach bag are all routine at 600 to 1200 dpi with no visible dot structure. Colour is built from CMYK plus extended inks such as light cyan, light magenta, orange and green, which widens the achievable gamut to roughly 90% of the sRGB space on a white-coated film.
Screen printing reproduces flat spot colour. Each colour is mixed to a Pantone reference and laid down as a solid, so a logo of two or three flat colours is sharper, more opaque and more repeatable than it would ever be digitally. Halftones are possible at 45 to 65 lines per inch, but the mesh limits the minimum dot, so gradients in screen printing tend to band and fine type below about 0.3 mm stroke fills in.
Detail limits also differ in registration. Digital prints hold every colour in one pass, so there is nothing to misregister. Screen printing stacks four to eight passes with a positional tolerance of roughly 0.2 to 0.5 mm per colour, which is invisible on a 25 cm badge and obvious on 4 mm keyline type. If your mark contains fine text, either enlarge it or print it digitally.
- Flat mark, 1 to 4 spot colours, high volume: screen wins on opacity and unit cost.
- Photographic, gradient or camo artwork of any volume: digital is the only real option.
- Artwork with a variable element such as a serial or a QR code: digital, no alternative.
- Metallic, puff, glow or high-build effects: screen only, because the effect lives in the ink layer.
- Fine keyline type under 1 mm: digital, or screen at 180 threads/cm with a hardened emulsion.
Registration, repeat sizing and where artwork can sit
A printed dry bag is not a flat sheet; it is a welded assembly with seams, D-ring patches, a base weld and a stiffened mouth. Artwork has to be planned around those features, not over them. The working clearance is 8 to 12 mm from any weld line, because the weld bead raises the surface by 0.3 to 0.8 mm and a squeegee will skip across it, leaving an uninked channel right where the eye follows the seam.
Shrinkage during cure is the second planning constraint. TPU laminated to a polyester face moves 0.5 to 1.5% when it goes through a 150 °C oven, which means a 300 mm artwork repeat lands between 295.5 and 298.5 mm. On a single centred badge this is invisible. On a repeat pattern that has to align across a side seam or meet a second panel, it is the difference between a clean join and a 4 mm mismatch.
Placement also has a durability dimension. The base and lower third of a bag take the abrasion from sand, concrete and boat decks; a print there will lose 20 to 40% of its density after 10,000 Martindale cycles. Put the mark in the upper third of the front panel, clear of the fold, and the same print still reads at 90% density after the same test.
Cure heat and what it does to the film underneath
Heat is the hidden risk in printed waterproof bags. TPU film softens anywhere between 120 and 180 °C depending on grade, and the radio-frequency welds that hold the bag together are the most heat-sensitive part of the assembly. A heat press at 160 °C for 15 seconds is safe on most 0.5 mm TPU shells. Push to 180 °C for 60 seconds and you start to see weld creep, where the seam edge softens and loses 10 to 20% of its peel strength.
Screen curing is gentler per degree but longer. A conveyor oven at 150 °C for two to three minutes subjects the whole bag, including the welds, to a sustained thermal load. That is usually fine for a body panel print, but it is a real problem when the print sits within 30 mm of a welded seam or a welded handle, because the heat travels along the film and softens the joint from both sides.
Ask for a weld peel test on a printed sample, not just an unprinted one. The comparison you want is the seam strength of a bag printed and cured through the normal route against the same bag left blank. A well-run line shows less than 10% loss; a line running too hot shows 20 to 35% and will produce field failures at the seam rather than at the print.
Abrasion, salt water and UV: the durability tests
Four tests predict almost everything about how a print survives a season. Crocking to ISO 105-X12 tells you whether colour transfers to clothing or to a car seat. Xenon arc exposure to ISO 105-B02 tells you how fast the colour fades. Cross-hatch adhesion to ASTM D3359 after salt spray tells you whether the ink stays on the film. Martindale abrasion tells you how quickly the image wears off a high-contact panel.
Run to 500 hours of xenon arc, which is roughly one season of strong summer sun for a bag used at weekends, a digital transfer print on a white underbase typically loses 1 to 1.5 grades of blue-wool fastness on dark reds and oranges, while a screen plastisol of the same hue loses 0.5 to 1 grade. Salt spray is harsher on digital: 72 hours at 5% NaCl drops adhesion by one cross-hatch grade, where silicone screen ink holds its rating.
Write the thresholds into the specification rather than accepting a subjective check. A workable brief says: crocking 4-5 dry and 4 wet, xenon arc 500 hours to grade 4 or better, cross-hatch 4B after 72 hours salt spray, and no visible substrate after 10,000 Martindale cycles. Bags that meet those numbers come back from a season on a boat still looking like the sample that was approved.
| Test | Standard | Digital transfer | Screen plastisol | Screen silicone | Typical pass threshold |
|---|---|---|---|---|---|
| Dry crocking | ISO 105-X12 | 4-5 | 4-5 | 5 | 4 or better |
| Wet crocking | ISO 105-X12 | 3-4 | 4 | 4-5 | 3-4 or better |
| Xenon arc 500 h | ISO 105-B02 | Grade 3-4 | Grade 4 | Grade 4-5 | Grade 4 or better |
| Cross-hatch adhesion | ASTM D3359 | 5B to 4B | 5B to 4B | 5B | 4B or better |
| Salt spray 72 h | ASTM B117 practice | 4B-3B | 4B-3B | 5B-4B | 4B or better |
| Martindale 10,000 cycles | ISO 12947 | 60-75% density left | 80-90% | 85-95% | 70% or better |
| Cold crack at -20 °C | Internal flex | Fine craze | Pass | Pass | No cracking |
Colour matching: Pantone targets and realistic tolerances
Colour matching is the most common source of disappointment in printed bag programmes, and the reason is structural rather than sloppy. A digital press builds colour from process inks and can only approximate a spot reference, so a Pantone target typically lands at a Delta E of 2 to 5 on a TPU shell. A screen ink is mixed to the reference itself and lands at Delta E 0.5 to 2, which is why brands with a tight visual identity lean toward screen for the primary mark.
Substrate colour moves the result in both routes. Printing a Pantone 200 C red onto a black 500D shell without a white underbase gives a muddy brown at Delta E 8 to 12; the same ink over an opaque white base gets to Delta E 2. On a mid-tone such as olive, expect a 1 to 1.5 Delta E shift even with an underbase, because the shell colour reads through the ink film.
Agree the tolerance before sampling, and agree the lighting. A Delta E of 2 is invisible to most people under shop lighting at 800 lux and obvious at 2,000 lux on a retail shelf. Specify D65 illumination and a 10-degree observer, and put a physical reference swatch, signed, into the sampling pack. Details of how we hold tolerances across a multi-colour programme are in our colour matching guide.
| Colour family | Digital Delta E vs Pantone | Screen Delta E vs Pantone | Underbase needed on dark shell | Notes |
|---|---|---|---|---|
| Solid corporate blue | 1.5-3.0 | 0.5-1.5 | Yes | Safest family for both routes |
| Bright red / orange | 3.0-5.0 | 1.0-2.0 | Yes | Gamut limit for digital |
| Fluorescent or neon | 4.0-6.0 | 1.5-3.0 | Yes | Poor lightfastness either way |
| Metallic gold / silver | Not achievable | 1.0-2.5 | Optional | Screen only |
| Deep black on black | 2.0-4.0 | 0.5-1.5 | No | Tone-on-tone reads well |
| Pastel on white | 1.5-2.5 | 0.5-1.0 | No | Both routes hold tightly |
Cost per piece, set-up charges and the break-even point
The cost curves cross, and where they cross depends mostly on the number of colours. Digital pricing is almost colour-blind: a one-colour mark and a full-colour photograph cost within 10% of each other, because the press lays down the same amount of ink either way. At 25 x 25 cm on a TPU panel, expect USD 0.85 to 1.40 per piece including the transfer medium, with a set-up of half a day for file preparation and one press profile.
Screen pricing scales with colour count. Each screen costs USD 18 to 35 to make and lasts 3,000 to 10,000 impressions before the emulsion breaks down. A four-colour mark therefore carries USD 72 to 140 of fixed cost plus 1.5 to 3 hours of make-ready, after which the variable cost is USD 0.35 to 0.60 per piece. Below a few hundred units the fixed cost dominates; above a thousand it disappears into rounding.
There is a third cost that both routes share and that buyers forget: the reject rate. Digital runs reject at 1 to 2% for placement and colour drift, screen runs at 2 to 4% for registration and mesh marks. On a 500-piece order with an AQL 2.5 inspection, that difference is worth more than the ink, which is why the cheapest route on paper is not always the cheapest route on the invoice.
| Order quantity | Digital total per piece | Screen total per piece (4 colours) | Cheaper route | Saving per 1,000 pieces |
|---|---|---|---|---|
| 200 pieces | USD 1.25 | USD 1.15 | Digital | USD 20 |
| 500 pieces | USD 1.05 | USD 0.85 | Digital | USD 200 |
| 800 pieces | USD 0.98 | USD 0.72 | Screen | USD 208 |
| 1,500 pieces | USD 0.92 | USD 0.58 | Screen | USD 510 |
| 5,000 pieces | USD 0.88 | USD 0.47 | Screen | USD 2,050 |
| 20,000 pieces | USD 0.85 | USD 0.41 | Screen | USD 8,800 |
Sampling, lead time and revision cycles
Digital sampling is fast because there is no tooling. A print-ready file goes to press the same day, a paper proof is available in 24 to 48 hours, and an on-bag sample takes the standard 6 to 10 working days that any sewn and welded sample takes. Revisions cost nothing beyond another press run, so a brand can iterate through six artwork versions in the time it takes to make one set of screens.
Screen sampling is slower at the front end and faster at the back. Screens take 3 to 5 days to expose and are then fixed: changing the size of the mark is free, but changing a colour means a new screen and a new make-ready. The practical consequence is that screen programmes need artwork frozen earlier, and benefit from a printed strike-off on the actual film before the screens are committed.
Bulk timing is the same either way once the artwork is approved. Waterproof bag production runs 35 to 50 days from approved sample to ship, on seven lines with a combined output of 200,000 pieces a month, with a 500-piece minimum and FOB Xiamen terms. Print defects are graded at AQL 2.5 alongside weld and hardware defects, and we document the whole sample-to-bulk sequence for every programme, which is worth reading before you plan a launch date.
Ink chemistry, compliance and end-of-life
What is in the ink matters as much as what it looks like. Plastisol is a PVC resin suspended in plasticiser, which is effective and cheap but brings phthalate and organotin questions with it. Silicone inks are inert, flexible and free of those substances, but they cost two to three times as much per kilogram and need a longer cure. Water-based systems have improved to the point where they are viable on absorbent face fabrics; our water-based printing ink guide covers where they still fall short on film.
Compliance paperwork follows the chemistry. A bag sold into the EU needs REACH SVHC screening on the ink as well as the film, California programmes need Prop 65 consideration, and retail programmes increasingly ask for OEKO-TEX certification on the printed panel as a whole. The relevant screening methods and restrictions are summarised by the US Environmental Protection Agency, which is a useful starting point when you write the chemical section of a brief.
End-of-life is the last consideration and the one most often ignored. A TPU shell is mechanically recyclable in a film stream, but every square centimetre of cured ink is contamination. Keeping print coverage below about 25% of the shell area, and using a single ink family across a range, keeps the recycling route open; covering an entire panel in multi-layer plastisol closes it. Our eco-friendly dry bag range is specified with that limit in mind.
Choosing a route: a decision matrix
Work through four questions in order. How many pieces, how many flat colours, does the artwork contain continuous tone, and where does the print sit relative to the closure fold? Quantity below 600 and colour count above four points to digital; quantity above 1,000 with a flat mark points to screen; continuous tone anywhere in the artwork points to digital regardless of volume; and a print within 60 mm of the fold line demands a high-elongation ink, which on current chemistry means silicone.
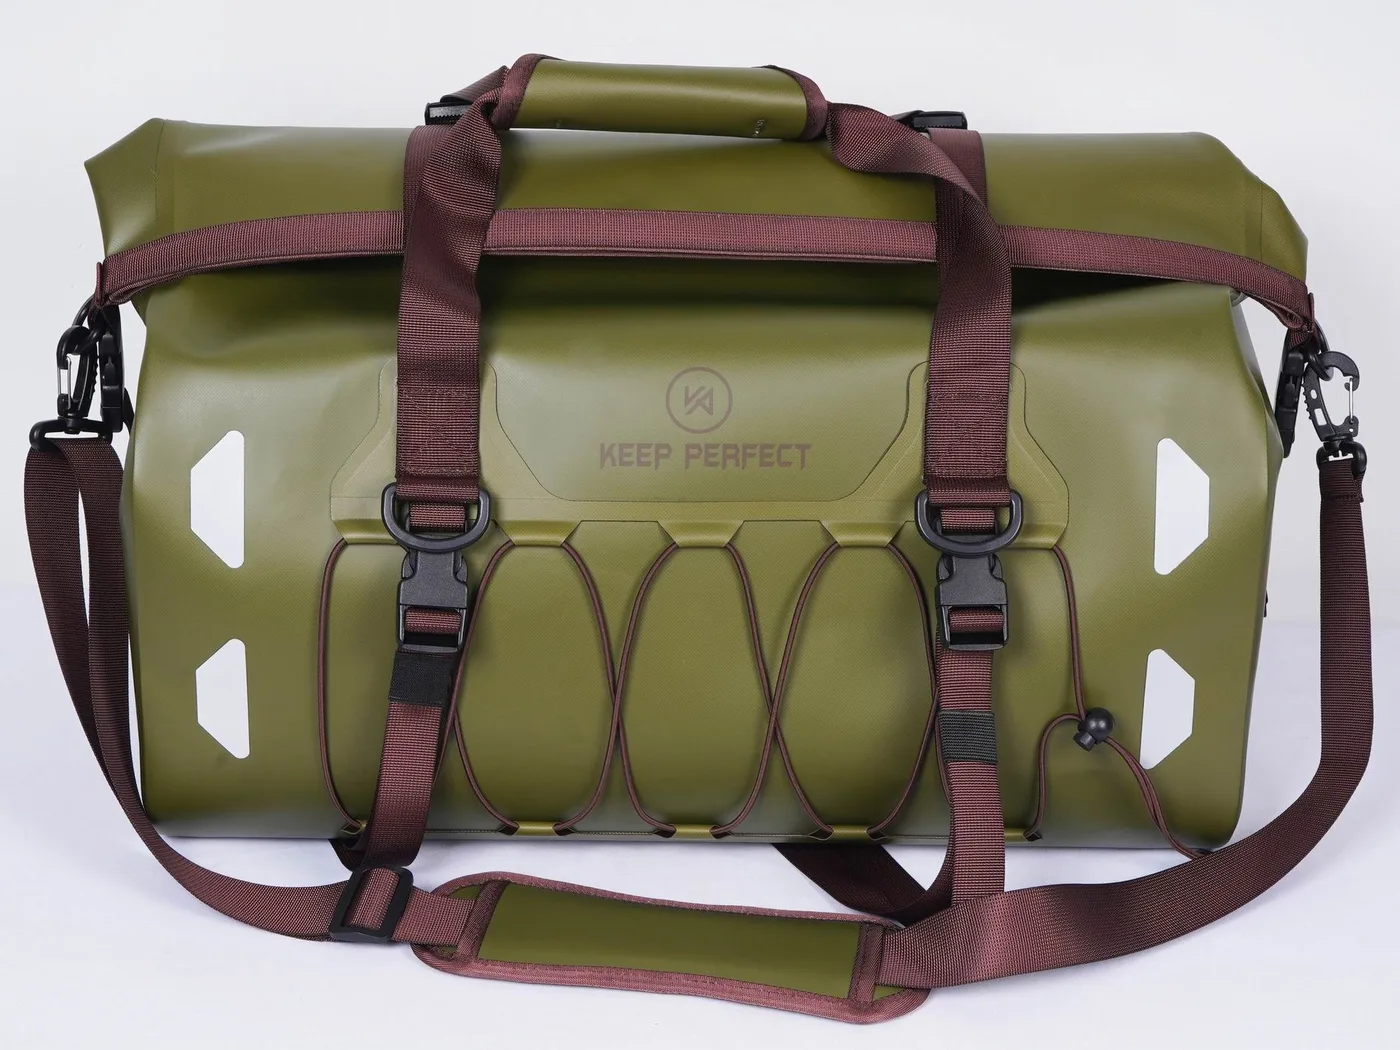
Hybrid builds are common and usually the right answer. A photographic digital panel on the front face combined with a one-colour silicone screen badge on the handle or the base patch gives the visual impact of the artwork and the durability of a spot-colour mark where hands actually touch. The two processes are sequenced so the digital print goes on first and the screen layer is cured at a temperature low enough not to disturb it, typically 130 to 140 °C.
Finally, plan the artwork around the bag rather than the bag around the artwork. Decide the print zone, the clearance from welds, the fold-line exclusion band and the ink family at the same time as you decide the shell colour, and put all four into the sampling brief. Placement questions are answered in detail in our logo placement guide, aftercare is covered in caring for printed dry bags, and the full shell and print options sit on the product line page.
Frequently asked questions
Q1. Should I print dry bags digitally or by screen?
Below 600 pieces with more than four colours or any gradient, print digitally. Above 1,000 pieces with a flat one to four colour mark and no artwork inside 60 mm of the closure fold, screen is cheaper per piece and tougher. Photographic artwork is digital at any quantity.
Q2. How thick is a screen print compared with a digital print?
A screen plastisol layer is 40 to 90 µm and silicone 25 to 60 µm, while a digital transfer or UV inkjet film is only 3 to 8 µm. That difference explains why screen ink cracks at a fold and digital ink crazes instead.
Q3. Will a printed logo crack where the bag rolls shut?
It will if the ink cannot stretch as far as the film. The outer face at the first fold stretches 15 to 25%, so keep any ink heavier than 20 µm at least 60 to 80 mm below the fold, or specify a silicone ink that elongates 200 to 450%.
Q4. Which print survives salt water better?
Silicone screen ink holds a 5B cross-hatch rating after 72 hours of 5% salt spray. Digital transfer drops one grade to 4B and UV inkjet can drop to 3B unless the film is corona-treated to 44 dyn/cm and an adhesion promoter is used.
Q5. Can digital printing match a Pantone reference?
Approximately. Expect Delta E 2 to 5 on a TPU shell, and Delta E 3 to 5 on bright reds, oranges and neons that sit outside the process gamut. Screen ink mixed to the reference reaches Delta E 0.5 to 2, which is why tight brand identities usually print the primary mark by screen.
Q6. How many colours before screen printing stops making sense?
Screen printing stays economic to about eight spot colours on a bag panel. Beyond that the set-up time, the registration tolerance of 0.2 to 0.5 mm per colour and the make-ready waste overtake the per-piece saving, and digital becomes both cheaper and more accurate.
Q7. What is the minimum order for a printed dry bag programme?
500 pieces is the working minimum for waterproof bag production, and it applies to both print routes. Below that quantity the screen set-up cost is spread too thinly and even digital cannot absorb the film and tooling lead time economically.
Q8. How long does a printed dry bag sample take?
Six to 10 working days for an on-bag sample in either route. Digital saves three to five days up front because no screens have to be exposed, and it allows unlimited artwork revisions at no tooling cost, whereas a screen colour change needs a new screen.
Q9. Does printing weaken the welded seams?
It can. A heat press at 160 °C for 15 seconds is safe on 0.5 mm TPU, but 180 °C for 60 seconds softens the weld bead and costs 10 to 20% of peel strength. Ask for a weld peel test on a printed sample, not only on a blank one.
Q10. How much does print add to the cost of a bag?
Digital adds USD 0.85 to 1.40 per 25 x 25 cm panel, screen adds USD 0.35 to 0.60 per piece plus USD 18 to 35 per screen. On a 500-piece four-colour run that is about USD 1.05 against USD 0.85 per piece all-in, and screen pulls ahead from roughly 800 units.
Q11. Can I print a full photographic image on a dry bag?
Yes, by digital transfer. It reproduces continuous tone at 600 to 1200 dpi with no visible dot structure and covers about 90% of the sRGB gamut on a white-coated film. Keep the image away from the fold line, where a low-elongation ink film will craze.
Q12. Is silicone ink worth the extra cost?
On handles, base patches and anything inside 60 mm of a fold, yes. It elongates 200 to 450%, holds cross-hatch 5B after salt spray, and stays grippy under water. It costs two to three times more per kilogram than plastisol and needs a 120 to 240 second cure.
Q13. Do I need a white underbase on a dark bag?
Almost always. A Pantone red printed straight onto a black 500D shell lands at Delta E 8 to 12, which reads as brown. Over an opaque white underbase the same ink reaches Delta E 2, and on a mid-tone such as olive expect a 1 to 1.5 shift.
Q14. How do I test whether a print will last?
Specify four tests: crocking to ISO 105-X12 at grade 4 or better, xenon arc to ISO 105-B02 at grade 4 after 500 hours, cross-hatch adhesion to ASTM D3359 at 4B after 72 hours of salt spray, and at least 70% density remaining after 10,000 Martindale cycles.
Q15. Does print affect whether a bag can be recycled?
Yes. Cured ink is contamination in a TPU film recycling stream, so keeping coverage under roughly 25% of the shell and using one ink family across a range keeps the route open. A full-panel multi-layer plastisol print effectively closes it.
Q16. Can one bag carry both digital and screen printing?
Yes, and it is often the best answer. Print the digital panel first, then cure a one-colour silicone badge at 130 to 140 °C so the lower temperature does not disturb the digital layer. This gives photographic impact plus a durable mark where hands touch.
People also ask
What is the difference between digital and screen printing on bags?
Digital lays down a 3 to 8 µm film of process ink in one pass, reproducing gradients and unlimited colours with no tooling. Screen pushes 25 to 90 µm of spot-matched ink through a mesh, one screen per colour, giving higher opacity and lower unit cost at volume.
How do you stop a printed logo cracking on a dry bag?
Keep ink at least 60 to 80 mm clear of the roll-top fold line, or use a high-elongation silicone ink. Test by rolling the sample shut 200 times and inspecting the fold at 10x magnification for hairline crazing.
Which printing lasts longest on a waterproof bag?
Silicone screen ink, which holds cross-hatch 5B after 72 hours of salt spray and grade 4 to 5 after 500 hours of xenon arc. Digital transfer is close on fade but loses one adhesion grade in salt water.
Is screen printing cheaper than digital printing?
Above roughly 800 pieces for a four-colour mark, yes: about USD 0.41 to 0.72 per piece against USD 0.85 to 0.98. Below 600 pieces the screen set-up of USD 18 to 35 per colour makes digital cheaper.
Can you print photographs on TPU dry bags?
Yes, by digital transfer at 600 to 1200 dpi, covering about 90% of the sRGB gamut on a white-coated film. Screen halftones top out at 45 to 65 lines per inch and band visibly on gradients.
How much artwork clearance do welds need?
Eight to 12 mm from any weld line. The weld bead raises the surface by 0.3 to 0.8 mm, and a squeegee skipping across it leaves an uninked channel exactly where the eye follows the seam.
Need this in production volume?
QUANZHOU JUNYUAN BAGS has produced waterproof bags since 2014 in an SGS-verified 4,950 m2 facility in Fujian, China. Minimum order 500 pieces, sampling in 6–10 working days, bulk in 35–50 days, FOB Xiamen — write to service@junyuanbags.com with your spec and target market.