TPU Dry Bags for ATV Riding: Durability Notes
An ATV subjects a dry bag to abrasion, fuel splash, mud and vibration at levels a paddle never produces, which is why rack-mounted loads need a 0.5 to 0.7 mm TPU laminate with radio-frequency welded seams rather than a light pack cloth. Expect 15 to 30 kilometres per hour of average speed over washboard and rock, 4 to 8 hours of continuous shaking per ride, and contact with steel rack bars under 10 to 20 kg of strap load. A 0.5 mm film survives roughly 300 to 500 riding hours in that duty; a 0.3 mm film shows through-wear in under 150.
These notes cover the failure modes in the order they actually appear: rack abrasion at the base, mud and silt in the closure, fuel and oil contact, cold-start handling below freezing, strap creep over a long day, and the washing mistake that destroys more bags than riding does. Each section gives the number that tells you where you are on the curve, plus a repair or replacement threshold you can check in the field.
- What ATV riding does that paddling never does
- Why TPU rather than PVC on a rack-mounted load
- Film thickness in practice: 0.3, 0.5 and 0.7 mm
- Where a rack-mounted bag actually wears
- Mud, silt and keeping the closure clean
- Fuel, oil and chemical contact
- Cold mornings and low-temperature flexibility
- Vibration, strap creep and the daily re-tension
- Pressure washing: what is safe and what is not
- Mounting geometry on a rear rack
- Inspection after every ride
- Repairing a scuff before it becomes a hole
- Spec notes for a fleet and a final word on wear
What ATV riding does that paddling never does
A dry bag on a kayak deck sits on a relatively smooth hull, gets wetted by clean water and is handled perhaps twice a day. The same bag strapped to an ATV rear rack rests on steel tube, is shaken continuously at 15 to 45 Hz for hours, is coated in abrasive silt, and is splashed with fuel and oil. Three of those four inputs are mechanical rather than hydraulic, which is why waterproofness is rarely the property that decides whether an ATV bag survives a season.
Speed matters too. ATV speeds look low on paper, but the surface is rough enough that a 30 km/h run over washboard produces more high-frequency input than a car at 100 km/h on tarmac. Multiply that by six hours and a rack bag experiences several hundred thousand load cycles per ride, all of them working the strap path, the base film and the corner welds.
The practical consequence is that durability on an ATV is a materials question, not a capacity question. Riders who choose bags by litre count and colour end up replacing them annually; riders who choose by film thickness, seam type and base protection get three to five seasons from the same bag.
Why TPU rather than PVC on a rack-mounted load
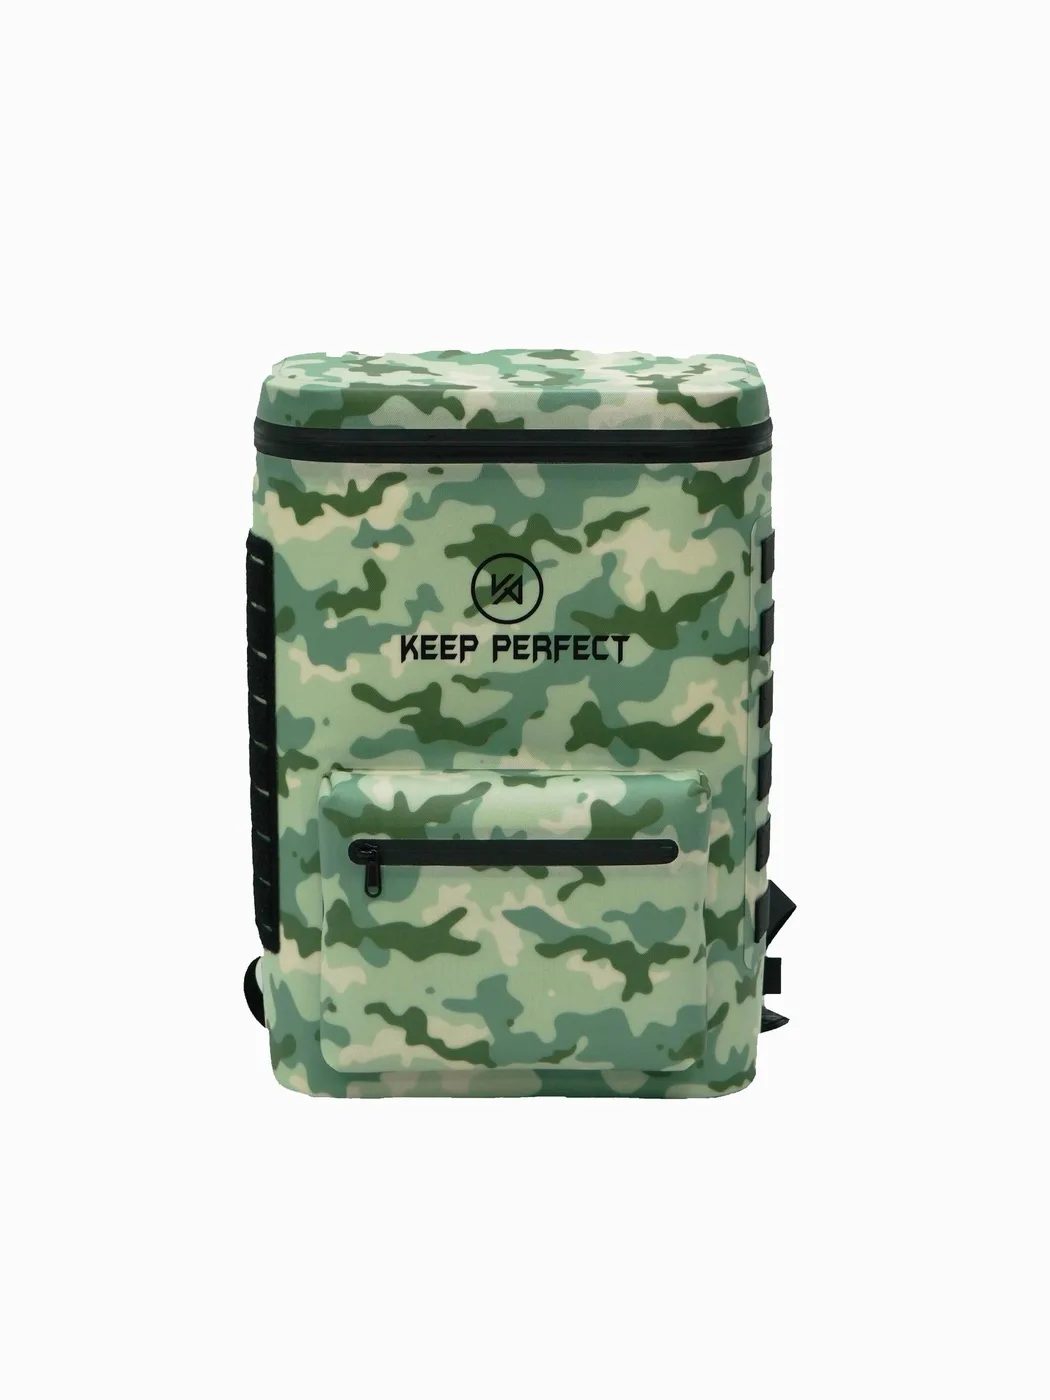
TPU and PVC both shed water; they behave very differently under abrasion and cold. TPU is an elastomer with high abrasion resistance and it stays flexible down to roughly minus 30 °C, while PVC relies on plasticisers that migrate out over time, stiffening the film and making it crack at the fold. On a rack that vibrates in cold morning air, that difference decides between a bag that lasts and one that splits at a crease.
There is also a repair advantage. TPU welds to itself with heat and takes a solvent-based or heat-activated patch cleanly, so a scuff or a small puncture can be fixed permanently in a workshop. PVC repairs are glue-dependent, and adhesion to an aged, plasticiser-depleted surface is unreliable, which usually means the bag is retired rather than repaired.
The trade-off is cost and hand feel. TPU laminate costs more per square metre and feels slightly rubbery compared with a slick PVC coating, and it marks more easily from scuffing. For a rack bag that is a fair exchange: a visible scuff on TPU is cosmetic, whereas a stiffening PVC film is the start of structural failure. The full comparison is set out in our TPU versus PVC fabric guide.
Film thickness in practice: 0.3, 0.5 and 0.7 mm
Film thickness is the single specification that predicts service life on an ATV, more than denier and more than any coating claim. Thickness governs how much material has to be worn away before a hole appears, and it governs how well the film resists being cut by a sharp edge under vibration. A 0.3 mm laminate is fine for a small personal-items pouch; it is not adequate for anything strapped to steel.
| Film thickness | Weight per m² | Rack abrasion life | Cold handling | Best ATV use |
|---|---|---|---|---|
| 0.3 mm TPU | 330-380 g | 80-150 riding hours | Flexible to -30 °C | Small pouches inside a larger bag |
| 0.4 mm TPU | 420-480 g | 200-320 riding hours | Flexible to -30 °C | Light rack bag, smooth rack |
| 0.5 mm TPU | 520-600 g | 300-500 riding hours | Flexible to -32 °C | Standard rear-rack load |
| 0.7 mm TPU | 700-820 g | 500-800 riding hours | Flexible to -35 °C | Heavy loads, steel bar racks |
| PVC coated, 0.55 mm | 620-720 g | 150-250 riding hours | Stiffens below -10 °C | Not recommended for racks |
Weight is the cost of that extra life. Moving a 25 litre bag from 0.4 mm to 0.7 mm film adds roughly 180 to 240 g, which is negligible against a 12 kg load and buys a large increase in abrasion life. Nobody has ever regretted the extra grams on a rack bag; plenty of riders have regretted saving them. Our detailed thickness testing is in the 0.3 versus 0.5 mm comparison.
Where a rack-mounted bag actually wears
Wear is not uniform, and it is worth knowing where to look because the first failure is almost always at one of four places. The base is obvious: it rests on steel tube and slides microscopically with every bump. Less obvious is the strap path, where webbing under 15 kg of tension saws across the film, and the corner welds, which flex while being abraded at the same time.
| Wear point | Mechanism | First visible sign | Hours to failure at 0.5 mm | Prevention |
|---|---|---|---|---|
| Base centre | Sliding on steel tube | Grey scuffing, matte finish | 350-500 h | 3 mm closed-cell pad |
| Along the strap path | Webbing sawing under tension | Frayed webbing, film burnish | 300-450 h | Sleeve the webbing |
| Bottom corner welds | Flex plus abrasion together | White stress line at the corner | 500-800 h | Pad the corner, rotate the bag |
| Against a tie-down hook | Point contact at 15-20 kg | Crescent-shaped cut | 50-150 h | Never hook directly to film |
| Closure fold line | Grit folded into the film | Crease whitening, stiffness | 400-700 h | Wipe before every roll |
The tie-down row deserves emphasis. Hooking a strap or a bungee directly onto the film concentrates 15 to 20 kg onto a few square millimetres and can cut a 0.5 mm laminate in a single ride. Always load through a welded D-ring or a webbing loop, and if the bag has no suitable hard point, add a sleeve or a strap pad rather than improvising. Hardware choices are covered in the D-ring and lash point guide.
Mud, silt and keeping the closure clean
Mud is the dominant contaminant on an ATV ride, and it is worse than clean water in three ways. It is abrasive, so folding it into a closure grinds the film at the fold. It holds water against the seam long after the ride ends. And it dries into a hard crust that has to be removed before the bag can be rolled at all, which is exactly when riders force a closure and damage it.
The routine is simple and takes two minutes at the end of a ride: rinse the closure area with low-pressure water before the mud dries, brush the fold line with a soft brush, and dry with the mouth propped open. Never roll a bag closed with damp mud on the fold, because the grit becomes embedded in the film surface and every subsequent closure abrades from inside the fold.
Buckles suffer the same fate. Silt packs into cam teeth and reduces holding force by 30 to 50 percent, which is why a strap that felt solid in the morning slips by afternoon. Rinse buckles while working them through their full travel, and add the monthly detail from our buckle cleaning notes if you ride in sandy terrain.
Fuel, oil and chemical contact
ATV bags meet petrol, two-stroke oil, chain lube and cleaning solvents, and TPU handles most of them better than PVC but not indefinitely. Short contact with fuel splashes is survivable if you wipe it off within the hour; leaving fuel sitting in a puddle against the film softens the surface and makes it far more susceptible to abrasion for the rest of the day. Oil is less aggressive but attracts dust, which turns into a grinding paste.
Carry fuel in an approved container, never inside a dry bag, and keep the container in a separate crate or mount rather than strapped against the bag. If a spill does happen, wipe immediately with a cloth and wash with mild soap and water at the end of the ride; do not use solvent cleaners on TPU, since they attack the surface far faster than the fuel did.
Cold mornings and low-temperature flexibility
Early starts are normal on an ATV, and a bag packed the night before at 15 °C can be handled at minus 15 °C the next morning. TPU retains flexibility well below that, but the fold still becomes stiffer, and a stiff fold rolled with cold hands is the most common cause of a closure that looks right and leaks anyway. The film is not the problem; the roll quality is.
| Temperature | TPU 0.5 mm behaviour | PVC coated behaviour | Handling advice |
|---|---|---|---|
| +20 °C | Soft, folds easily | Soft, slightly tacky | Normal three-fold closure |
| 0 °C | Slightly firmer, still supple | Noticeably stiffer | Roll on a flat surface |
| -10 °C | Firm but foldable | Boardy, creases whiten | Warm the fold with a hand first |
| -20 °C | Folds with effort | Cracks at an existing crease | Roll once, check, re-roll |
| -30 °C | Near the lower service limit | Not usable | Avoid packing changes outdoors |
The practical rule is to pack and roll the bag indoors or in a heated cab, then leave it alone. If you must open it in the field at minus 20 °C, warm the fold with a bare hand for twenty seconds before rolling, make the first fold wide, and pull the buckle with the heel of the hand rather than fingertips. More on the temperature limits is in the cold crack notes.
Vibration, strap creep and the daily re-tension
Webbing under tension creeps, and an ATV ride accelerates the process. A strap set at 18 kg before a ride will typically read 12 to 14 kg after two hours of washboard, and a loose load then starts to move, which is when abrasion begins in earnest. Re-tension at the first stop after 30 minutes and again at the halfway point of the ride; two checks a day cut rack wear substantially.
Rubber padding is the other half of the answer. A 3 mm closed-cell pad between the bag and the steel rack stops the micro-sliding that produces the matte grey base, and it damps the vibration input reaching the welds. It costs almost nothing, weighs 60 to 90 g and is the most effective single addition to any rack-mounted setup.
Pressure washing: what is safe and what is not
A pressure washer is the fastest way to destroy a good bag. A nozzle at 100 bar held 200 mm from the surface cuts film, lifts weld edges and drives water past a closure that was perfectly sound. Even at 50 bar, a focused jet will burnish the film and thin it measurably in a single pass. If you must use one, stand at least 600 mm away, use a fan nozzle, and keep it off the closure and the welds entirely.
The better method is a bucket, a soft brush and low-pressure water, followed by shade drying with the mouth open. Ten minutes of that removes everything a washer would, and it leaves the film intact. Machine washing is out of the question for the same reason: it twists welded seams and abrades the film against the drum.
Mounting geometry on a rear rack
Geometry decides whether a load stays put and where it wears. A rack bag should be pulled down and inward, not just down, and it needs two independent paths so a single strap failure does not put 12 kg on the trail behind you. Keep the bag within the rack footprint: anything cantilevered past the rack edge flexes on every bump and fatigues the base film far faster than a supported load.
| Mounting choice | Strap paths | Load limit | Wear risk | Verdict |
|---|---|---|---|---|
| Flat on the rack, crossed straps | 2 crossed, 15-20 kg each | 15 kg | Low | Best option |
| Flat on the rack, single loop | 1 loop, 20 kg | 8 kg | Medium, rotation | Acceptable for light loads |
| Cantilevered past the rack edge | 2, but unsupported | 5 kg | High, base fatigue | Avoid |
| Bungee net over the top | Elastic, variable | 6 kg | High, point contact | Emergency only |
| Strapped against the seat | 2, angled | 10 kg | Medium, rubbing | Fine with a pad |
Whatever the arrangement, check the load at the first stop and photograph it if you are running a fleet; a bag that has shifted 3 cm tells you the strap path is wrong before it tells you anything else. Riders often blame the bag for a mounting problem, and the correction is usually a second strap rather than a new product.
Inspection after every ride
- Rinse the bag and the closure with low-pressure water before any mud dries.
- Turn the bag inside out and look for grey scuffing along the base and strap path.
- Run a thumb around every corner weld, checking for a white stress line.
- Work each buckle through full travel while wet, then dry it open.
- Close with three folds, squeeze, and listen for a hiss over 30 seconds.
- Note the riding hours; inspect welds thoroughly every 50 hours.
Logging hours sounds fussy until a weld corner fails on day three of a remote trip. A bag with 400 recorded hours on 0.5 mm film is in the window where base wear becomes visible, and knowing that in advance means carrying a patch or a spare rather than improvising with tape. Keep the log next to your service hours; they correlate closely.
Repairing a scuff before it becomes a hole
A scuff is repairable, a hole is an inconvenience, and a split seam is usually terminal. Catch wear while the film is still continuous: clean the area, roughen it lightly, and apply a TPU patch with heat and pressure, overlapping the damaged area by at least 25 mm in every direction. A correctly applied patch on 0.5 mm film restores most of the strength of the surrounding material.
Where the damage is at a corner weld, patch from both sides if you can reach the inside, and retire the bag from rack duty even after a successful repair, since the flex at a corner will eventually work the patch edge loose. Keep the repaired bag for lighter duties where it will still give years of service. The kit contents and technique are set out in our patch kit guide, and seam behaviour over time is covered in the seam integrity notes.
Spec notes for a fleet and a final word on wear
- Specify 0.5 mm minimum film for any bag that touches a steel rack; 0.7 mm for heavy loads.
- Require radio-frequency welded seams, not stitched and taped, on all rack bags.
- Add welded D-rings or webbing loops; never load a strap directly onto the film.
- Fit a 3 mm closed-cell pad under the base of every rack-mounted bag.
- Re-tension straps at 30 minutes and mid-ride; log the hours as well.
- Rinse before mud dries; ban pressure washers above 50 bar and 600 mm distance.
- Wipe the fold line before every closure and keep silt out of the buckles.
- Patch scuffs at 25 mm overlap while the film is still continuous.
- Keep fuel and oil in approved containers, separate from any bag.
- Check the specifications across the full dry bag range before ordering.
Abrasion and seam performance are measurable rather than a matter of opinion, and the relevant test methods are published by ASTM, with material and testing standards catalogued by ISO. Asking a bag maker which method a claim was tested under is the fastest way to separate a real specification from a marketing sentence, and it is worth doing before a fleet order rather than after.
Guiding operations, rental fleets and clubs specifying bags for a season face the same list multiplied across every machine, and the useful move is standardisation: one film thickness, one closure type, one mounting pattern, so a briefing given once applies everywhere.
One last note on expectations. A rack bag is a consumable in the same sense that tyres are: it is designed to wear, and the goal is predictable wear that you can inspect rather than sudden failure you cannot. Choose the film for the duty, pad the contact points, rinse before the mud sets, and the bag will tell you when it is tired long before it lets you down. Our TPU abrasion testing notes give the numbers behind that claim, and the TPU waterproof backpack line shows the same construction in a carried format.
Frequently asked questions
Q1. Are TPU dry bags good for ATV riding?
Yes, provided the film is at least 0.5 mm and the seams are welded. TPU resists rack abrasion far better than PVC, stays flexible to roughly minus 30 °C and can be heat-patched, which matters on a machine that shakes a bag for hours at a time.
Q2. What film thickness should an ATV rack bag use?
0.5 mm minimum for a standard rear-rack load and 0.7 mm for heavy loads on steel bar racks. A 0.3 mm laminate shows through-wear in under 150 riding hours, against 300 to 500 hours for 0.5 mm.
Q3. How long does a dry bag last on an ATV?
A 0.5 mm welded TPU bag typically gives 300 to 500 riding hours of rack duty before base wear becomes visible, and 500 to 800 hours before corner welds show fatigue. Padding the base and re-tensioning straps extends both figures substantially.
Q4. Why does the base of my bag go grey and matte?
That is abrasion from micro-sliding on the steel rack, not UV damage. It appears after roughly 300 to 500 hours on 0.5 mm film and is prevented by a 3 mm closed-cell pad under the base.
Q5. Can I pressure wash a muddy dry bag?
Only at low pressure, from at least 600 mm, with a fan nozzle and never on the closure or welds. A 100 bar jet held 200 mm away cuts film and lifts weld edges in a single pass.
Q6. Is TPU or PVC better for cold ATV mornings?
TPU, decisively. It stays foldable to about minus 30 °C, while PVC stiffens noticeably below minus 10 °C and cracks at an existing crease near minus 20 °C.
Q7. How tight should rack straps be?
15 to 20 kg per path, checked with a luggage scale. Webbing creeps to around 12 to 14 kg after two hours of washboard, so re-tension at 30 minutes and again mid-ride.
Q8. Can I strap a bag directly with a hook or bungee?
No. A hook concentrates 15 to 20 kg onto a few square millimetres and can cut 0.5 mm film in one ride. Always load through a welded D-ring or a webbing loop.
Q9. What should I do if fuel spills on the bag?
Wipe it off within the hour, then wash with mild soap and water at the end of the ride. Fuel left against the film softens the surface and makes it far more vulnerable to abrasion.
Q10. How do I keep mud out of the closure?
Rinse the closure with low-pressure water before the mud dries, brush the fold line, and never roll a bag closed with damp grit on the fold, because it embeds into the film and abrades from inside.
Q11. Can a scuffed TPU bag be repaired?
Yes, while the film is still continuous. Clean, lightly roughen, and heat-apply a TPU patch overlapping the damage by at least 25 mm. Damage at a corner weld should retire the bag from rack duty even after repair.
Q12. How often should I inspect an ATV dry bag?
Rinse and check after every ride, and inspect welds thoroughly every 50 riding hours. A bag with 400 logged hours on 0.5 mm film is in the window where base wear starts to show.
Q13. Does a heavier film make the bag much heavier?
Modestly. Moving a 25 litre bag from 0.4 mm to 0.7 mm adds roughly 180 to 240 g, which is negligible against a 12 kg load and buys a large increase in abrasion life.
Q14. Should fuel cans ride inside a dry bag?
Never. Fuel goes in an approved container carried in a separate crate or mount, away from any bag. Solvent cleaners are equally bad for TPU and should not be used on the film.
Q15. Do I need a pad under a rack bag?
Yes. A 3 mm closed-cell pad costs 60 to 90 g, stops the micro-sliding that causes base wear and damps vibration reaching the welds. It is the cheapest durability upgrade available.
Q16. What is the most common cause of a wet bag on an ATV?
Grit or dried mud folded into the closure, followed by a strap that has crept loose. Both are maintenance issues rather than product faults, and both are fixed in about two minutes per ride.
People also ask
What makes a dry bag suitable for ATV riding?
A 0.5 mm or thicker TPU laminate, radio-frequency welded seams, welded D-rings for strapping, and a padded base. Those four features survive rack abrasion and vibration, which are the forces that actually end a bag’s life.
How do you strap a dry bag to an ATV rack?
Use two independent crossed strap paths at 15-20 kg each, keep the load inside the rack footprint, and load only through welded D-rings. Pad the base and re-tension at 30 minutes and mid-ride.
Why does my ATV dry bag wear through at the bottom?
Micro-sliding on the steel rack, worsened by a loose strap. It shows as grey matte scuffing after 300 to 500 hours on 0.5 mm film and is prevented by a closed-cell pad and regular re-tensioning.
Can you use a pressure washer on TPU?
Only with a fan nozzle from 600 mm or more, and never on seams or the closure. A focused 100 bar jet cuts film and lifts weld edges, which is why a bucket and brush is the safer method.
Do dry bags work in freezing ATV conditions?
TPU does, to around minus 30 °C, though the fold stiffens. Warm the fold with a hand, make the first fold wide and pull the buckle with the heel of the hand. PVC stiffens and cracks in the same conditions.
How do you repair a scuff on a TPU dry bag?
Clean and lightly roughen the area, then heat-apply a TPU patch overlapping the damage by 25 mm on all sides. Corner-weld damage should retire the bag from rack duty even after a sound repair.
Need this in production volume?
QUANZHOU JUNYUAN BAGS has produced waterproof bags since 2014 in an SGS-verified 4,950 m2 facility in Fujian, China. Minimum order 500 pieces, sampling in 6–10 working days, bulk in 35–50 days, FOB Xiamen — write to service@junyuanbags.com with your spec and target market.