Home / Blog / Waterproof Technology
Immersion Testing a Dry Bag
An immersion test puts a loaded dry bag one metre below the surface of fresh water for 30 minutes and then inspects the inside for any trace of moisture. Done properly it is the single most informative check you can run, because it reproduces the pressure, the temperature and the time profile of a real capsize rather than a splash. A 20L bag closed with three folds and held down by a 4 kg weight sees 9.8 kPa of external pressure at one metre, roughly twice what a kneeling paddler generates, and it will expose a closure error, a pinhole weld or a tired seam within the first ten minutes.
The test is also easy to run badly. Testing an empty bag proves almost nothing, testing for five minutes misses slow capillary leaks, and testing in a bath you cannot see into turns a measurement into a guess. This guide sets out the tank, the weights, the indicator method, the pressure maths, the variables that change the result by a factor of two, and the sampling plan that turns one wet-or-dry outcome into something you can act on before a trip or before a bulk shipment.
- What an immersion test actually proves
- IPX7 in plain numbers: depth, minutes and water temperature
- Building a test tank: volume, depth and a weight
- Preparing the bag: fill level, rolls and tissue indicators
- The 30-minute protocol, step by step
- Reading the outcome: damp patch, drip or stream
- Air tests versus water tests, and why you need both
- Depth, pressure and why one metre is not a formality
- Temperature, salt and surfactants: the variables that change results
- Closure variables: rolls, fill level and purge valves
- Sampling: how many bags from a batch prove anything
- Field immersion: rivers, pools and the sea
- Recording results, and where immersion fits in a quality programme
What an immersion test actually proves
Immersion answers one question: can water cross the barrier under a sustained pressure gradient for a defined period? It does not tell you how the bag behaves in a jet of spray, how it survives being dragged over rock, or whether the fabric will last a season. Those are separate tests with separate methods. Conflating them is why a bag that passes a hose test can still fill with water when it is lashed to a deck and submerged for two minutes.
The distinction matters because water entry is pressure-driven. A splash delivers water at a point with almost no sustained pressure; immersion applies a uniform load to every square centimetre of the bag at once, including the fold line, the weld corners and the valve. A defect that is invisible under a spray nozzle becomes a steady trickle under a metre of water, and a trickle over 30 minutes is 50 to 200 ml inside the bag, which is enough to soak a phone and a spare layer.
IPX7 in plain numbers: depth, minutes and water temperature
IPX7 is the grade most dry bags are sold against, and its definition is precise: the enclosure is immersed in water for 30 minutes with the lowest point of the enclosure 1,000 mm below the surface and the highest point at least 150 mm below the surface. The IEC publishes the grades in IEC 60529, which is why a serious spec sheet cites the standard instead of inventing adjectives. Water temperature is normally specified within a few degrees of ambient to avoid thermal effects.
| Rating | Test method | Water volume or depth | Duration | What it covers in practice |
|---|---|---|---|---|
| IPX4 | Splashing from all directions | 10 L per minute | 5 minutes | Rain, paddle drip |
| IPX5 | 6.3 mm nozzle water jet | 12.5 L per minute | 3 minutes | Bow spray, power wash |
| IPX6 | 12.5 mm nozzle water jet | 100 L per minute | 3 minutes | Breaking waves, deck wash |
| IPX7 | Immersion | 1 m depth | 30 minutes | Capsize, wet exit, short submersion |
| IPX8 | Immersion beyond IPX7 | Depth agreed with the maker | Agreed duration | Sustained submersion, diving support |
Two details in the IPX7 definition are routinely ignored. The first is the 150 mm margin: if the top of your bag is only 20 mm below the surface, the closure is barely loaded and the test is not an IPX7 test at all. The second is duration. Thirty minutes is not arbitrary; slow capillary paths through a foldline take 8 to 20 minutes to deliver the first drop, so a 10 minute test passes bags that would fail at 25 minutes.
Building a test tank: volume, depth and a weight
You need a vessel deep enough to hold the bag with 150 mm of water above its highest point, which for a 20L bag means about 1.25 metres of water column and a container at least 1.3 m tall. A domestic bath gives 350 to 450 mm of usable depth, which is a 0.4 m test and roughly 40 percent of the IPX7 pressure. That is still a useful screening test, but label it honestly as a partial-depth check rather than an IPX7 result.
For a full-depth test, the practical options are a plastic barrel or water tank of 200 to 400 litres stood upright, a swimming pool with a weighted line, or a dock with a cleat and a depth sounder. Weight is the part people underestimate: a 20L bag holding 6 litres of air displaces about 6 kg of water, so it needs 5 to 7 kg to hold it under. Use a coated dumbbell plate or a mesh bag of gravel, never a sharp weight resting on the weld, and attach it with webbing rather than a hook through a D-ring tab.
- Depth: at least 1.15 m of water above the highest point of the bag.
- Vessel: a 200 to 400 litre upright tank, or a pool with a measured 1.15 m line.
- Weight: 5 to 7 kg for a 20L bag, 2 to 3 kg for a 10L bag, attached by webbing.
- Water: fresh, clean, between 15 and 25 degrees Celsius, and still rather than circulated.
- Indicators: plain white tissue or kitchen roll, plus a dry paper towel for the base.
- Timer: a phone with a 10 and a 30 minute alarm, kept out of the splash zone.
- Marker: a tape line on the tank wall at 1,150 mm so the depth is repeatable.
Preparing the bag: fill level, rolls and tissue indicators
Test the bag as it will be used. Fill it to about 70 percent with the real load or with dry towels of equivalent bulk, press the air out, make three flat folds on a hard surface, and close the buckle with the bag upright. Testing an empty, loosely rolled bag is the most common error in the field and it produces false passes, because an empty bag has no internal pressure and the folds are not under tension.
Place the indicators before you close. Lay two sheets of white tissue flat on the base of the bag, tuck one strip up each side seam, and put one folded sheet against the inside of the closure. Any moisture that enters shows as a grey or translucent patch on white tissue within seconds, and it localises the failure: a damp strip at a side seam means a weld problem, a damp sheet at the closure means a fold problem, and a damp base patch with dry sides means condensation or a pinhole you need to find under light.
The 30-minute protocol, step by step
- Fill the bag to 70 percent with a dry load, press out the air and close with three flat folds.
- Lay tissue sheets on the base and against each side seam, and note their dry weight.
- Weigh the closed bag and record it, so you can detect any water gain in grams.
- Attach the weight by webbing and lower the bag slowly until the top is 150 mm under.
- Start the timer and leave the water completely still; no stirring, no circulation pump.
- At 10 minutes lift it halfway and look for a bubble trail escaping from the closure.
- At 30 minutes lift it out, dry the outside first, then open it and inspect each tissue.
- Weigh the bag again: a gain of more than 5 g on a 20L bag means water got in.
Drying the outside before opening is not a formality. Water clinging to the rim runs into the mouth the moment you unroll it, and it produces more false failures than any genuine defect. Keep a dry microfibre towel dedicated to this step and wipe the top 100 mm of the bag twice, then open it over a surface where you can see a drip. If the tissues are dry and the weight is unchanged, the bag passed.
A bubble trail at the 10 minute check is the fastest diagnostic in the whole protocol. Escaping air means the closure is leaking in both directions, so water is already on its way in; hold the bag still and watch where the bubbles originate. Bubbles from the centre of the fold mean the load is too bulky and the roll is bridging. Bubbles from one corner mean the fold is uneven. Bubbles from a seam mean a weld defect, and that bag should be retired or repaired rather than re-rolled.
Reading the outcome: damp patch, drip or stream
Three outcomes are worth distinguishing because they point at different causes. A damp patch of 20 to 40 mm on a tissue, appearing after 20 minutes, is a capillary leak through the fold: slow, small, and usually cured by re-rolling or by reducing the fill level. A drip that has run down a seam and pooled at the base is a weld or tape failure. A continuous stream on lifting the bag means a hole or a fully open closure, and it usually coincides with a bag that was overfilled or a buckle that popped under the weight.
| Result | Water gained in 30 min | Probable cause | Next action |
|---|---|---|---|
| Tissues dry, weight unchanged | Under 1 g | Sound bag and closure | Pass; record and return to service |
| Damp patch at the closure | 1-20 ml | Capillary path through a fold | Re-roll at lower fill and retest |
| Damp strip along one seam | 10-60 ml | Weld gap or tape lift | Mark, weld repair or retire |
| Pool at the base, dry sides | 5-40 ml | Pinhole or condensation | Light-box inspection for pinholes |
| Steady drip on lifting | 50-200 ml | Closure opened or buckle slipped | Check hardware and fill level |
| Stream on lifting | 200 ml plus | Open closure or split film | Retire the bag |
Air tests versus water tests, and why you need both
An air test is faster and finds gross leaks: close the bag, squeeze it, and listen or feel for escaping air, or submerge it and look for a bubble trail. It runs in 20 seconds, needs no tank, and catches an unrolled closure or a split seam immediately. Its weakness is sensitivity. Air at 3 kPa of squeeze pressure escapes through openings that water at 1 metre and 9.8 kPa enters far more readily, because water has lower viscosity and a much higher surface interaction with the film.
The two tests are therefore complementary rather than interchangeable. Use the air test at the start of every trip as a 20-second gate, and use the water test at the start and end of every season, and before any trip where the consequence of failure is expensive or dangerous. Our air inflation method describes the squeeze procedure in detail, and the home testing guide covers the bath version of the water test for people without a full-depth tank.
Depth, pressure and why one metre is not a formality
Hydrostatic pressure rises by about 9.8 kPa for every metre of depth in fresh water, and slightly more in salt water because the density is 2.5 percent higher. At the surface the pressure difference across the film is close to zero. At 0.5 metres it is 4.9 kPa. At one metre it is 9.8 kPa, and across a 200 mm by 120 mm panel that is a total load of 235 newtons, or about 24 kg of force pressing on the closure and the welds. That is the load the bag has to hold without a path forming.
| Depth | Pressure (fresh water) | Load on a 200 x 120 mm panel | Real-world equivalent |
|---|---|---|---|
| 0.1 m | 1.0 kPa | 2.4 kg | Bag sitting in a puddle |
| 0.3 m | 2.9 kPa | 7.1 kg | Bath test, bag on the bottom |
| 0.5 m | 4.9 kPa | 12.0 kg | Kneeling on a loaded bag |
| 1.0 m | 9.8 kPa | 23.5 kg | IPX7 immersion test |
| 2.0 m | 19.6 kPa | 47.1 kg | Capsize in deep water |
| 3.0 m | 29.4 kPa | 70.6 kg | Diving support, prolonged submersion |
The practical consequence is that a bag which passes at 0.3 m tells you very little about 1.0 m. If you only have a bath, at least be consistent: run every bag at the same depth, the same duration and the same fill level, so the results are comparable with each other even if they are not IPX7. Consistency turns a weak test into a usable trend line, and a trend line is what tells you when a fleet of bags is reaching the end of its service life.
Temperature, salt and surfactants: the variables that change results
Temperature changes both the film and the pressure reading. A TPU laminate is stiffer at 5 degrees Celsius than at 25, and a stiff roll conforms less well, so a bag tested in cold water is more likely to fail at the fold and less likely to fail at the film. Water density also rises slightly as it cools, which raises the pressure at a given depth by about 0.2 percent per degree. Record the water temperature on every test; without it two results are not comparable.
Salt water is denser, so the pressure at one metre is about 2 percent higher, which is a small effect. The bigger differences are surface tension and conductivity. Salt water with a little detergent or sunscreen residue in it has a lower surface tension than clean fresh water and wets the film more readily, so it finds capillary paths that clean water would not. That is the closest laboratory analogue to real sea conditions, and it is why our saltwater comparison recommends a controlled salt mix rather than a river for repeatable results.
| Variable | Change tested | Effect on the result | Control |
|---|---|---|---|
| Water temperature | 5 C versus 25 C | Cold film seals worse at the fold | Record and hold at 15-25 C |
| Salinity | 0 versus 35 g per litre | 2 percent more pressure at depth | Use a fixed mix or note the source |
| Surfactant residue | 0 versus 0.1 percent | Lower surface tension, faster wicking | Use clean water for certified tests |
| Fill level | 50 versus 90 percent | Fold bridges and leaks above 85 percent | Test at 70 percent fill |
| Water movement | Still versus circulated | Movement loads the closure unevenly | Keep the tank still for 30 minutes |
| Bag age | New versus 3 seasons | Weld fatigue and stiffening film | Re-test annually and log the trend |
Closure variables: rolls, fill level and purge valves
Roll count is the variable with the largest effect on the outcome. Two folds typically fail an immersion test within 8 to 15 minutes because there is only one effective contact line for water to cross. Three folds pass reliably at 70 percent fill. Four folds add margin but consume another 0.3 to 0.5 litres and crease the film harder, so they are worth using only on a bag that has already failed at three and cannot be re-packed smaller.
Fill level interacts with roll count. At 90 percent fill the fabric is in tension across the mouth and the first fold bridges instead of conforming, which is why an overfilled bag with four folds can leak where a 70 percent bag with three does not. Purge valves are the third variable: a valve squeezed closed before the roll leaves internal pressure that pushes outward on the fold line, while a valve left open during immersion is simply a 6 mm hole in the barrier. Close the valve after rolling, and test valved and unvalved bags separately.
Sampling: how many bags from a batch prove anything
One bag tells you about that bag. If you are accepting a delivery or qualifying a new spec, you need a sampling plan. A common approach is an AQL 2.5 inspection on the shipment, with immersion testing on a fixed number of units drawn at random from the inspected lot: three units per 500 for a routine lot, five units per 500 for a first lot from a new shell or a new welding recipe, and eight units if the lot follows any process change.
The failure criterion has to be written down before the test, not after. A workable rule is zero tolerance for water inside the bag, and a re-test permitted once after re-rolling if the initial failure was a damp patch at the closure with dry seams. Any failure at a weld, a valve or a hardware mount is a lot-level failure, and it triggers a 100 percent immersion check on that lot. Recording the result per unit, with a photograph of any damp indicator, is what makes the decision defensible later. See the AQL guide for sample sizes.
Field immersion: rivers, pools and the sea
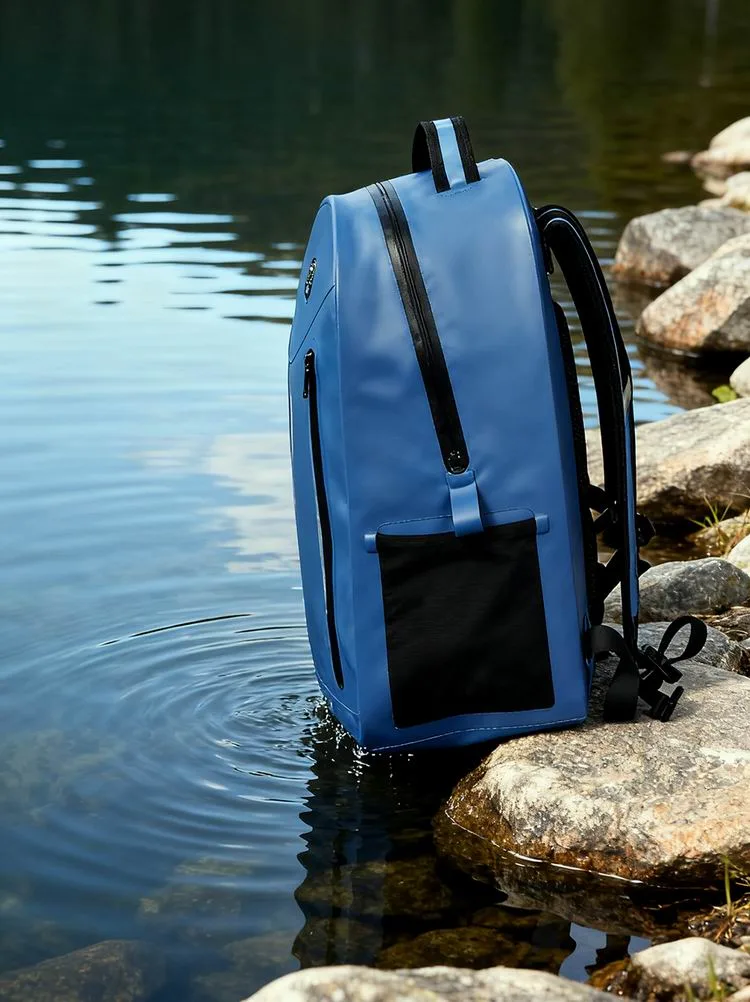
Laboratory immersion is controlled; field immersion is not, and that is exactly why it is worth doing once a season. Take the bag to a lake or a pool, load it as you would for a trip, and sink it to one metre for 30 minutes with a weighted line. A river adds current, which loads the closure on one side and is a harsher test than anything in the standard. The sea adds salt, surfactants and wave action, and it is the environment most bags actually fail in.
Two safety notes apply in the field. Never test with anything you cannot afford to lose: use towels, not a phone or a camera. And never use a dry bag as a buoyancy aid during a test or at any other time, because a bag that passes an immersion test can still lose its trapped air the moment the closure is disturbed. If a bag fails in the field, retire it from water use and demote it to a gym bag or a laundry sack rather than patching it and hoping.
Recording results, and where immersion fits in a quality programme
A test result is only useful if someone can repeat it. Log the date, the bag identity, the size, the material, the fill level, the roll count, the water type and temperature, the depth, the duration, the weight before and after, and the indicator outcome for each of the four tissue positions. That is nine fields, it takes two minutes, and it converts a memory into a data set you can compare against next season.
- Date, tester and bag identity, including the size and the shell material.
- Fill level as a percentage and the roll count actually used.
- Water type, temperature and depth, with duration in minutes.
- Weight before and after, to the nearest gram, on the same scale.
- Indicator outcome for base, each side seam and the closure separately.
- Any bubble trail observed at the 10 minute check and where it originated.
- Pass, re-test or fail, with a photograph of any damp indicator.
Over a fleet, that log becomes a maintenance plan. Bags that drift from 0 g of water gain in year one to 3 g in year three are telling you the film is ageing, and they can be rotated out of critical use before they actually fail. Clubs and rental operations that keep the log typically extend average service life by two seasons, because they retire bags on evidence rather than on a guess made on a wet morning.
Immersion is one of four checks worth running on a waterproof bag programme, and it should sit alongside a spray or jet test, an air test, and a seam pull test. Spray tests catch closure geometry problems quickly and cheaply; air tests catch gross defects on every unit; immersion validates the design on a sample; and seam pull tests confirm the welding parameters are still in window. Running only one of these leaves a class of defect undetected.
For programmes in production volume, the immersion test is normally run at three points: on the approved sample before tooling, on five units from the first bulk lot, and on three units per lot thereafter. Our own waterproof line has run since 2014 in an SGS-verified 4,950 m2 facility, with sampling in 6 to 10 working days and bulk in 35 to 50 days, and immersion is the check we insist on before any shipment leaves.Hydrostatic resistance of the shell itself is reported against the ISO water-penetration method.
If you take one thing from this guide, make it the fill level and the duration. Test at 70 percent fill, three folds, one metre, 30 minutes, with tissue indicators in four positions and a weight recorded to the gram. That protocol is repeatable in a lake, a pool or a tank, it matches the IPX7 definition published by the IEC, and it will separate a sound bag from a failing one in half an afternoon. Read the ratings background in our IPX guide, the depth-versus-spray trade-off in IPX6 versus IPX7, and the physics of a full submersion in what happens when you submerge a dry bag. Bags intended for this kind of use are covered in our floating dry bag selection.
Frequently asked questions
Q1. How do you immersion test a dry bag?
Fill it to 70 percent, close with three folds, place tissue indicators inside, weigh it, sink it to one metre for 30 minutes, then dry the outside and check the tissues and the weight for any gain.
Q2. How deep and how long is an IPX7 test?
One metre of depth, measured to the lowest point, with the highest point at least 150 mm under the surface, held for 30 minutes in fresh water at ambient temperature.
Q3. Can I immersion test a dry bag in a bath?
Yes, but it is a partial-depth test of roughly 0.4 m and 40 percent of the IPX7 pressure. It still finds closure errors and pinholes; just do not call the result IPX7.
Q4. How much weight does it take to sink a dry bag?
A 20L bag with 6 litres of trapped air needs 5 to 7 kg. Use a coated plate or a mesh bag of gravel attached by webbing, never a sharp weight resting on a weld.
Q5. Why did my dry bag pass an air test but fail immersion?
Air tests use about 3 kPa of squeeze pressure; immersion at one metre applies 9.8 kPa. Water also has lower viscosity and wets the film more readily, so it finds paths that air does not.
Q6. Should the bag be empty or loaded during the test?
Loaded to about 70 percent. An empty bag has no internal pressure and its folds are not under tension, which produces false passes. Use dry towels if you do not want to risk the real kit.
Q7. How do I know where the leak is?
Place separate tissue indicators on the base, against each side seam and against the closure. A damp closure tissue means a fold problem; a damp seam tissue means a weld problem.
Q8. What does a bubble trail during the test mean?
Air escaping from the bag, which means water is entering by the same path. Bubbles from the centre of the fold mean the load is too bulky; bubbles from a corner mean an uneven roll.
Q9. Does water temperature change the result?
Yes. Cold film is stiffer and conforms less well at the fold, so a bag tested at 5 degrees Celsius is more likely to fail there. Record temperature and hold it between 15 and 25 degrees.
Q10. Is salt water a harsher test than fresh water?
Slightly. Salt water is 2.5 percent denser, so pressure at depth is about 2 percent higher, and residue such as sunscreen lowers surface tension and speeds wicking through a fold.
Q11. How many bags from a batch should be immersion tested?
Three per 500 for a routine lot, five per 500 for a first lot from a new shell or welding recipe, and eight after any process change. Zero tolerance for water inside the bag.
Q12. Can a bag that fails be re-tested?
Once, if the failure was a damp patch at the closure with dry seams. Any failure at a weld, valve or hardware mount is a lot-level failure and triggers a full check.
Q13. Do I need to dry the outside before opening?
Yes. Water clinging to the rim runs into the mouth the moment you unroll it and causes false failures. Wipe the top 100 mm twice with a dry towel first.
Q14. Will an immersion test damage a good bag?
No, provided you rinse it with fresh water afterwards, dry it in shade with the mouth open and store it loosely rolled. Salt water and direct sun are what cause the damage.
Q15. How often should I immersion test my own bags?
At the start and the end of each season, and before any trip where a failure would be expensive or dangerous. Run the 20-second air test before every outing instead.
Q16. What is the difference between IPX7 and IPX8?
IPX7 is fixed at one metre for 30 minutes. IPX8 is a deeper or longer immersion whose conditions the maker states, so an IPX8 claim is only meaningful when the depth and duration are published with it.
People also ask
How do you test if a dry bag is waterproof?
Run an air test by squeezing the closed bag and listening for escaping air, then a water test by sinking it to one metre for 30 minutes with dry tissue inside. The water test is the one that proves an immersion rating.
What does IPX7 mean on a dry bag?
It means the bag survived 30 minutes of immersion with its lowest point one metre below the surface and its highest point at least 150 mm under, tested to IEC 60529 in fresh water.
Why does my dry bag leak when submerged but not in rain?
Rain applies almost no sustained pressure. Submersion applies about 9.8 kPa at one metre, which loads the fold line, the welds and the valve at the same time and opens capillary paths that spray never finds.
Can you test a dry bag with air instead of water?
Yes, as a quick gate: close the bag, squeeze it and feel or listen for escaping air. It catches gross leaks in 20 seconds but is far less sensitive than immersion, so use both.
How much pressure is one metre of water?
About 9.8 kPa in fresh water, which puts roughly 23 kg of load on a 200 by 120 mm panel. That is twice what a kneeling paddler generates and is why depth matters.
Do dry bags need to be tested every season?
Yes. Film stiffens, welds fatigue and hardware wears, so an annual immersion test catches the drift from 0 g of water gain to 3 g before it becomes a failure on the water.
Need this in production volume?
QUANZHOU JUNYUAN BAGS has produced waterproof bags since 2014 in an SGS-verified 4,950 m2 facility in Fujian, China. Minimum order 500 pieces, sampling in 6–10 working days, bulk in 35–50 days, FOB Xiamen — write to service@junyuanbags.com with your spec and target market.