Best Dry Bags for Kayaking: Sizes, Features and Buying Guide
For kayaking, the best dry bag is a radio-frequency welded roll-top bag in TPU laminate: 5L on the deck for water and snacks, 10L to 15L in the cockpit for spare layers, and 20L to 40L for overnight kit. Three things separate a bag that survives a season from one that fails in a month: welded seams rather than stitched and taped, a closure you can roll three times with wet hands, and D-rings that let you clip the bag to the boat. Volume should be planned at 80% of nominal capacity, because a bag filled to the brim has nothing left to fold and a fold is what makes the seal.
This guide ranks bag formats by where they sit on the kayak rather than by brand, because position determines risk: deck bags take the most water and cockpit bags take the most handling. The recommendations below come from seven production lines running 149 machines at 200,000 pieces a month in a 4,950 m2 SGS-verified facility in Fujian, China, where waterproof bags have been built since 2014. Minimum order is 500 pieces, sampling takes 6 to 10 working days, bulk runs 35 to 50 days, FOB Xiamen.
- How to choose a dry bag for kayaking
- Best dry bag sizes by trip type
- Best grab bag for the deck: 2L to 5L
- Best day bag for the cockpit: 10L to 15L
- Best overnight bag for a sea kayak: 20L to 40L
- Best format for a sit-on-top kayak
- Closure type: roll-top versus zip versus clip
- Film thickness and seam construction
- Ratings that matter: IPX6 versus IPX7
- Colour, visibility and attachment points
- Checklist before you buy
- Care after salt water
- Specifying a kayak dry bag range for a club or fleet
How to choose a dry bag for kayaking
Start with position, not with capacity. A kayak gives you three storage zones and each one has a different exposure to water. Deck bungees sit in the splash path of your own paddle drip and every bow wave, so anything there should be small, brightly coloured and checked often. A cockpit or footwell takes cockpit wash and constant handling, which is where most closure failures happen because a bag gets opened and re-rolled dozens of times a day. A day hatch or rear bulkhead is the driest place on the boat and is where keys, wallets and spare batteries belong.
Once position is settled, capacity follows from a real load list. Write down what must stay dry, weigh it, and add 20% for the air you will not manage to press out. A spare thermal top packs to about 2 litres, a light rain shell to 1.6 litres, a compact towel to 1.4 litres and a 1.2 kg lunch to roughly 2.2 litres. Four items, six litres, and the honest answer is a 10L bag rather than the 20L most paddlers buy first.
The third decision is closure type. A roll-top with three folds is the only closure that reliably survives a wet exit, because it has no mechanical part to wear and no slider to misalign. A water-resistant zip with a storm flap is faster to open and belongs on a camera bag that is opened forty times a day, not on a bag that goes underwater.
Best dry bag sizes by trip type
The table below is the short version of this whole guide. It maps trip profile to total waterproof volume, to the split across bags, and to the loaded weight you should expect. Loaded weight matters as much as volume: on a deck, keep it under 3 kg so a bag cannot shift and upset trim when you edge the boat.
| Trip profile | Water time | Waterproof volume | Loaded weight | Bag split | Rating |
|---|---|---|---|---|---|
| Sheltered lake paddle | 1-2 h | 5-8 L | 1.0-1.5 kg | 1 x 10L | IPX6 |
| Coastal day paddle | 3-4 h | 10-15 L | 2.0-2.8 kg | 1 x 10L + 1 x 5L | IPX7 |
| Surf or rock garden | 3-5 h | 12-18 L | 2.4-3.2 kg | 1 x 15L + 1 x 5L | IPX7 |
| Tidal estuary with camera | 4-6 h | 18-22 L | 3.0-4.0 kg | 1 x 20L + 1 x 5L | IPX7 |
| Overnight sea kayak trip | 2 days | 40-60 L | 7-11 kg | 1 x 40L + 2 x 10L | IPX7 |
| Expedition, unsupported | 5+ days | 80-120 L | 14-20 kg | 3 x 30L + 2 x 10L | IPX7-IPX8 |
Two patterns are worth calling out. Day paddlers are consistently better served by two bags than by one, because redundancy means a single failed seal only wets part of the kit. Overnight paddlers are better served by several mid-size bags than by one large sack, because a 60L cylinder will not pass through most sea kayak hatch openings, while three 20L bags will.
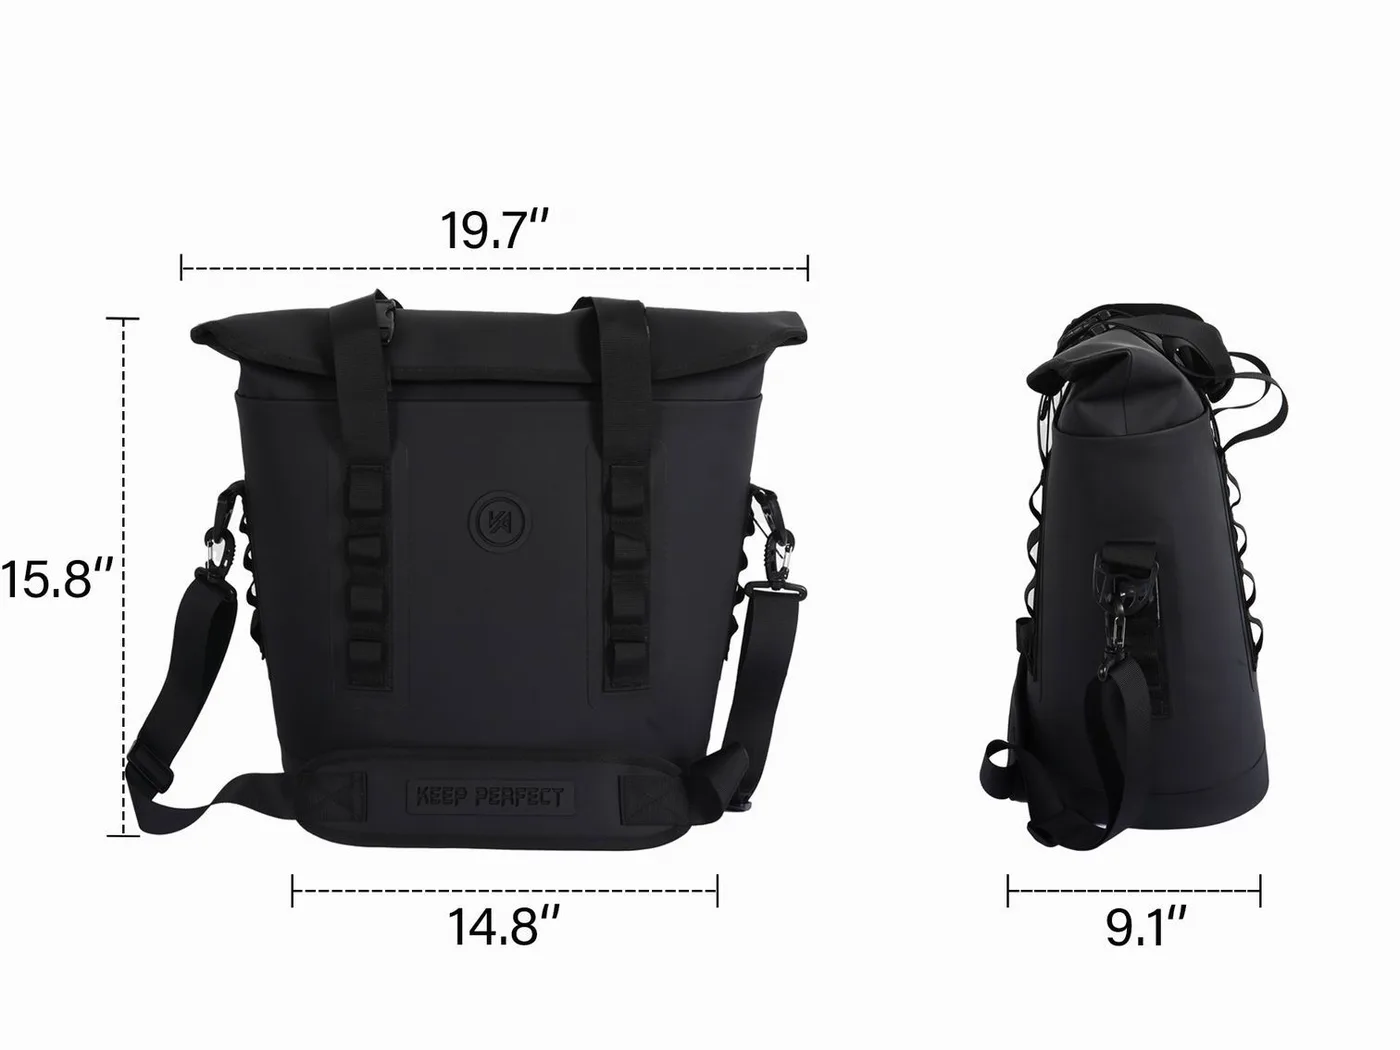
Best grab bag for the deck: 2L to 5L
The deck bag is the one you reach for with wet hands while the boat is moving, so its job is access rather than volume. A 2L roll-top holds a phone, keys and a compact camera; a 5L holds those plus a spare layer and a first-aid pouch. Anything larger becomes a sail in a headwind and an obstruction when you need to move forward on deck.
The features that matter here are a wide mouth, a single reinforced fold line, and two deck-line attachment points rather than one. A wide mouth lets you pack one-handed; a single fold line means there is no ambiguity about where the first fold goes when you cannot look down; and two attachment points stop the bag rotating under a bungee and presenting its closure to the water.
A 5L bag is also the right size to keep as a dedicated emergency pouch: a torch, a whistle, an emergency contact card and a small first-aid kit, packed once a season and never opened otherwise. If you paddle alone, this is the single most useful bag you own, and it should stay clipped to your person or your lifejacket rather than to the boat.
Best day bag for the cockpit: 10L to 15L
This is the workhorse size and the one most paddlers should buy first. A 10L roll-top holds a spare thermal top, a light rain shell, a compact towel and a 1.2 kg lunch at about 85% fill, which leaves enough collar to roll three times. A 15L gives you the same load plus a camera body and one lens, or room for a second water bottle on a hot day.
The trade-off is buoyancy and trim. A 10L bag with air trapped in the collar gives six to eight kilograms of positive buoyancy, which is genuinely useful if the bag goes overboard and genuinely annoying if it is stuffed into a hatch where it floats up against the deck. Press the air out before the first fold when the bag lives inside the boat, and leave it in when the bag is clipped outside.
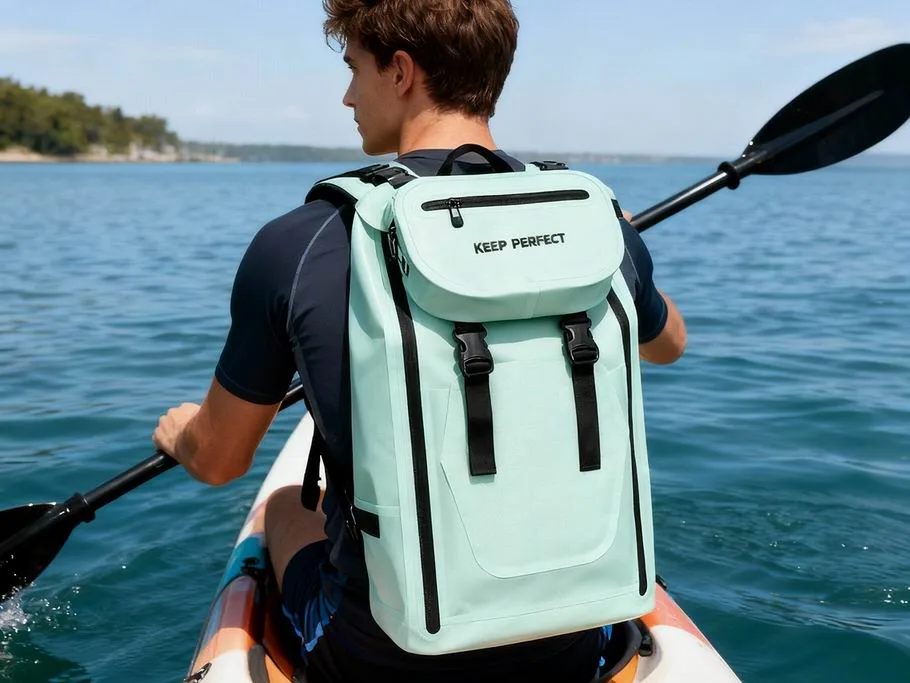
For reference on what actually fits at each size, the 10L capacity breakdown and the 20L comparison list real objects rather than theoretical maxima. The gap between them is larger than the numbers suggest, because a 20L roll-top loses 2.5 to 4 litres of usable volume once it is rolled three times.
Best overnight bag for a sea kayak: 20L to 40L
Overnight paddling changes the constraint from access to geometry. A sea kayak rear hatch is a long oval, typically 40 cm by 25 cm on a British-style boat and narrower on some Greenland designs, and a single large cylinder simply will not pass the lip. Three 20L bags pass easily, pack the hull tighter, and let you keep wet cooking gear away from a sleeping bag.
Film thickness matters more at this size. A 20L or 40L bag is dragged across sand and gravel at every landing, so 0.5 mm TPU with a 500D face fabric pays for itself in a season. The weight penalty is roughly 90 g on a 20L bag, which is trivial against the abrasion life you gain. Our 420D versus 500D comparison sets out where each belongs.
Pack order matters too. Sleeping bag and clothing go in first and deepest, food and cooking gear next, and the bag you need at camp last. Colour-code the bags or use a clear window so you can identify contents through the fabric without opening three bags on a beach in the rain.
Best format for a sit-on-top kayak
A sit-on-top has no cockpit to shelter anything, so every drop of water lands directly on your bag. That raises the rating requirement rather than the volume requirement: IPX6, which covers powerful jets from any direction, is the floor, and IPX7 is the sensible target because a sit-on-top paddler who falls off is in the water with the gear rather than beside it.
Attachment is the bigger problem. Most sit-on-tops have a tank well behind the seat and bungees across it, which means the bag sits in standing water unless it is raised or drained. Use a bag with a welded base rather than a flat bonded one, and lash it so water can run out from under it. A 15L to 20L bag tethered behind the seat covers a full day on a sit-on-top where a sit-in paddler would carry a 10L.
The single most common failure on a sit-on-top is not a leak but a loss: an untethered bag floats away after a capsize. Two attachment points and a short leash cost nothing and are the difference between a minor incident and a lost phone, keys and car fob.
Closure type: roll-top versus zip versus clip
Closure choice is where most buying decisions go wrong, because a fast closure reads as a convenience and is actually a waterproofing downgrade. The table below sets out what each closure buys you.
| Closure | Wet-exit survival | Open speed | Best position | Watch for |
|---|---|---|---|---|
| Three-fold roll-top | Yes | 5-8 s | Anywhere | Grit on the fold line |
| Single-fold clip | Marginal | 2-3 s | Day hatch | Narrow contact patch |
| Water-resistant zip | No | 1-2 s | Camera access on shore | Spray tracks along the coil |
| Slider seal (zip-lock) | Yes on small bags | 3-5 s | Phone and snack pouches | Slider wear over cycles |
| Screw-top rigid | Yes | 8-12 s | Electronics cases | Cross-threading |
If the bag will ever be submerged, the roll-top is the only real answer. Three folds create three contact lines, each of which water has to cross under pressure, and the IEC defines the IPX grades those folds are tested against in IEC 60529. A bag that passes IPX7 has survived 30 minutes at one metre in still water, which is a far stricter condition than anything a kayak produces in normal use.
Film thickness and seam construction
Two numbers decide whether a bag lasts: film thickness and seam method. Film thickness governs puncture and flex life rather than waterproofness, so 0.3 mm is adequate for a 2L deck pouch, 0.4 mm suits a 10L cockpit bag, and 0.5 mm is the right call for a 20L or 40L bag that gets dragged ashore. Paying for 0.5 mm on a small deck bag buys weight with no functional return.
Seam method is not a spectrum. A sewn seam punches needle holes through the waterproof layer and tape covers the damage rather than removing it; tape adhesive is the first thing to fail under UV. Radio-frequency welding melts two thermoplastic surfaces into each other, so there is no hole to begin with. If a specification sheet does not say which method was used, assume stitched and taped.
There is one honest advantage to sewn construction: it can be repaired on a trail. For expedition paddling where a field repair might decide whether the trip continues, some buyers specify welded seams in the wet zones and sewn panels in dry structural areas. For day and overnight paddling within reach of a car, welded throughout is the better choice.
Ratings that matter: IPX6 versus IPX7
Ingress protection ratings describe a laboratory test, not a promise. IPX6 is a high-pressure jet from every direction, which is what bow spray and a breaking wave produce. IPX7 is 30 minutes submerged at one metre, which is what a capsize in shallow water produces. A bag can pass either without passing the other, and the honest specification names both.
For kayaking the useful target is IPX7, because the failure mode you actually care about is a wet exit rather than spray. Our IPX rating guide sets out what each grade tests and the three-fold closure guide explains why the rating is worthless if the bag is closed with two folds. Note also that IPX7 is not a diving rating: sustained depth and pressure change are outside its scope.
Colour, visibility and attachment points
A floating bag that cannot be seen is a bag that will not be recovered. Choose the brightest colour available and, if night recovery is plausible, retroreflective trim rather than just a bright panel — retroreflective tape returns light to the source while a bright panel does not. Reflective webbing loops also double as attachment points, which is why they are worth specifying on every bag above 5L.
D-rings and lash points should be welded onto a reinforcement patch, not sewn through a loaded panel. Anchor failure is consistently the second most common return reason after closure failure, and it is almost always a stitching problem rather than a film problem. Check that any D-ring can be pulled hard without the surrounding fabric distorting.
Checklist before you buy
Run these six checks on any bag before it goes on the water. They take two minutes and they catch almost everything that fails later.
| Check | Pass condition | Why it matters |
|---|---|---|
| Seam | Continuous weld, no stitch line in wet zones | Tape adhesive fails before film |
| Closure | Rolls three times with room to spare | Two folds do not survive immersion |
| Film | 0.4 mm or thicker above 10L | Puncture and flex life |
| Hardware | D-rings welded to a patch, not sewn | Anchor failure is the top return reason |
| Rating | IPX7 named with the test standard | IPX6 alone does not cover a wet exit |
| Float test | Comes back up loaded and closed | Confirms the collar still holds air |
The float test is the one people skip and the one that catches aged bags. Load the bag as you would carry it, close it as you would close it, and push it under in shallow water where you can retrieve it. If it does not come back up promptly, the collar has lost stiffness and the bag is due for retirement, even if it has never leaked. More detail in why a sealed bag can still sink.
Care after salt water
Salt is the main reason kayak bags age faster than hiking bags. Rinse inside and out with fresh water the same day, paying attention to the rolled collar where crystals sit, then wipe with mild soap and a soft cloth, rinse again, and dry open and unrolled in shade. Never machine wash: it abrades the film and twists welded seams.
Between seasons, store bags clean, fully dry and unrolled or loosely folded in a cool dark place. Rolling tightly for months puts the same fold line under stress every time and that crease becomes a leak path. Keep them away from solvents, fuel and insecticide sprays, all of which attack TPU. Full routine in the salt-water cleaning guide.
Specifying a kayak dry bag range for a club or fleet
Clubs and rental fleets have a different problem from individual paddlers: standardisation. Choose one closure geometry across every size so a member who learns one bag can use all of them, and pick two sizes rather than five. A fleet built on a 10L and a 20L covers everything from a lake session to an overnight trip and simplifies spares entirely.
Write the specification in nine lines before requesting quotes: volume at three folds, film type and thickness, face fabric denier, seam method and overlap width, target rating with the test standard named, hardware grade, colour reference, print method, and quantity per size and colourway. Add the inspection level — AQL 2.5 is standard — and state whether hydrostatic test data is needed with the shipment. The broader range sits under roll-top dry bags and the welded daypack options under TPU waterproof backpacks.
Cold-water paddlers should note one thing that is not a bag problem: hypothermia. Carry a means of communication in a lifejacket pocket that is reachable with cold hands, and read the cold-water safety guidance published by the CDC before planning a winter paddle. A dry bag keeps kit dry; it does not keep a person warm. Tidal planning matters just as much — check predictions through NOAA if you paddle in US waters.
Programme volumes start at 500 pieces per size and colourway, with sampling in 6 to 10 working days and bulk in 35 to 50 days after sign-off, FOB Xiamen, T/T 30/70, inspected to AQL 2.5.
Frequently asked questions
Q1. What is the best size dry bag for kayaking?
For a day paddle, 10L to 15L in the cockpit plus a 5L grab bag on the deck. For an overnight sea kayak trip, three 20L bags rather than one 60L, because a 60L cylinder will not pass through most hatch openings. Plan at 80% of nominal volume so there is collar left to fold.
Q2. Should a kayak dry bag float?
Yes, or at minimum it should be tethered. A sealed bag with trapped air floats, but a tightly packed bag with heavy contents can sink even when sealed. Treat buoyancy as gear recovery, never as personal flotation equipment, and always wear a certified lifejacket.
Q3. How many dry bags do I need for kayaking?
Two for a day paddle and three to five for an overnight trip. Multiple bags give redundancy, pack better in a hull and let you keep wet cooking gear away from a sleeping bag. A single large bag is harder to pass through a hatch and puts all your kit behind one seal.
Q4. Is IPX7 necessary for kayaking?
Yes. Kayaking crosses from spray into immersion the moment you wet exit, and IPX6 covers jets but not submersion. IPX7 means 30 minutes at one metre in still water, which is stricter than anything a kayak produces in normal use, so it gives real margin.
Q5. What film thickness is best for a kayak dry bag?
0.4 mm for a 10L cockpit bag and 0.5 mm for 20L and above, because larger bags get dragged across sand and gravel at every landing. 0.3 mm is adequate only for a small 2L deck pouch. Thickness governs puncture and flex life, not waterproofness.
Q6. Are welded seams really better than stitched and taped?
Yes for waterproofness. A sewn seam punches needle holes through the waterproof layer and tape covers the damage rather than removing it; tape adhesive fails under UV before the film does. Welding melts two surfaces into one, so there is no hole. Sewn construction wins only on field repairability.
Q7. Can I use a dry bag instead of a lifejacket?
Never. A dry bag is gear-recovery equipment, not personal flotation equipment. It is not certified to support a person, it can lose air if the closure opens, and it offers no freeboard in moving water. Always wear a certified personal flotation device on the water.
Q8. How do I stop my dry bag floating away in a capsize?
Clip it to the boat with a short leash and use two attachment points so it cannot rotate. An untethered bag that floats away after a capsize is the single most common way paddlers lose phones, keys and car fobs.
Q9. What should I keep on the deck versus in the hatch?
Deck: water, snack, sunscreen and a phone in a secondary pouch, in a 2L to 5L bag you can reach with wet hands. Hatch: keys, wallet, dry towel and spare batteries, which are the driest items and the ones you only touch ashore.
Q10. Do I need a purge valve on a kayak dry bag?
Only if you pack compressible gear and want the bag to sit flat in a hatch. A valve lets you squeeze air out after closing. If you mostly carry clothing and food, a standard roll-top without a valve is simpler and has one fewer seal to fail.
Q11. How do I dry a dry bag between paddling days?
Open it fully, turn the mouth downward, and leave it in shade with air moving. Do not machine dry or use a heat gun, both of which damage the film. Make sure the collar is completely dry before rolling it for storage, or mildew will start along the fold line.
Q12. Will salt water ruin a TPU dry bag?
Not if you rinse it. Salt crystals left in the collar abrade the fold line and accelerate creasing. Rinse inside and out with fresh water the same day, wipe with mild soap, rinse again and dry open in shade. With that routine a 0.5 mm bag lasts five to ten years of weekend use.
Q13. Should I get a clear window in my kayak dry bag?
Only where a bag is stored out of reach and you need to identify contents without opening it. A window adds a weld line, which is another potential failure point. Colour coding is safer and lighter for most paddlers.
Q14. How much weight can I put on the deck of a kayak?
Keep deck load under 3 kg so it cannot shift and upset trim when you edge the boat. Heavier items belong in the day hatch or rear bulkhead, low and central. A 10L bag packed with clothing weighs about 2 kg and is comfortable on deck.
Q15. What is the best dry bag for a sit-on-top kayak?
A 15L to 20L welded roll-top with a welded base and two lash points, tethered behind the seat. A sit-on-top has no cockpit shelter, so every drop lands on the bag, which raises the rating requirement to IPX7 even though the volume requirement is similar.
Q16. When should I retire a kayak dry bag?
When the float test fails, when the collar has gone limp and will not hold a fold, or when you see whitening along a weld or crease line. A bag that floated eight kilograms new may float five after two hard seasons, and knowing that number is what separates retrieving your kit from watching it sink.
People also ask
How do you pack a dry bag for kayaking?
Pack heavy items low, keep the load to about 80% of nominal volume, press the air out before the first fold if the bag lives in a hatch, then close with three folds and a tight buckle. Keep the deck bag to what you need with wet hands.
What size dry bag fits in a sea kayak hatch?
Most sea kayak hatches take a 20L bag comfortably and a 30L with effort. A 60L cylinder will not pass the lip on most boats, which is why overnight paddlers use three 20L bags instead of one large sack.
Do dry bags keep water out if you capsize?
Yes, if the bag is rated IPX7 and closed with three folds. A capsize is a short immersion, which IPX7 covers. For extra safety put electronics in a small roll-top inside the main bag so there are two independent seals.
How do you attach a dry bag to a kayak?
Use two deck lines with a single full turn, or a short leash clipped to a fixed point. Two points stop the bag rotating under a bungee and presenting the closure to the water. An untethered bag floats away after a capsize.
Are TPU dry bags better than PVC for kayaking?
For kayaking yes. TPU stays flexible when cold, has no plasticiser to migrate and welds cleanly, which suits a bag folded and squeezed at every launch. PVC is heavier and hardens under sustained UV. Use 420D or 500D face fabric with 0.4 to 0.5 mm film.
How do you test a dry bag before a trip?
Close with three folds, squeeze and listen for a hiss, then submerge for 30 seconds in a bath and check for moisture inside. Repeat the float test at the start of each season with the bag loaded as you would carry it.
Need this in production volume?
QUANZHOU JUNYUAN BAGS has produced waterproof bags since 2014 in an SGS-verified 4,950 m2 facility in Fujian, China. Minimum order 500 pieces, sampling in 6–10 working days, bulk in 35–50 days, FOB Xiamen — write to service@junyuanbags.com with your spec and target market.