Dry Bag for Backcountry Skiing: Packing and Sizing Guide
A one-day backcountry ski tour needs 12 to 20 litres of waterproof space per person, a hut overnight needs 25 to 35 litres, and a four-day spring traverse needs 45 to 60 litres, split across two or three roll-top bags that together weigh under 700 g empty. The volume is driven by what must stay dry rather than by what you carry: a down jacket, a sleep layer, spare socks, a first-aid pouch and a phone, which pack to roughly 11 litres and 2.4 kg on a day tour.
The rest of this guide covers the capacity maths by tour type, where each bag rides on the climb and the descent, what cold does to film and buckles, a closure technique that works with mittens on, and a thaw-and-dry routine for a hut. Every figure is tied to a real load or a real temperature: a 780 g pair of skins, a 1.4 kg down jacket, a minus 18 °C morning start, a four-minute transition at the top of the climb.
- What a ski tour asks of a waterproof system
- Capacity by tour type: litres and kilos
- The two-volume rule: dry space and wet space
- What cold does to the film and the buckle
- Where each bag rides on the climb and the descent
- Avalanche kit access and the ten-second rule
- Roll-top closures with mittens on
- Waterproof ratings that actually apply on snow
- Electronics, batteries and the warm-body rule
- Weight budget: grams per litre on a climbing day
- The four-minute transition at the top
- Hut routine, and what a season wears out first
- Choosing your three bags: a decision rule
What a ski tour asks of a waterproof system
On a touring day the water arrives as snow, sweat and spindrift rather than as rain or immersion, and that changes every decision about a bag. Snow packs into a fold line and melts there; sweat soaks the base layer you peel off at the top of the climb; spindrift finds the gap between a pack lid and a shoulder strap. A touring pack already sheds light snow, so the dry bag inside it is not fighting a downpour, it is fighting slow persistent damp that arrives from three directions at once.
In one way that is easier than paddling: there is no immersion event on a ski tour unless you cross a creek on a spring traverse. In another way it is harder, because a bag that gets damp at minus 12 °C freezes solid overnight and cannot be opened in the morning without warming it first. The dominant failure mode on snow is ice inside the closure, not water inside the bag, and that single fact shapes the whole packing plan.
So the job list is short and specific. Keep the insulation layer and the sleep layer dry, keep melt water away from the electronics pouch, and seal wet skins and a soaked base layer into a separate space that never touches dry kit. Three jobs means three volumes, which is why experienced tourers converge on three bags between 5L and 20L rather than one large sack that has to be opened at every transition.
Capacity by tour type: litres and kilos
Work from the tour profile, not from the pack you already own. A resort-adjacent lap with one short climb needs far less waterproof volume than a hut trip where a sleeping bag and a down jacket travel with you for two days. The table below lists packed figures including the air you cannot fully expel from a rolled bag, which is typically 8 to 12% of the stated volume.
| Tour profile | Time out | Waterproof volume | Packed weight | Bag split |
|---|---|---|---|---|
| Resort-adjacent lap | 2-4 h | 8-12 L | 1.2-2.0 kg | 1 x 10L |
| Day tour, one ascent | 5-8 h | 14-20 L | 2.2-3.0 kg | 1 x 15L + 1 x 5L |
| Long day, two ascents | 8-11 h | 18-24 L | 2.8-3.6 kg | 1 x 20L + 1 x 5L |
| Hut overnight | 2 days | 25-35 L | 4.5-6.0 kg | 1 x 30L + 1 x 10L |
| Spring traverse | 4-6 days | 45-60 L | 8-12 kg | 1 x 40L + 2 x 10L |
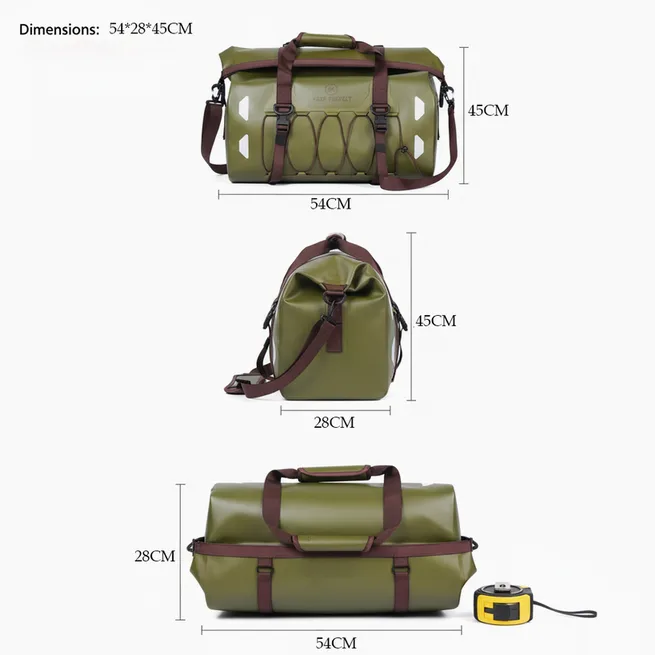
Two rules fall out of those numbers. Buy the bag for the longest tour you realistically do twice a season, not the longest tour you might do once, because an oversized 40L bag on a five-hour day tour becomes a shapeless mass that settles to the bottom of the pack and pulls on your lumbar region on the descent. And always split the volume: two bags of 10L and 5L weigh about 40 g more than one 15L bag and let you open only the one you need at a windy transition.
The two-volume rule: dry space and wet space
Every ski tourer eventually learns that the wet volume and the dry volume must never share a bag. Skins come off the skis at the top with snow and glue-side moisture on them; a base layer comes off soaked through the back where the pack sat; gloves drip melt water for an hour after you stop. All of that belongs in one designated wet bag, sealed, and strapped to the outside of the pack or buried at the bottom of it.
The dry space holds the down jacket, the spare hat and gloves, the sleep layer on a hut trip, the first-aid pouch and the electronics. That list packs to 9 to 12 litres on a day tour, which is why a single 15L bag is the most useful first purchase for ski touring. The wet space is smaller in volume but heavier when wet: skins and a soaked base layer weigh about 1.4 kg together and occupy 4 to 6 litres.
What cold does to the film and the buckle
Polymer behaviour is the part of cold-weather packing that most people learn the hard way. A PVC coated bag that folds beautifully at 5 °C turns board-stiff at minus 10 °C and will crack if you force a fold. TPU laminated film stays workable far lower, which is the main reason a 0.5 mm TPU bag is the default choice for winter use; the trade-off is cost per bag, not performance.
Buckles matter as much as film. Acetal and nylon hardware both get brittle below about minus 25 °C, and a side-squeeze buckle that has been soaked and frozen will snap at the tongue rather than release. Warm the buckle in a gloved hand or inside a jacket for thirty seconds before you squeeze it, and never lever a frozen buckle open with a ski pole tip.
| Air temperature | 0.5 mm TPU film | 0.5 mm PVC film | Buckle behaviour | What to do |
|---|---|---|---|---|
| 0 to -5 °C | Supple, folds normally | Slightly stiff | Releases normally | Pack as usual |
| -10 °C | Folds with light pressure | Needs warming first | Stiff but usable | Warm the fold in your hands |
| -20 °C | Folds with two hands | Do not fold | Brittle, slow release | Keep the bag closed all day |
| -30 °C | Stiff, risk of crease damage | Crack risk | Do not force | Open only indoors |
| Above 0 °C, wet snow | Fully flexible | Flexible | Watch for ice in the tongue | Dry the buckle before storage |
Where each bag rides on the climb and the descent
Position is a stability decision on skis in a way it is not in a canoe. A soft bag of 3 kg placed at the very top of a 45-litre touring pack raises the centre of mass and makes the descent feel nervous, particularly on firm spring snow where you are already weighting the tails. Put the heaviest dry bag low and close to the back panel, and let the light insulation bag sit in the lid where you can reach it without unpacking.
The wet bag should be the one on the outside. Strapping a sealed 5L or 10L wet bag under the lid or across the top of the pack keeps melt water away from the dry compartment and means you can drop it in the porch of a hut without carrying snow through the sleeping area. Use two compression straps through welded D-rings, not a single strap over the middle, so the bag cannot rotate when you are skiing a traverse.
Avalanche kit access and the ten-second rule
A transceiver, a probe and a shovel live in the pack, never in a dry bag. That is not a waterproofing opinion, it is an access rule: a shovel handle has to be in your hand within ten seconds of a burial, and a roll-top closure adds at least that long to the retrieval even with warm fingers. Keep the shovel blade in the dedicated pack sleeve and the probe shaft beside it.
Where a dry bag does earn a place in the safety system is as the carrier for the spare items that support a long rescue: a headlamp with fresh batteries, a foil blanket, a spare pair of mittens, a small stove and a first-aid pouch. Those pack to about 2.5 litres and 900 g and belong in one clearly labelled 5L bag that every member of the group knows by colour. Our first-aid kit sizing notes cover the pouch breakdown in more detail.
Roll-top closures with mittens on
The standard three-fold closure assumes bare fingers. With a liner glove and a mitten over it, fold once, press the fold flat along its whole length with the heel of the hand rather than pinching it with fingers, fold twice more, then clip. Pressing with the palm matters because a mitten cannot feel whether a fold has seated evenly, and an uneven fold is what lets melt water track sideways into the bag over an hour of climbing.
Snow in the fold is the enemy. Brush the mouth of the bag with a glove before the first fold, and if snow has already got in, do not try to wipe it out with a bare hand in a wind. Roll the bag with the snow inside, accept a damp inner surface for one day, and clean and dry the fold properly that evening. Forcing a dry glove into a frozen fold tears the film at the crease, and a torn crease is the single most common reason a winter bag gets retired early.
Waterproof ratings that actually apply on snow
Snow contact sits at the low end of the ingress scale and that is worth saying plainly: a ski tour rarely justifies an IPX7 immersion-rated bag on its own. What it does justify is a welded seam, because a stitched seam wicks melt water by capillary action for as long as snow sits against it, which is hours rather than seconds. The ISO and IEC test language gets quoted a lot in marketing, but the practical distinction on a mountain is weld versus stitch.
| Exposure on a tour | What reaches the bag | Rating that covers it | Seam that survives |
|---|---|---|---|
| Spindrift at 30 km/h | Driven dry snow | IPX4-IPX5 | Welded |
| Snowfall with the lid open | Damp snow on the fold | IPX4 | Welded, wipe the fold |
| Wet skins stored inside | Melt water pooling | No rating needed, seal it | Welded, 0.5 mm film |
| Creek crossing on a traverse | Brief submersion | IPX7 | Welded, continuous |
| Bag buried overnight | Freeze-thaw cycling | IPX6 plus cold-flex | TPU, 0.5 mm, welded |
The interesting row is the last one. A bag left outside a hut overnight goes through a freeze-thaw cycle that no ingress test simulates, and the film at the fold is what takes the strain. Choose a bag rated for cold-flex by the maker and roll it loosely rather than tightly if you know it will spend the night out; a tight fold that freezes is a crease that will eventually split.
Electronics, batteries and the warm-body rule
Cold destroys battery runtime far faster than water destroys phones. A lithium-ion phone at minus 5 °C loses roughly a third of its usable runtime, and by minus 20 °C most phones shut down even at a nominal 60% charge. The countermeasure is not a bigger dry bag, it is body heat: carry the phone in an inside jacket pocket, not in the bag, and use the bag for the spare battery pack and the cable.
If a phone must travel in the bag, wrap it in the spare down jacket so it is insulated as well as dry, and put it in a small 2L roll-top inside the main 10L bag. Two independent seals and a layer of loft will keep it working through a long cold day. Headlamp batteries behave the same way, which is why the rescue bag described earlier should carry lithium primaries rather than alkaline cells.
| Item | At -5 °C | At -20 °C | Where it belongs |
|---|---|---|---|
| Phone | About 70% runtime | Shuts down early | Inside jacket pocket |
| Spare power bank | About 80% runtime | About 40% runtime | Wrapped in the down jacket |
| Headlamp, lithium cells | Near normal | About 85% runtime | Top of the rescue bag |
| Headlamp, alkaline cells | About 60% runtime | Below 25% runtime | Avoid below freezing |
| GPS watch | Normal while worn | Normal while worn | On the wrist, never in the bag |
Weight budget: grams per litre on a climbing day
A ski tour is a climbing day with a short reward at the end, so weight carried uphill is the number that matters. An empty 15L roll-top in 0.5 mm TPU with a 420D face weighs about 240 g, a 5L about 110 g, and a 30L about 430 g. Add roughly 90 g for a shoulder strap set if you plan to carry the bag on its own at any point.
That means a three-bag system for a day tour costs close to 450 g of empty bag weight, which is real but defensible when you set it against the alternative. A pack liner system weighs less and fails differently: a thin liner punctures at the corner of a ski boot buckle and once punctured it protects nothing. For a tour where the consequence of a wet sleeping layer is a cold night, 450 g is cheap insurance.
The four-minute transition at the top
A transition is where bags get opened in bad conditions and where snow gets inside them. Doing the same sequence every time saves minutes and keeps the closure clean. Practise it in the dry at home once, with mittens on, before you need it on a windy col.
- Skis off, anchors in, jacket on before anything is unpacked.
- Open the wet bag first, seal the skins and the soaked base layer inside it, roll three times.
- Strap the wet bag to the outside of the pack and tighten the compression straps.
- Open the dry bag only now, take the down jacket and the hat, close it immediately.
- Food and water from the lid pocket, not from a dry bag, so no bag is open twice.
- Check every buckle is clipped before you pick up the skis.
The order matters because the wet bag and the dry bag are open at different times, so only one closure is exposed to falling snow at any moment. It also means the wet bag is already sealed before you start handling dry insulation, which stops a wet glove transferring moisture to the one layer that has to loft. Our freezing-conditions guide goes deeper into what happens when a sealed bag spends a night at minus 15 °C.
Hut routine, and what a season wears out first
Bring every bag inside at the end of the day and let it come up to room temperature before you open it. Forcing open a bag whose fold is still frozen is the fastest way to put a permanent crease in the film. Thirty minutes in a porch or a vestibule is usually enough for a 5L or 10L bag; a 30L left outside all day may need an hour.
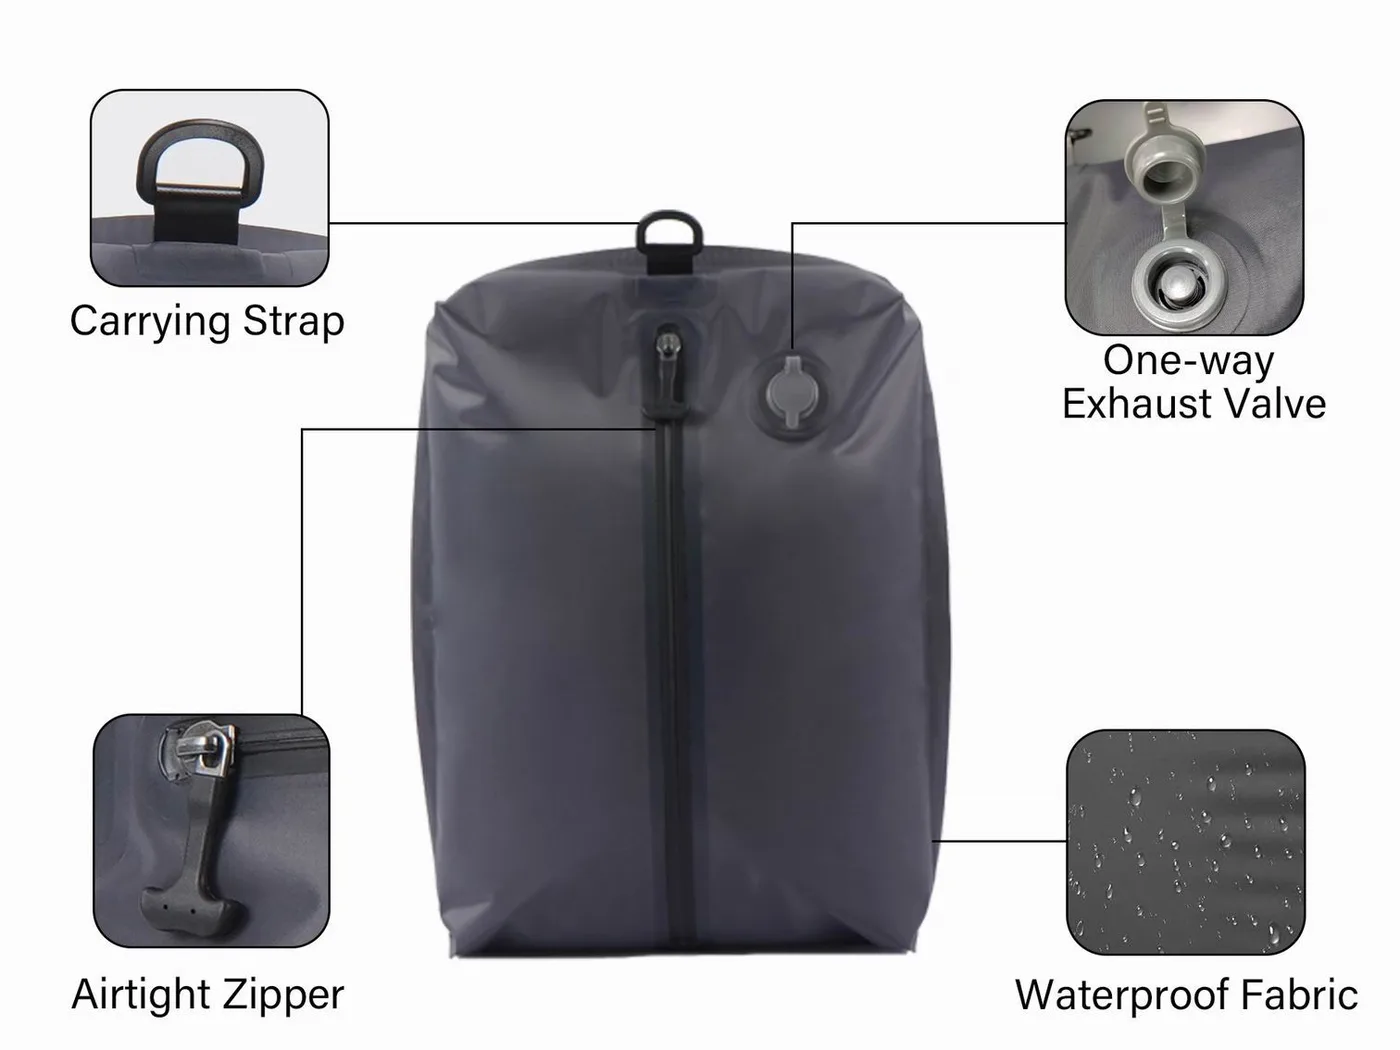
Once it is open, turn it inside out and wipe the inner surface. Condensation from a day of temperature swings leaves 30 to 60 ml of water on the inside of a 15L bag even when nothing got in from outside, and if you roll the bag closed with that still inside you will be starting tomorrow with a damp interior and a fold that ices up. Dry the fold line with a cloth, leave the mouth open overnight, and store the bag loosely rolled.
After roughly forty touring days, the first thing to go is usually the fold line, not the body of the bag. A crease that has been rolled three times a day, forty times a season, develops a whitened line where the film has fatigued, and that line eventually cracks. The second thing to go is the buckle tongue, which takes grit from ski edges and boot buckles and wears thin.
Abrasion from ski edges is the third failure and it is entirely preventable. Never pack skins or a bag in the same compartment as a pair of skis or an ice axe without a sleeve; a 0.5 mm film will survive normal contact with fabric and soft gear but not a honed steel edge sliding against it for an hour of skinning. The same care notes apply to the harness side of things, and our harness maintenance guide covers the strap side in detail.
Choosing your three bags: a decision rule
- Buy for the longest tour you do twice a season, not the one trip you might do once.
- Split the volume: one dry bag, one wet bag, one rescue bag, each with its own colour.
- Choose 0.5 mm TPU film over PVC if the bag will fold below minus 10 °C.
- Welded D-rings on every bag that will be strapped to a pack or a sled.
- Check the buckle can be released with a mitten on, at the shop, before you buy.
- Keep the transceiver, probe and shovel out of every dry bag, always.
- Match the closure to the colour: high-contrast fold panels are easier to close in flat light.
Those seven lines also work as a group standard. If you ski with the same three or four people every winter, agreeing on a colour code for dry, wet and rescue bags means anyone can find the right bag in anyone else’s pack during a rescue or a whiteout. Clubs and guiding operations that standardise this way tend to buy one size family so the fold geometry is identical across every bag; you can compare the sizes against our roll-top dry bag range.
For programmes bought in volume, the same brief becomes a specification: film thickness, seam type, hardware grade, colourway and the cold-flex data behind the waterproof claim. Compare the figures there against the full product line before you fix a size.
Cold injury is the risk that no bag manages. Wet insulation plus wind plus a long descent is how hypothermia starts on a tour that looked benign at the trailhead, and the CDC publishes the warning signs and the response sequence every touring group should know. A dry bag protects kit; knowing when to turn around protects people. Check the forecast and the freezing level through NOAA before you commit to a route, and read the snowshoeing sizing guide if you also spend winter days on foot at lower elevation.
Frequently asked questions
Q1. What size dry bag do I need for backcountry skiing?
For a day tour plan on 14 to 20 litres split into a 15L dry bag and a 5L wet bag. A hut overnight needs 25 to 35 litres, and a four-day spring traverse needs 45 to 60 litres across three bags.
Q2. Is a 20L dry bag big enough for a ski tour?
Yes for a long day with two ascents, provided you split it: a 20L for insulation and sleep layers plus a 5L for wet skins and a soaked base layer. One 20L doing both jobs means opening it at every transition.
Q3. Do dry bags work below freezing?
They work, but the film stiffens and the fold needs more pressure. A 0.5 mm TPU bag folds down to about minus 20 °C with two hands; PVC should not be folded below minus 10 °C without warming it first.
Q4. Should my avalanche transceiver go in a dry bag?
No. A transceiver, probe and shovel must be reachable in about ten seconds, and a roll-top closure adds too much time. Keep them in the pack sleeves and use a dry bag for the spare rescue kit instead.
Q5. How do I keep snow out of the roll-top closure?
Brush the mouth with a glove before the first fold, press the fold flat with the heel of your hand rather than pinching it, and never wipe a frozen fold with a bare hand. Melted snow in the fold is the most common winter leak path.
Q6. Is TPU or PVC better for ski touring?
TPU. It stays flexible at low temperature, has no plasticiser to migrate, and welds cleanly, which matters when the bag is folded every day of a season. PVC stiffens at minus 10 °C and cracks if a fold is forced.
Q7. Where should a dry bag sit in a touring pack?
Heaviest bag low and close to the back panel, light insulation bag in the lid for quick access, wet bag strapped outside under the compression straps. A 3 kg bag at the very top makes the descent feel unstable.
Q8. How much does a ski touring dry bag system weigh?
About 450 g empty for a three-bag system: a 15L at roughly 240 g, a 10L at about 180 g and a 5L at about 110 g in 0.5 mm TPU. Add 90 g if you fit a shoulder strap set.
Q9. Can I put wet skins in the same bag as my down jacket?
No. Skins carry snow and glue-side moisture and will wet everything they touch within an hour. Use one designated wet bag, seal it, and strap it outside the pack.
Q10. What waterproof rating do I need for ski touring?
IPX4 to IPX5 covers spindrift and snowfall, which is most of a tour. Step up to IPX7 only if your route includes a creek crossing or a spring traverse where a bag may go under. Welded seams matter more than the number.
Q11. How do I open a frozen dry bag?
Do not force it. Bring it indoors and let it reach room temperature, which takes about thirty minutes for a 10L and up to an hour for a 30L, then open it and wipe the condensation from the inner surface.
Q12. Why is there water inside my dry bag when it never got wet?
Condensation. A bag sealed on a cold climb and opened in a warm hut collects 30 to 60 ml on the inside wall from the air trapped inside it, so dry the interior before you roll it closed again.
Q13. Do I need a compression bag for a sleeping bag on a hut trip?
A compression sack saves volume but not waterproofness, and a compressed down bag loses loft if it is stored compressed for weeks. Pack the sleeping bag in a 30L roll-top rolled loosely and compress it only for the climb.
Q14. How do I strap a dry bag to a touring pack?
Use two compression straps through welded D-rings on the bag rather than one strap across the middle, so the bag cannot rotate on a traverse. Sewn loops tear under that load; welded points do not.
Q15. How long does a dry bag last with winter use?
Around forty touring days per season over several winters before the fold line whitens and eventually cracks, assuming it is thawed before opening and stored loosely rolled. Ski-edge abrasion and forced frozen folds are what shorten that.
Q16. Can I carry a dry bag on a sled or a pulk?
Yes, and it is a good use for a 30L or 40L bag, but lash it to the frame at two points and keep the closure facing up. Sleds spray slush continuously, so check the fold every hour on a long approach.
People also ask
How do you pack a dry bag for ski touring?
Split into dry, wet and rescue volumes. Down jacket, spare hat and gloves, sleep layer and electronics go in the dry bag; skins and a soaked base layer go in a separate wet bag strapped outside; headlamp, foil blanket and first-aid pouch go in one labelled rescue bag.
Are dry bags necessary for backcountry skiing?
Necessary is strong, but a welded roll-top is the cheapest way to guarantee a dry insulation layer on a multi-day trip. Snow, sweat and spindrift will damp a pack lid within a few hours, and a wet down jacket is a genuine safety problem at nightfall.
What temperature damages a dry bag?
Flexible films start to stiffen noticeably below minus 10 °C and PVC risks cracking if folded below that. Hardware gets brittle near minus 25 °C. Above freezing there is no temperature risk from cold, but direct sun on dark film accelerates UV ageing.
Why does my dry bag freeze shut?
Melted snow or condensation in the fold turns to ice overnight and locks the closure. Brush the fold before rolling, dry the interior after every day, and bring the bag indoors to thaw rather than levering it open cold.
Can you put ski boots in a dry bag?
You can, and it keeps melt water off the rest of your kit, but use a dedicated 20L or 30L with a reinforced base because boot buckles and edges abrade film fast. Keep boots out of the same bag as any soft insulation.
How many dry bags should a ski tourer carry?
Three: a dry bag of 10L to 20L, a wet bag of 5L to 10L, and a small labelled rescue bag of about 5L. Beyond three bags you spend more time sorting kit at transitions than the extra organisation is worth.
Need this in production volume?
QUANZHOU JUNYUAN BAGS has produced waterproof bags since 2014 in an SGS-verified 4,950 m2 facility in Fujian, China. Minimum order 500 pieces, sampling in 6–10 working days, bulk in 35–50 days, FOB Xiamen — write to service@junyuanbags.com with your spec and target market.