Home / Blog / Travel & Packing
Motorcycle Luggage Dry Bag Setup
A workable motorcycle dry bag setup carries 20 to 40 litres on the tail, 12 to 20 litres per side if you run soft panniers, and keeps every bag at least 150 mm away from any exhaust surface that can exceed 300 °C. Waterproofing matters more here than on a backpack: at 100 km/h, rain arrives as a horizontal jet, so a bag that survives a shower on foot can be soaked in twenty minutes on a motorway. Welded TPU with a three-fold roll-top handles both.
This guide covers capacity by position, the orientation of the closure relative to the direction of travel, strap loads and abrasion, exhaust and engine heat, how the load changes handling, and the five-minute roadside check that stops a strap walking loose. Figures come from soft luggage in the 10L to 60L range carried at 80 to 130 km/h on both road and gravel, loaded to 8 to 14 kg.
- Why a dry bag beats a soft pannier on most bikes
- Capacity by position: tail, side and tank
- Which way the roll-top should face
- Straps, tension and the walk-loose problem
- Exhaust heat: clearances that stop a melted bag
- Vibration, abrasion and where the film wears through
- How the load changes the way the bike handles
- Rain at speed: the rating that actually matters
- Packing order for the road you are actually riding
- Security: leaving the bike parked with bags on
- The five-minute roadside check
- Choosing bags for a bike rather than for a boat
- Setup checklist before a long ride
Why a dry bag beats a soft pannier on most bikes
A motorcycle needs luggage that is waterproof, narrow, and cheap to replace. Purpose-built soft panniers satisfy the first two but cost three to five times as much per litre, and they are shaped for one bike. A roll-top dry bag of 20L or 30L costs less, packs to any shape, and doubles as a holdall at the destination. The trade-off is that a dry bag has no structure: it needs a rack or a seat to sit on and straps to stop it moving.
Structure is the real issue. A bag that sags into a rear wheel or drifts sideways under braking is dangerous regardless of how waterproof it is. The fix is not a frame but a load path: strap the bag down against a firm surface, then strap it forward and backward so it cannot shift. Two straps in compression and two in tension is the arrangement that survives a 400 km day on corrugated gravel.
Waterproofing is the other reason. Most textile motorcycle luggage ships with a rain cover, which works until it flaps off at 110 km/h or pools water at the base. A welded bag with a roll-top closure has no cover to lose. That is the same argument that drives our floating dry bag range on boats, where a cover is also the first thing to go.
Capacity by position: tail, side and tank
Split the load by access frequency rather than by volume alone. The tail bag holds what you want at a fuel stop: rain shell, gloves, water, documents. Side bags hold what you want at the hotel: clothing, boots, tools. Nothing that must stay dry should sit where it can be hit by the front wheel spray pattern, which on a naked bike reaches well above the rider's knee at speed.
| Position | Useful volume | Mass limit | Access on the road | Water exposure |
|---|---|---|---|---|
| Tail, on the pillion seat | 20-40 L | 10 kg | Excellent, no dismounting | High spray |
| Tail, on a top rack | 30-60 L | 14 kg | Good | High spray |
| Side, soft throw-over | 12-20 L each | 7 kg each | Poor, needs a stop | Medium |
| Tank bag, strapped | 5-12 L | 3 kg | Excellent | Low, rider shields it |
| Front fork or handlebar | 3-8 L | 2 kg | Excellent | High, affects steering |
The mass limits are about handling, not about the bag. Ten kilograms high on the pillion seat raises the centre of gravity enough to be felt in slow corners and in crosswinds; seven kilograms per side, balanced, is nearly invisible. If you need to carry more than 20 kg total, put the heaviest items low and forward, and consider whether the bike's own load rating allows it before you add luggage at all.
Which way the roll-top should face
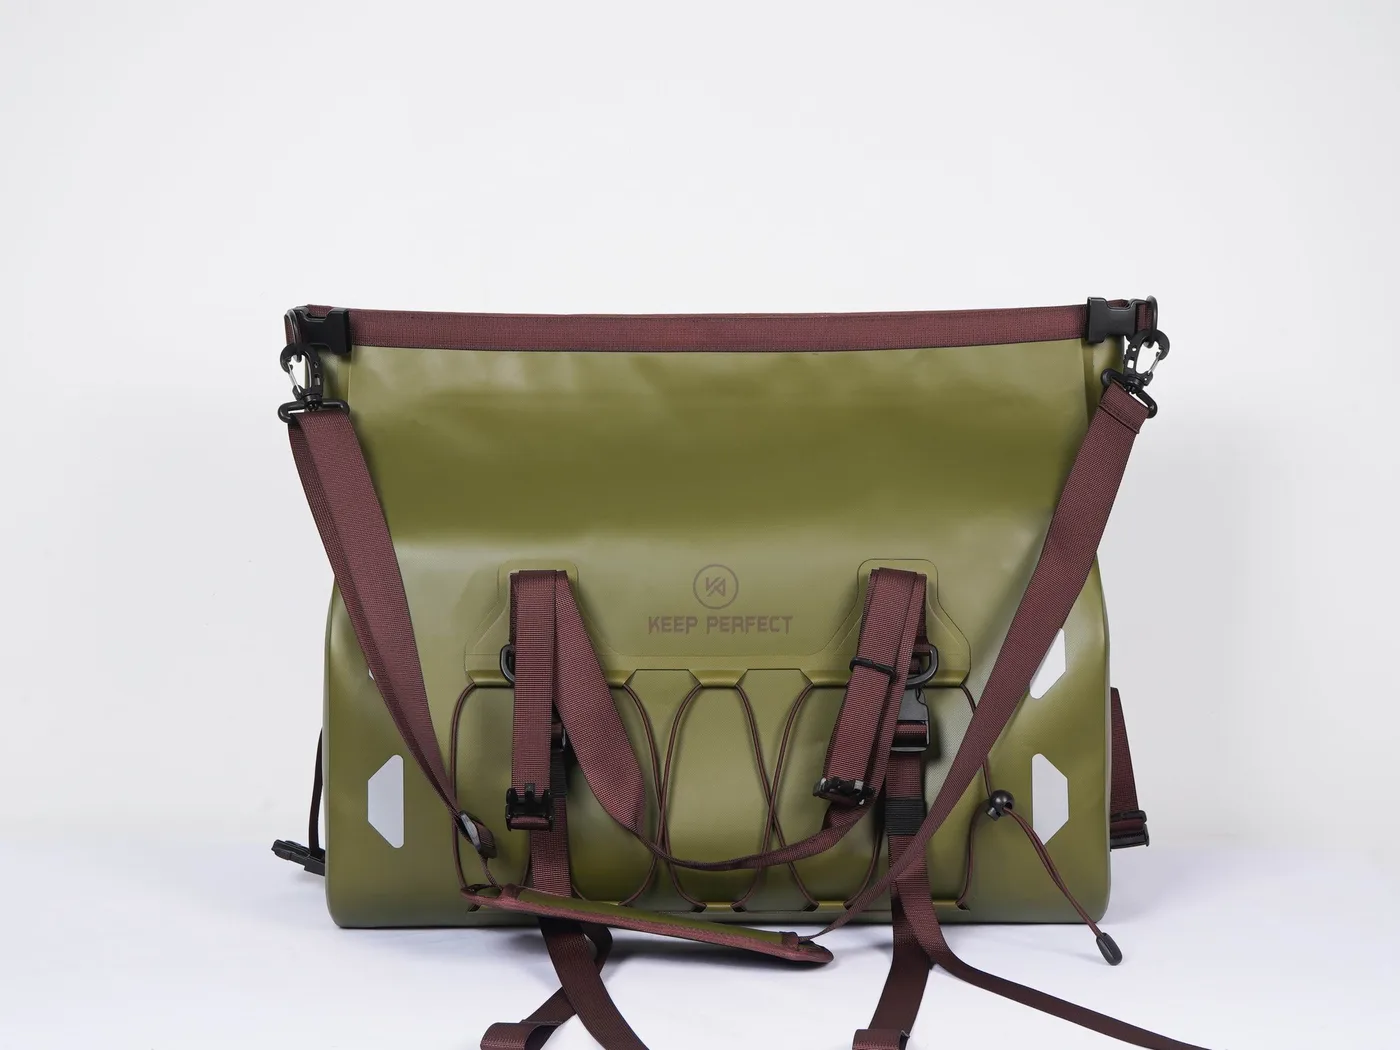
Face the closure rearward on a tail bag. At 100 km/h the relative airflow travels from front to back over the bike, so a forward-facing mouth is presented directly to the airstream and any imperfection in the fold becomes a scoop. A rearward-facing mouth sits in the turbulent wake behind the rider and sees far less water, which is the same reason a jacket's main zip is usually behind the storm flap.
There is an exception. If the bag sits directly behind a screen or a tall rider, the wake can recirculate and push water upward against the rear of the bag. In that case turn the mouth inboard, towards the bike, and tuck the rolled top down between the bag and the seat. Test it once: ride 20 km in real rain, stop, open the bag and feel the inside of the fold for moisture before you trust the arrangement on a long trip.
Roll three times, always, and roll away from the direction of travel so the fold tightens rather than opens. A single fold will hold a light shower at 60 km/h and will not hold an hour of motorway rain. Leave about 15% of the bag's volume empty so the roll has fabric to work with; a bag packed to the brim cannot be folded properly, which is the most common cause of a wet tail bag.
Straps, tension and the walk-loose problem
Nylon cam straps stretch when wet and creep under vibration, which is why a bag that was drum-tight at breakfast is loose by lunch. Elasticated luggage straps with a rubber core hold tension through the movement better than flat webbing on corrugated roads, and they also absorb the shock loads that tear welded anchor points. Whatever you use, the strap must press the bag down onto the seat, not pull it sideways into the frame.
| Strap type | Working load | Wet stretch | Best use | Watch out for |
|---|---|---|---|---|
| Flat webbing cam buckle | 250 kg | 3-5% | Rack-mounted tail bags | Creep on long gravel sections |
| Elastic rubber-core strap | 90 kg | Absorbs shock | Corrugated roads, dirt | Rubber perishes in UV |
| Rok-style loop strap | 120 kg | Low | Quick roadside adjustment | Hooks can scratch paint |
| Bungee net | 20 kg | High | Light outer layers only | Never use as primary restraint |
| Ratchet tie-down | 450 kg | None | Heavy pannier frames | Over-tension crushes soft bags |
Tension by feel, not by force. Pull each strap until the bag can be shifted no more than 10 mm with a firm hand at its base, then stop. Overtensioning a soft bag compresses the film, forces air out of the roll and puts constant load on the weld footprints, which is how anchor points fail. Retension after the first 30 km and again after every fuel stop on the first day, then once a day after that.
Exhaust heat: clearances that stop a melted bag
Heat is the failure mode most riders underestimate. A stainless header pipe runs at 300 to 600 °C under load, a muffler can sits at 200 to 400 °C, and TPU film starts to soften well below that. The safe clearance depends on whether air is moving: at a standstill in traffic, radiated heat builds and 150 mm is not generous. On the move, 100 mm is usually enough on the shielded side.
| Heat source | Surface temperature | Minimum clearance | What happens if closer | Protection |
|---|---|---|---|---|
| Header pipe | 300-600 °C | 200 mm | Film softens in minutes | Heat shield plus air gap |
| Muffler can | 200-400 °C | 150 mm | Glossing, then pinholes | Reflective sleeve, spacer |
| Engine cases | 90-140 °C | 50 mm | Slow stiffening of film | None needed with airflow |
| Radiator outlet air | 60-90 °C | N/A | Warms contents only | Route straps away |
| Brake disc, after hard use | 300-500 °C | 150 mm | Melts strap webbing | Never route straps near |
Check clearance with the suspension compressed, not on the stand. A bag that clears the muffler by 160 mm on the side stand can touch it when a passenger and luggage compress the rear shock over a dip, and a strapped bag under load sits lower than an empty one. Have someone sit on the bike while you measure, and re-measure after the first hour of riding when the strap tension has settled.
Vibration, abrasion and where the film wears through
A dry bag on a motorcycle is subject to a form of abrasion it never meets elsewhere: high-frequency, low-amplitude rubbing against a vibrating surface. Ten hours of that through a dusty contact patch wears a 0.4 mm film noticeably, and the wear point is almost always where the bag meets the seat edge or a rack tube. Put a sacrificial layer between them: a folded towel, a thin foam pad, or a strip of old webbing costs nothing and doubles the life of the bag.
Watch the straps themselves. Webbing dragged across a film surface acts like sandpaper once dust gets into the weave, and the damage appears as a dull grey band rather than a hole. Route straps over the bag's welded anchor points instead of across its body, and check any contact area for shiny patches at every fuel stop. A 0.5 mm film on a 500D face survives a season of this; a 0.3 mm film on a lightweight face often does not.
How the load changes the way the bike handles
Weight behind the rear axle is the least damaging place to put luggage, and weight above the seat line is the most damaging. Ten kilograms on the pillion seat is felt as slower steering and a tendency to run wide; the same ten kilograms in side bags at axle height barely registers. Front-mounted loads are the worst of all: two kilograms on the handlebars is enough to make slow-speed manoeuvres difficult and to introduce a wobble at certain speeds.
| Load placement | Mass | Effect felt by the rider | Verdict |
|---|---|---|---|
| Above the seat, rear | 10 kg | Slow steering, wider lines | Acceptable with care |
| At axle height, sides | 14 kg | Slight extra inertia | Best option |
| Above the seat, tall stack | 12 kg | Crosswind sensitivity, weaving | Avoid above 400 mm tall |
| On the handlebars | 2 kg | Wobble at 60-80 km/h | Avoid |
| Tank, strapped | 3 kg | None if within 250 mm of the rider | Fine for light items |
Suspension settings matter as much as placement. Add 8 kg or more behind the axle and the front end lightens, so add a few clicks of rear preload to restore the geometry rather than accepting a vague front. Check tyre pressures too: luggage raises the recommended rear pressure by roughly 0.2 bar for a solo rider with 12 kg aboard, which keeps the sidewalls from overheating on a long motorway day.
Rain at speed: the rating that actually matters
Speed converts rain from a vertical shower into a horizontal jet. At 100 km/h a raindrop arrives with roughly forty times the kinetic energy it has falling vertically, and the water is driven into every fold, strap gap and seam end. That is an IPX6 event at minimum, which is defined as protection against powerful water jets, and it is why a water-resistant bag with a coated zip fails on a motorway and passes in a car park.
| Condition | Speed | Exposure type | Rating required | Bag construction |
|---|---|---|---|---|
| Light shower in town | 40 km/h | Spray from traffic | IPX4 | Coated fabric |
| Steady rain on an A-road | 80 km/h | Directed jets | IPX6 | Welded seams, roll-top |
| Motorway rain, one hour | 110 km/h | Sustained jets | IPX6-IPX7 | Welded, 0.5 mm film |
| River crossing or deep flood | 0 km/h | Short immersion | IPX7 | Welded, three folds |
| Overnight in the open | 0 km/h | Standing water | IPX7 | Welded, off the ground |
Ratings describe a test, not a promise. The IPX grades are defined in IEC 60529, and the test method for coated and laminated fabrics used in these products is published by ASTM. Ask which protocol a rating was measured under; a bag described only as waterproof with no standard behind the word has told you nothing you can rely on at 110 km/h.
Packing order for the road you are actually riding
- Pack the wet-weather layer last, in the top third of the tail bag, so it comes out before you are wet.
- Put documents, phone and charging cables in a 5L roll-top inside the main bag; two seals beat one.
- Roll soft items and push them into the corners; a bag packed flat leaves voids that let the load shift.
- Keep tools and heavy spares low and central, never in a high tail bag where they raise the centre of gravity.
- Fill to about 85% so the roll has fabric to work with, then press the air out before the first fold.
- Close with three folds, buckle, and tug the roll to confirm it will not unroll under vibration.
The double-seal rule for electronics is worth the 300 g. A phone in a 5L roll-top inside a 30L tail bag survives a strap failure, a burst of hail and a bag that shifted under braking, because it has two independent closures and a layer of clothing between it and the outer film. It also means you can hand the small bag to someone at a border crossing or a ferry terminal without unpacking the bike.
There is a packing habit to avoid: do not strap a hard object against the bag body. A pump, a tool roll or a fuel bottle pressed into the film becomes a point load that works through the material over a day of vibration. Put hard items in the centre of the load, wrapped, and leave the outer faces soft. Our road trip organisation guide covers the same principle for car boots, where the forces are smaller but the habit matters just as much.
Security: leaving the bike parked with bags on
Soft luggage is an opportunity. A bag strapped to a seat can be cut off in under a minute, so either take it with you or make it slow to remove. A 3 mm steel cable looped through the bag's welded D-rings and around the frame or the pillion grab rail deters the opportunistic theft that accounts for most losses, and it costs about 200 g. Do not rely on the straps: a cam buckle releases in two seconds.
Think about what is visible as well as what is accessible. A clear window that helps you find a bag in a hold also advertises its contents in a car park. Keep valuables in the closed tail bag or on your person, and park the bike so the luggage side faces a wall or another machine where that is possible. Nothing here stops a determined thief; the goal is to make a different bike look easier.
A motorcycle carries chemicals that a kayak never meets. Petrol splash, chain lube overspray and oil mist all attack the surface of TPU and PVC slowly, and none of them causes an immediate failure. The effect is cumulative: the film loses plasticiser or surface hardness, becomes tacky, and then picks up dust that abrades it from outside. Wipe any splash off within the hour rather than at the end of the day.
The list runs from mild to serious: petrol splash swells the surface and makes it tacky within minutes, so wipe it and wash later; chain lube overspray mostly attracts dust, so wipe it at the next stop; engine oil softens the film at the weld edge, so wash and inspect the seam. Brake fluid is the one to take seriously. It attacks most elastomers quickly, and a bag that has been soaked in it should be retired rather than patched, because the damage extends beyond the visible mark. Keep any bottle carried on the bike inside a sealed container, in a side bag rather than a tail bag, and never above clothing you intend to wear.
The five-minute roadside check
- Press down on each bag at its base: it should move less than 10 mm.
- Run a hand under each strap where it crosses the bag, feeling for shiny or grey abrasion patches.
- Check exhaust clearance again with the bike off the stand and the load settled.
- Look at the roll: three folds still visible, buckle still seated, no fabric peeking out.
- Feel the film near any hot surface: warm is acceptable, tacky or glossy is not.
Do this at the first fuel stop and once more at the end of the day. Most luggage incidents start as a slow change that a rider would have noticed: a strap that has crept 5 mm, a fold that has relaxed by one turn, a bag that has sagged towards the muffler. Five minutes catches all of them, and it costs less time than repacking a wet bag in a service station car park.
At the end of the trip, unpack fully, hose the bags down at ambient temperature, and dry them in shade with the mouth open before storage. Dust and chain lube left on the film for a winter will work into the surface and shorten its life more than the riding did. Full washing detail is in our roll-top cleaning guide, and the format comparison is in the backpack versus duffel note.
Choosing bags for a bike rather than for a boat
Three specification lines matter more for motorcycling than for paddling. Film thickness: choose 0.5 mm, because the abrasion here is continuous and dry. Anchor points: welded D-rings with a wide footprint, because strap loads are far higher than a deck line. Colour: matte black or olive hides road film between washes, and a light mint or rose bag looks filthy after one day on a wet motorway.
Three other specification lines shift when the bag leaves the water: anchor points need a welded footprint an order of magnitude stronger than a deck lash point because strap tension is far higher, colour should be dark and matte rather than high-visibility because road film shows on pale film, and shape should be low and wide for a seat rather than tall and narrow for a hatch. If you ride mostly gravel, add one more: a bag with a flat, wide base sits better on a rack than a round one, and round bags roll in a way that loosens straps. A duffel format in the 30L to 40L range usually wins here, while a tall roll-top suits a narrow seat on a sports bike. Both formats are covered across the full product line, and the wet-weather layering logic carries over from our rainy commute setup.
Setup checklist before a long ride
- Weigh the packed bags: keep the tail under 10 kg and each side under 7 kg.
- Set rear preload and add roughly 0.2 bar to the rear tyre for a 12 kg load.
- Measure exhaust clearance with the suspension compressed, not on the stand.
- Face the closure rearward and roll three times, with 15% of the volume left empty.
- Add a sacrificial layer between the bag and any seat edge or rack tube.
- Cable-lock the bags through welded D-rings whenever the bike is out of sight.
Two habits make the difference between a setup that works and one that is merely optimistic. The first is testing the whole arrangement on a wet 30 km loop near home before a long trip, because every bike has a different wake and a different spray pattern. The second is carrying one spare strap and a small roll of tape: straps are the part that fails, and a bag can be rescued in two minutes with either.
Weather planning deserves a look before any multi-day ride as well. Frontal rain at 90 km/h is a different problem from a tropical downpour at 40 km/h, and knowing which you will meet decides how much of the load needs to be inside a welded bag rather than under a cover. Forecast detail for long-distance planning is published by NOAA, and the wider packing method for multi-stop trips is in our multi-city packing guide. For a load that lives outdoors all season rather than on a bike, the handling notes in our handlebar setup guide transfer directly.
One last production note for anyone specifying bags for a riding club, a rental fleet or a retail range: the strap anchor and the film class are the two items that decide whether a bag survives a season strapped to a motorcycle. We have built waterproof bags since 2014 in an SGS-verified 4,950 m² facility, with a 500-piece minimum, sampling in 6 to 10 working days and bulk in 35 to 50 days, and those two lines are where we spend the most sampling time.
Frequently asked questions
Q1. What size dry bag do I need for motorcycle luggage?
A 30L to 40L duffel on the tail covers a weekend, with 20L enough for a day ride. Add 12L to 20L per side if you need panniers, and keep the tail load under 10 kg.
Q2. Which way should the roll-top face on a motorbike?
Rearward, so the closure sits in the rider's wake rather than in the airstream. If the bag sits behind a tall screen where the wake recirculates, turn the mouth inboard towards the bike instead.
Q3. How far from the exhaust should a dry bag sit?
At least 150 mm from a muffler can and 200 mm from a header pipe, measured with the suspension compressed. Header pipes run at 300 to 600 °C, which softens TPU film in minutes.
Q4. Are dry bags waterproof enough for motorway rain?
Yes, if they are welded and rated IPX6 or better. At 110 km/h rain arrives as a sustained horizontal jet, which is exactly what the IPX6 jet test replicates and what a coated zip or a rain cover will not survive.
Q5. What straps should I use for a dry bag on a bike?
Elastic rubber-core straps for corrugated roads, flat webbing cam straps for rack-mounted bags. Pull down onto the seat until the bag shifts less than 10 mm, then retension after 30 km.
Q6. Can I strap a dry bag to the handlebars?
Only up to about 2 kg and only in a 3L to 8L bag. More than that changes slow-speed steering and can introduce a wobble between 60 and 80 km/h.
Q7. How much weight can I put on the pillion seat?
Keep it to 10 kg, and keep the stack under 400 mm tall. Above that the bike becomes sensitive to crosswinds and the steering slows noticeably.
Q8. Do I need to change tyre pressure when carrying luggage?
Yes. For a solo rider with about 12 kg aboard, add roughly 0.2 bar to the rear tyre. This keeps the sidewall from overheating and restores some of the geometry the load has taken away.
Q9. Will vibration damage a dry bag on a motorcycle?
Yes, at contact points. Put a sacrificial layer such as a folded towel or foam pad between the bag and the seat edge or rack tube, and route straps over welded anchors rather than across the body.
Q10. Is TPU or PVC better for motorcycle luggage?
TPU. It stays flexible, resists the light oil and fuel contact that happens around a bike, and welds cleanly. PVC stiffens with heat cycling and ages faster under UV on a rear rack.
Q11. How do I stop luggage being stolen from the bike?
Loop a 3 mm steel cable through the welded D-rings and around the frame or grab rail. A cam buckle releases in seconds, so straps alone are not a deterrent.
Q12. What happens if petrol gets on a dry bag?
Wipe it off within the hour. Petrol swells the film surface and makes it tacky, which then attracts dust that abrades the bag from outside. Wash with mild soap afterwards.
Q13. Should I use a rain cover over a dry bag?
No. A properly rolled welded bag does not need one, and a cover flaps, pools water at the base and usually comes off above 110 km/h. If a cover is your only waterproofing, the bag is not waterproof.
Q14. How full should a dry bag be for motorcycle use?
About 85%. That leaves enough fabric for three proper folds; a bag packed to the brim cannot be rolled correctly, which is the most common cause of a wet tail bag.
Q15. Can I use a dry bag as a tank bag?
Yes, in the 5L to 12L range and up to 3 kg, kept within about 250 mm of the rider. Keep it clear of the ignition and fuel filler, and check that it does not foul the bars at full lock.
Q16. How often should I check the straps on a trip?
After the first 30 km, at every fuel stop on day one, and once a day after that. Straps creep when wet and under vibration, and most luggage incidents start as a small change a rider could have felt.
People also ask
How do you strap a dry bag to a motorcycle?
Press the bag down onto the seat or rack with two straps, then add two more pulling forward and backward so it cannot shift. Tension until the bag moves less than 10 mm at its base, and retension after 30 km.
Are dry bags good motorcycle luggage?
They are waterproof, cheap per litre and pack to any shape, which suits tail and side loads. They lack structure, so they need a firm surface to sit on and four straps to stay put.
What size dry bag fits on a bike tail?
A 30L to 40L duffel suits a weekend and a 20L roll-top suits a day ride. Keep the stack under 400 mm tall and the mass under 10 kg so the steering and crosswind behaviour stay predictable.
Can exhaust heat damage a dry bag?
Yes. Header pipes run at 300 to 600 °C and muffler cans at 200 to 400 °C, which softens and then perforates TPU film. Keep 150 to 200 mm of clearance, measured with the suspension compressed.
Do you need waterproof luggage for motorcycling?
Yes, because speed turns rain into a horizontal jet. A bag rated IPX4 for town spray will be soaked inside an hour at 110 km/h, so look for welded seams and IPX6 or better.
How do you keep motorcycle luggage from moving?
Use four straps in two directions, add a sacrificial non-slip layer under the bag, and check tension at every stop on the first day. Elastic straps hold tension better than flat webbing on corrugated surfaces.
Need this in production volume?
QUANZHOU JUNYUAN BAGS has produced waterproof bags since 2014 in an SGS-verified 4,950 m2 facility in Fujian, China. Minimum order 500 pieces, sampling in 6–10 working days, bulk in 35–50 days, FOB Xiamen — write to service@junyuanbags.com with your spec and target market.