Home / Blog / Design & Branding
Dry Bag Photography Setup
A dry bag photography setup that works needs three controls: two softboxes at roughly 45 degrees and 1.2 m from the bag, a circular polariser rotated until the specular highlight drops about two stops, and a grey card so every colourway lands within Delta E 3 of the physical sample. Shoot still frames at f/8, ISO 100 and 1/125 s on a 50 mm to 85 mm lens and most of the problems that make welded TPU look like cheap shower curtain disappear.
The complication is that waterproof film is a mirror-like surface wrapped around a soft body. There is no rigid geometry to catch an edge light, the fold line moves every time the bag is packed, and a 5L grab bag and a 90L expedition sack must look like the same family in the same grid. This guide covers the light rig, the camera settings, the colour reference workflow, the detail frames that actually convert, and the hourly economics of shooting six sizes in one studio day.
- Why glossy film ruins an ordinary product setup
- Lens choice, aperture and honest working distance
- Building the two-light rig that flatters TPU
- Polariser, flags and where the highlight should sit
- Colour accuracy across an eight-colourway range
- Showing capacity without hiring a model
- Water-in-action frames that do not look faked
- Detail frames: welds, roll lines, buckles and logos
- Backgrounds, surfaces and props that suit two audiences
- A repeatable shot list for a whole range
- Retouching limits and honest representation
- What a studio day actually costs
- Turning the setup into a repeatable house style
Why glossy film ruins an ordinary product setup
Canvas, felt and 600D polyester scatter light in every direction, so almost any softbox position produces a readable product shot. TPU laminate does not behave that way. A film surface returns a strong directional component alongside its diffuse body colour, typically in the range of 4% to 8% of incident light, and that specular component clips to pure white within a third of a stop once the light source is small relative to the subject.
The second problem is geometry. A roll-top bag is a cylinder that changes shape with how full it is, so the highlight wanders as the stylist handles it. Photograph three identical bags packed to 40%, 70% and 90% of their stated volume and you will get three different highlight positions. Standardising both the fill level and the number of folds before you start saves more retouching time than any filter you can buy.
Lens choice, aperture and honest working distance
Focal length controls whether a bag looks squat or slim. On a full-frame body, 50 mm reproduces roughly what the eye sees at arm’s length, which is why it is the default for hero frames; 85 mm compresses perspective and flatters tall roll-tops. Wider than 35 mm, a bag shot at chest height develops an exaggerated top and a distorted base, and online shoppers read that distortion as false capacity.
Aperture then decides how much of the curved body stays sharp. At f/4 a 20L bag shot three-quarters on has depth of field of around 60 mm, which is less than the front-to-back depth of the bag itself. Stopping to f/8 or f/11 triples that to roughly 200 mm for the whole item to resolve, so the weld line and the buckle are critically sharp in the same frame as the shape that does the selling.
| Shot type | Focal length | Aperture | ISO | Shutter | Notes |
|---|---|---|---|---|---|
| Hero three-quarter | 50 mm | f/8 | 100 | 1/125 s | Single focus point on the roll line |
| Detail of a weld | 100 mm macro | f/11 | 100 | 1/8 s | Tripod, five-frame focus stack |
| Open mouth, interior | 35 mm | f/9 | 100 | 1/60 s | Tilt the copy down to avoid ceiling reflection |
| Water-in-action | 70 mm | f/5.6 | 400 | 1/1250 s | Higher ISO buys droplet-freezing speed |
| Full range lineup | 24 mm tilt-shift | f/11 | 100 | 1/60 s | Keep the sensor parallel to the row |
Building the two-light rig that flatters TPU
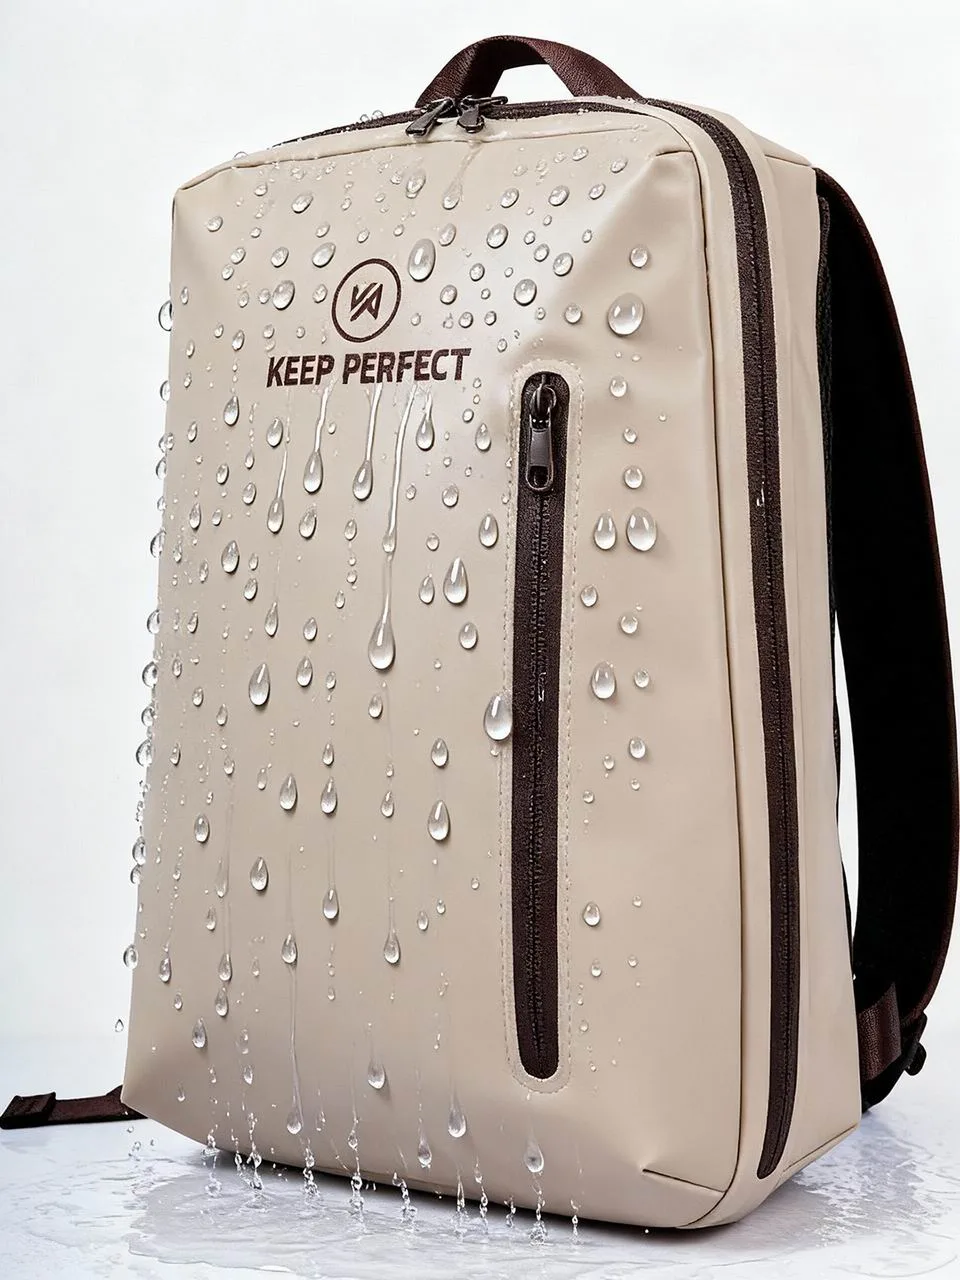
Place the key softbox at 45 degrees to the left of the camera axis, about 1.2 m from the bag and raised to 30 degrees above the product centre line. The fill sits at the mirror angle on the right, one and a half stops down, with a 90 cm octabox rather than a bare reflector so it does not create a second hard highlight on the opposite curve.
Distance does more work than power for this material. Bringing a light from 2.4 m to 1.2 m doubles its illuminance, but it also shrinks the apparent size of the source relative to the bag and therefore sharpens the reflection. If your only available modifier is small, push it back and raise power rather than moving it in close and dimming it.
| Fixture | Position | Distance | Output | Purpose |
|---|---|---|---|---|
| Key 90 cm octabox | 45 deg left, 30 deg high | 1.2 m | Full power | Body colour and main form |
| Fill 60 x 90 softbox | 45 deg right, level | 1.6 m | One third (-1.5 stops) | Lifts shadow side without a second highlight |
| Black flag, 60 x 90 foam | Just outside key edge | 0.4 m | Absorbs | Kills the wrap-around sheen on the base |
| White bounce card | Front, below frame | 0.3 m | Reflects | Keeps the roll line readable |
| Backlight strip, gridded | Behind, 20 cm above floor | 1.0 m | Half power | Separates black bags from a dark background |
Polariser, flags and where the highlight should sit
A circular polariser on the taking lens is the cheapest tool in the kit. Rotate it slowly while watching the histogram and you will usually find an angle roughly 30 to 40 degrees into the turn where the specular area drops by about two stops while the body colour barely shifts. Lock the filter ring there with a mark so the whole range matches frame to frame.
Black flags handle the rest. A sheet of black foam board placed just outside the key light edge removes the wrap-around glow that makes a cylinder look like a tube rather than a bag, and it costs nothing. Aim to keep one soft highlight, ideally running along the roll line where the fold naturally occurs, and let the rest of the surface fall away.
Colour accuracy across an eight-colourway range
Colour is where most waterproof ranges lose money. A mixed grid shot over two days with different white balance will show olive varying by Delta E 5 to 8 between frames, which reads as six different greens on a category page. Shoot RAW, fix white balance manually at 5500 K with the reference card in the first frame of every set, and re-measure if you change any modifier.
Then build tolerance into the process rather than hope. The ASTM publishes instrumental colour-difference methods used across the coatings and textiles trades, and quoting a Delta E acceptance figure is far more useful to a print partner than arguing over adjectives like warm or deep. Agree the number before you photograph, not after.
| Tolerance | Delta E 2000 | Visible to a shopper | Action |
|---|---|---|---|
| Under 1.0 | Not noticeable | No | Ship it |
| 1.0 - 2.5 | Hard to see side by side | Rarely | Accept for small items |
| 2.5 - 5.0 | Noticeable on a grid page | Yes | Re-shoot the colourway |
| 5.0 - 10.0 | Clearly different bags | Always | Fix white balance and shoot again |
| Above 10.0 | Wrong product | Always | Check the reference standard itself |
Showing capacity without hiring a model
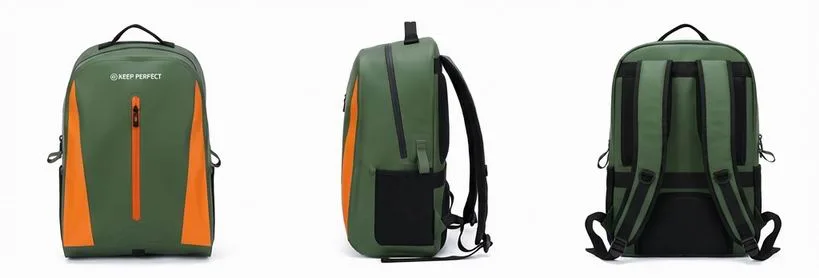
Every waterproof brand faces the same question: how do we show what fits inside? Reference objects beat hand models because they add no licensing cost and work at thumbnail size. Use objects with a known size that a shopper can mentally scale: 330 ml cans, a 13-inch laptop, a 750 ml bottle, or a folded fleece of known dimensions shot from the same camera height each time.
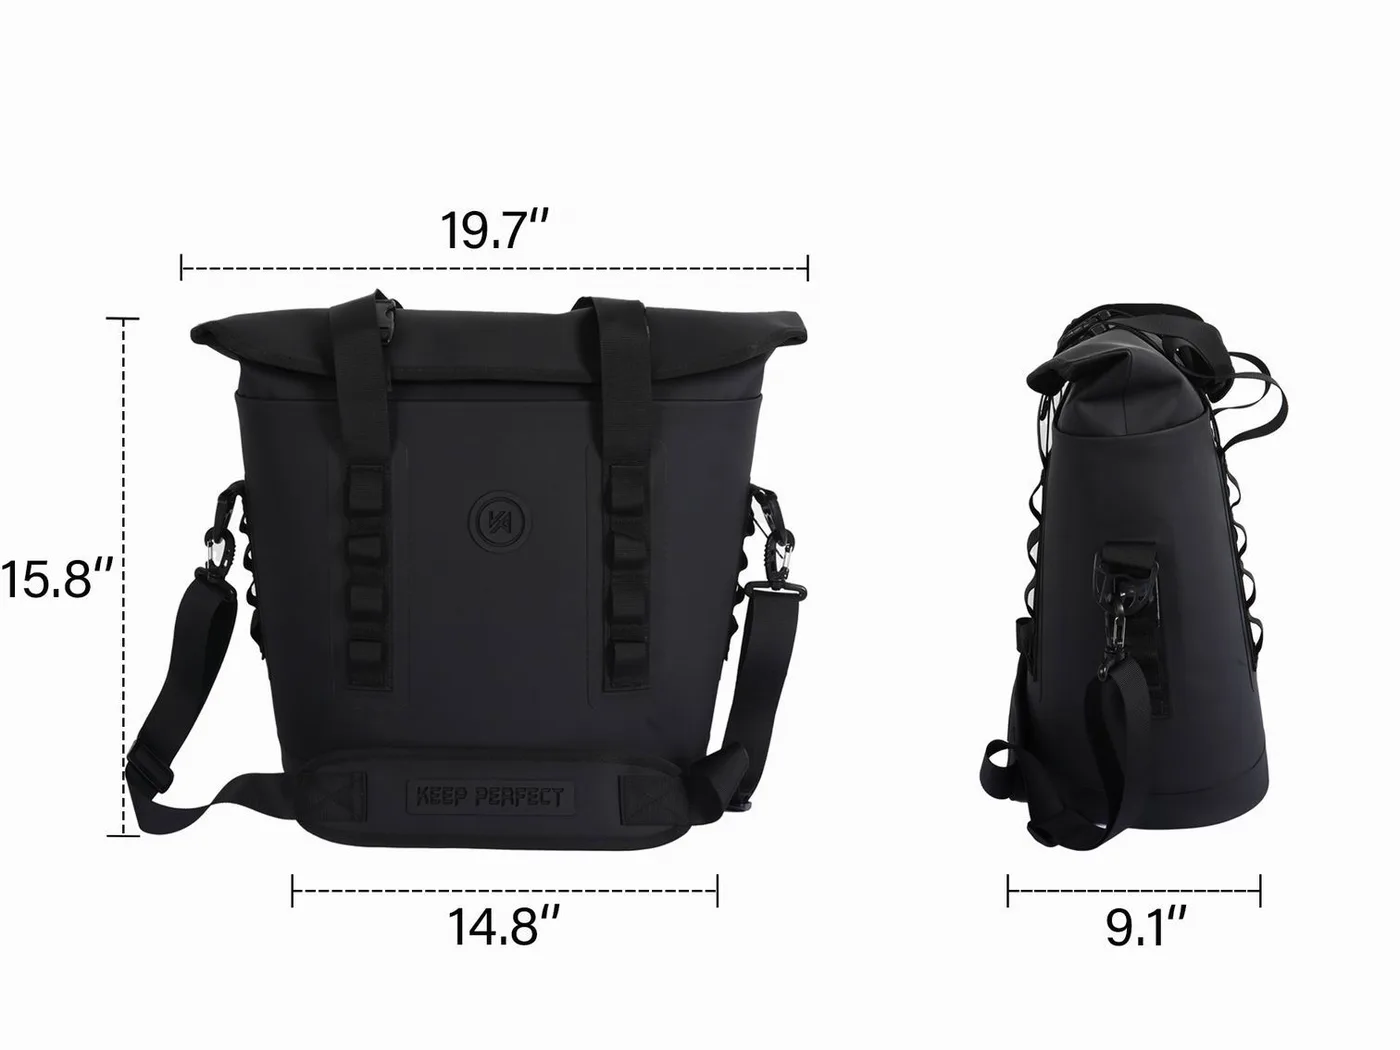
A side-by-side lineup does the heavy lifting for size families. Photograph the 5L, 10L, 20L and 40L versions in one frame from a sensor-parallel camera position, roll each one closed the same number of times, and caption with external dimensions and packed weight rather than a marketing claim. Combined with the capacity measurement guide, that grid removes more pre-purchase doubt than any lifestyle shot.
Water-in-action frames that do not look faked
Real water beats the glycerin-and-spray-bottle trick every time, and audiences can tell. A garden hose delivering roughly 12 litres per minute at arm’s length reads as a wave slap; fake droplets sit on the film in perfect spheres and betray themselves immediately. Freeze the action at 1/1250 s or faster and let the ISO climb rather than opening the aperture, because depth of field collapses exactly when you need it.
Keep the claim honest while you are at it. A splash frame implies a jet test, and a submerged frame implies an immersion test, so only shoot what the spec supports. The IEC publishes the ingress protection codes used for waterproof claims, and our IPX6 versus IPX7 breakdown explains which visual the bag has actually earned.
Detail frames: welds, roll lines, buckles and logos
Four close-ups sell more waterproof bags than any hero image. First, the weld: a radio-frequency seam should show an even bond width with no scorching, so shoot it with a millimetre scale rod in frame. Second, the roll line: three folds, photographed from above, shows that the closure geometry exists rather than being drawn in post.
Third, the hardware: buckles, D-rings and strap anchors, because these are what fail in the field. Fourth, any branding. If you are working out where the mark sits, read our notes on logo placement before the shoot rather than after, since a curved wet surface reduces legible area more than most layouts assume.
Backgrounds, surfaces and props that suit two audiences
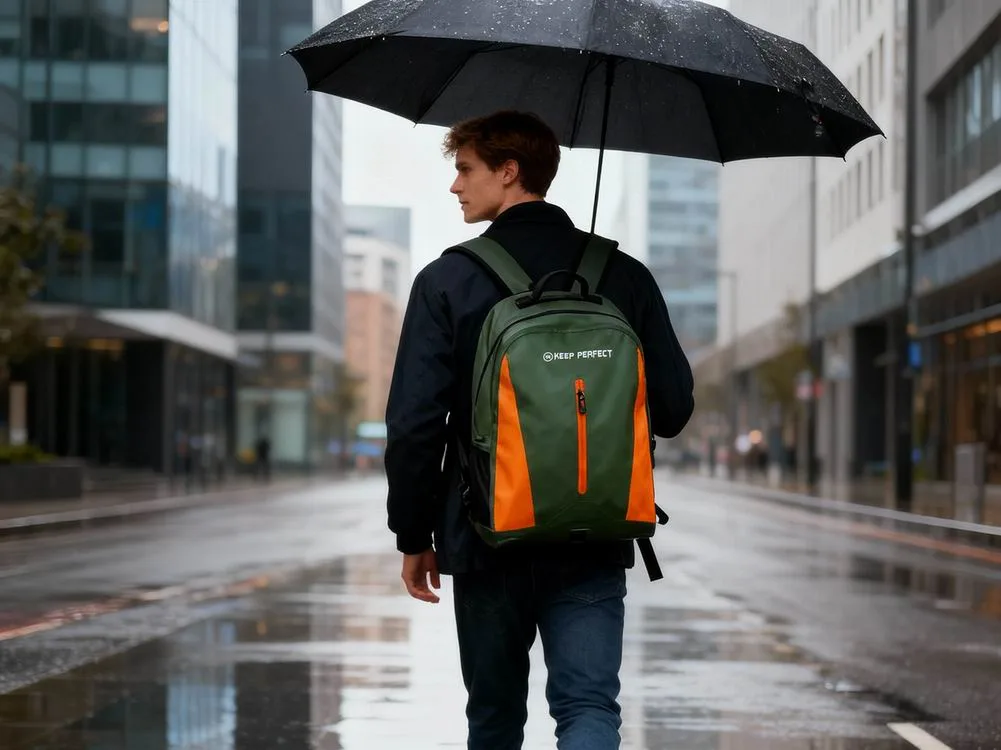
Most ranges need two presentation modes. Watersports frames want wet rock, sand, board decks and a low horizon, where the light stays broader and slightly cooler. Lifestyle and commute frames want concrete, wood, painted metal and a warmer bounce, and they tend to sell a different decision: is this the bag I carry on Monday morning?
Avoid two surfaces in particular. Gloss acrylic reflects your softboxes straight back into the lens and undoes every polariser setting, and seamless white paper pushed close to a dark product creates a grey bloom that no masking job fixes cleanly. Matte painted plywood and wet slate are both forgiving, cheap and resettable between colourways.
Props should earn their place by answering a question the shopper is already asking. A paddle, a dry towel and a phone pouch answer what does it protect. A rolled fleece answers how much fits. Anything else competes with the product for attention, and on a page where the grid is only 900 px wide, competition usually loses. Keep no more than three objects in any single frame.
A repeatable shot list for a whole range
- Hero three-quarter, packed to 70% volume, roll closed three times.
- Straight-on front view at the exact height used for the size grid.
- Open mouth looking down at roughly 45 degrees, interior visible.
- Detail of the seam, scale rod in frame.
- Detail of the buckle and strap attachment under load.
- Detail of the logo area, raking light from one side.
- Size comparison frame with the two neighbouring sizes.
- In-context frame, dry or wet according to the target activity.
Running the list in this order saves the most expensive resource in the room: stylist time per size. Once one bag is lit and metered, sizes two through six need only a fill change and a camera height adjustment, so a range that took six hours to light shoots in under ninety minutes. Write the order on the studio wall and resist improvising.
| Frame | Set-up time | Capture time | Retouch time | Per bag total |
|---|---|---|---|---|
| Hero three-quarter | 8 min | 5 min | 12 min | 25 min |
| Open mouth interior | 3 min | 4 min | 8 min | 15 min |
| Seam detail | 5 min | 6 min | 6 min | 17 min |
| Buckle and hardware | 4 min | 4 min | 5 min | 13 min |
| In-context frame | 15 min | 10 min | 10 min | 35 min |
Retouching limits and honest representation
Set the rules before anyone opens an editing tool. Dust removal, straightening, exposure trimming and background cleanup are fair game. Changing the hue of a colourway, cloning out the natural creases from honest use, or thickening a weld in post all cross from presentation into misrepresentation, and they are also what puts returns on your doorstep when the arrived bag does not match the grid.
On delivery, standardise the output: sRGB, longest edge around 2000 px, no embedded profile surprises, and a visible width and height so the page does not shift as it loads. For stores that apply their own filters, supply one unretouched frame per size to prove the colour was not manufactured; the ISO viewing and colour standards are a useful reference when you write that specification into a brief.
What a studio day actually costs
Budget in hours, not in daydreams. A competent product photographer, a stylist and a rented studio with a 90 cm octabox typically run a full day for what an unplanned two-location lifestyle shoot costs in half a morning once transport, permits and weather risk are counted. The leverage comes from batching six sizes into one session, which spreads the setup across the range.
| Cost line | Range | Typical value | Notes |
|---|---|---|---|
| Studio day | Half to full | Full day booked | Half days rarely save money |
| Stylist time | 3 - 8 h | Per hour rate | Most of it goes to repacking between sizes |
| Retouch per frame | 8 - 25 min | Per image | Details cost more than full bags |
| Prop and surface kit | One-off | Reusable | Slate, plywood, cans, scale rods |
| Colour reference card | One-off | Replace yearly | Cards fade and drift |
Turning the setup into a repeatable house style
Expect the first hour of any session to produce nothing usable. The soft box needs repositioning, the polariser mark has to be found again, and the reference card has to be metered under the actual working distance. Schedule that hour deliberately instead of letting it eat into capture time, and budget it again whenever you change any piece of the rig.
Consistency compounds. Save the light positions, the polariser rotation mark, the white balance, the camera height for each size family and the file naming pattern into a one-page studio card, then tape it to the trolley. Six months later, when the range extends with a new colourway, you can reshoot one item and drop it into the grid without retouching everything around it.
One habit protects you twice over: keep the original capture file. When a marketplace disputes a listing or a buyer queries a shade, the untouched RAW with its reference card in frame settles the question in minutes. Storage is cheap; reshooting a colourway that has already gone to print is not.
For brands planning imagery alongside production, timing matters as much as technique. Browse the current product line for size families, then plan frames across the roll-top dry bag range and the TPU waterproof backpack range so one lighting rig covers both.
Frequently asked questions
Q1. What is the best camera setup for photographing dry bags?
Use a 50 mm to 85 mm lens at f/8, ISO 100 and 1/125 s on a tripod, with two softboxes at 45 degrees and 1.2 m from the bag. Add a circular polariser for glossy film and a grey card in the first frame to fix white balance.
Q2. How do I stop reflections on a TPU dry bag?
Enlarge the apparent size of the light source by moving it back, then rotate a circular polariser until the highlight drops about two stops. Finish with a black flag just outside the key edge to remove the wrap-around sheen along the base.
Q3. Do I need expensive lighting equipment?
No. Two entry-level 60 x 90 softboxes, a sheet of black foam board and a white card at 0.3 m produce publishable results. Distance and placement matter far more than power output for specular film surfaces.
Q4. Should I photograph dry bags wet or dry?
Both, but for different jobs. Dry frames sell colour, shape and size accuracy; wet frames sell the waterproof story. Keep them in separate sets so the shopper can compare the colourway on an identical dry grid.
Q5. How do I show what fits inside a dry bag?
Use reference objects of known size such as 330 ml cans or a 750 ml bottle, shoot the whole size range in one sensor-parallel frame, and caption with external dimensions plus a packed weight rather than a comparative claim.
Q6. What aperture keeps a whole roll-top bag sharp?
f/8 to f/11 on a full-frame body. At f/4 depth of field is around 60 mm, which is less than the depth of a 20L bag, so either the closure or the front panel falls out of focus.
Q7. Why do my black dry bags photograph grey?
Usually either an oversized specular area above roughly 8% of the visible bag, or a white bounce card too close below frame. Flag the key light, pull the bounce back, and add a gridded backlight strip for separation.
Q8. How many product shots does each size need?
Eight is a practical target: hero, straight-on, open mouth, seam detail, buckle detail, logo detail, size comparison and one in-context frame. Anything beyond eight rarely changes conversion measurably.
Q9. Can I use a smartphone for dry bag product photos?
For social crops and lifestyle frames, yes, in good daylight with the lens parallel to the bag. For a colour-critical grid across several colourways, no: manual white balance and consistent light distance are hard to repeat on a phone.
Q10. How do I keep colourways consistent between shoots?
Fix white balance manually, keep one grey or colour reference card in the first frame of every set, log the light distances and polariser rotation on a studio card, and set a Delta E 2000 acceptance figure before anyone starts editing.
Q11. Is focus stacking necessary for seam details?
It helps below about 0.3 m working distance, where depth of field can fall under 10 mm. Five to eight frames stacked give a weld edge that resolves cleanly at full zoom, which is what inspects credibility.
Q12. What background works best for black and olive colourways?
Matte surfaces such as wet slate or painted plywood. Avoid gloss acrylic, which reflects the softboxes back into the lens, and avoid placing dark products close to seamless white paper, which produces grey bloom.
Q13. How much retouching is acceptable?
Dust removal, straightening, exposure correction and background cleanup are fine. Changing a colourway hue, cloning out honest creases or thickening a weld in post misrepresents the product and drives returns.
Q14. What shutter speed freezes water splash?
1/1250 s or faster. Raise ISO rather than opening the aperture, because a wider aperture shrinks depth of field and takes the whole bag out of focus mid-splash.
Q15. How long does it take to shoot a six-size range?
Around six hours for setup plus ninety minutes of capture once the first bag is lit, roughly 25 minutes per bag including a hero, an interior and two detail frames. In-context frames add another 35 minutes each.
Q16. Should photography happen before or after the first sample?
Plan it during sampling so the shot list can influence acrylic pattern placement, and shoot the confirmation images after the sample passes its checks. Never photograph a prototype whose colour and hardware still might change.
People also ask
How do you photograph waterproof fabric without glare?
Increase the apparent size of the light source by moving it back rather than dimming it close in, add a circular polariser rotated until the highlight drops roughly two stops, and use black flags to cut the remaining wrap-around sheen.
What is the best light angle for shiny bags?
About 45 degrees off the camera axis and 30 degrees above the product centre line, roughly 1.2 m away. That angle puts the highlight along a natural curve instead of straight into the lens.
Why do photos of black dry bags look washed out?
Because too much of the surface is reflecting light directly. Any specular area above about 8% of the visible bag reads grey at thumbnail size, so flag the key light and add separation from behind.
Do you need a light box to photograph bags?
A small light box suits a 2L pouch but not a 40L duffel. For anything above roughly 10 litres, build a two-softbox open rig at 1.2 m and control reflections with distance and flags instead.
How do you show size in product photos?
Shoot the full range side by side from one sensor-parallel position with the same fold count, and add reference objects of known size such as 330 ml cans, plus external dimensions in the caption.
Are lifestyle photos better than studio photos for dry bags?
They serve different jobs. Studio frames win on colour, size and spec accuracy; lifestyle frames win on context and aspiration. Most ranges convert best when both appear on the same page in that order.
Need this in production volume?
QUANZHOU JUNYUAN BAGS has produced waterproof bags since 2014 in an SGS-verified 4,950 m2 facility in Fujian, China. Minimum order 500 pieces, sampling in 6–10 working days, bulk in 35–50 days, FOB Xiamen — write to service@junyuanbags.com with your spec and target market.