Multi-Day Dry Bag Plan for Motorcycle Touring
A five-day motorcycle tour needs 45 to 70 litres of waterproof capacity carrying 9 to 14 kg, split across three sealed volumes rather than one large bag, because a tail pack at 130 km/h is exposed to driven rain, exhaust heat and constant buffeting that no single closure handles gracefully. Plan for 12 to 15 litres per day on a summer tour and 16 to 20 litres per day when heated layers and wet-weather gear travel along. Two 25 litre rolls plus a 10 litre accessory bag covers every case in between.
This guide works through the volume maths day by day, the mounting geometry that keeps a load stable at speed, the heat clearance that stops a melted base, the rating that survives highway rain, and a six-minute daily inspection. Every figure comes from loaded touring practice: strap tension in kilograms, exhaust clearance in millimetres, apparent wind in km/h, and drying windows in hours at a roadside hotel.
- What a multi-day tour really adds to the load
- Volume by day count: the planning table
- Tail roll, saddle roll or rack-mounted duffel
- Strapping geometry that holds at 130 km/h
- Heat clearance and the melt points nobody checks
- Highway rain: the rating that actually covers it
- Access discipline and the two-sealed-volume rule
- Dust, insects and grit at the fold line
- Electronics, documents and the top-of-bag rule
- Overnight: detach, drain and dry
- A six-minute daily inspection
- Weight, handling and the 15 kg ceiling
- Pre-tour checklist
What a multi-day tour really adds to the load
Motorcycle luggage has a hard constraint that bicycle luggage does not: the load sits behind or beside the rider and moves the centre of mass of a 250 kg machine. Adding 12 kg high on a tail rack changes how the bike turns in and how it behaves in a crosswind, so the touring plan starts from a mass budget rather than a volume budget. Most riders handle up to 15 kg of luggage comfortably above 80 km/h and start to notice instability above that.
Volume grows in steps rather than smoothly. Days one and two carry the same clothing; day three adds laundry; day four adds whatever you bought; and every wet day adds a damp layer that will not compress. The practical approach is to size for the wettest, longest day of the itinerary and accept that the bags look half empty for the first morning. A bag packed to 70 percent is easy to close correctly, which matters more than filling the space.
Access frequency also climbs on a tour. Fuel stops come every 200 to 300 km, and each one is a chance to open a bag for a layer, a toll card or a camera. Riders who pack for access rather than for density finish a tour with dry kit; riders who pack tight finish it with a bag that has been badly rolled a dozen times.
Volume by day count: the planning table
These figures assume a rider carrying their own clothing, a light tool roll, electronics and a compact wash kit, with accommodation each night rather than camping. Add 8 to 12 litres and 1.5 to 2.5 kg for a tent and sleep system, and another 2 litres for a cooking kit if the tour is self-catered. The split column is the important one, because three volumes are easier to mount and far more forgiving of a single bad closure than one.
| Tour length | Waterproof volume | Loaded weight | Suggested split | Openings per day |
|---|---|---|---|---|
| Weekend, two days | 22-30 L | 5-7 kg | 1 x 25 L tail roll + 5 L pouch | 3 |
| Long weekend, three days | 32-42 L | 7-9 kg | 1 x 25 L + 1 x 10 L | 4 |
| Five-day tour | 45-70 L | 9-14 kg | 2 x 25 L + 10 L accessory | 5 |
| Seven-day tour with laundry stop | 55-75 L | 11-15 kg | 2 x 25 L + 10 L + 5 L | 5 |
| Ten-day tour, mixed climate | 70-90 L | 13-18 kg | 2 x 30 L + 2 x 10 L | 6 |
| Camping tour, five days | 60-85 L | 12-17 kg | 2 x 30 L + 12 L barrel | 6 |
Two rows deserve a comment. The seven-day tour is only marginally larger than the five-day one because a laundry stop resets the clothing volume entirely, and that is the single most effective way to ride lighter on a long trip. The ten-day mixed-climate row nearly doubles the small-bag count on purpose: crossing from 30 °C to 6 °C means carrying two layer systems, and they must not share a bag with anything damp.
Tail roll, saddle roll or rack-mounted duffel
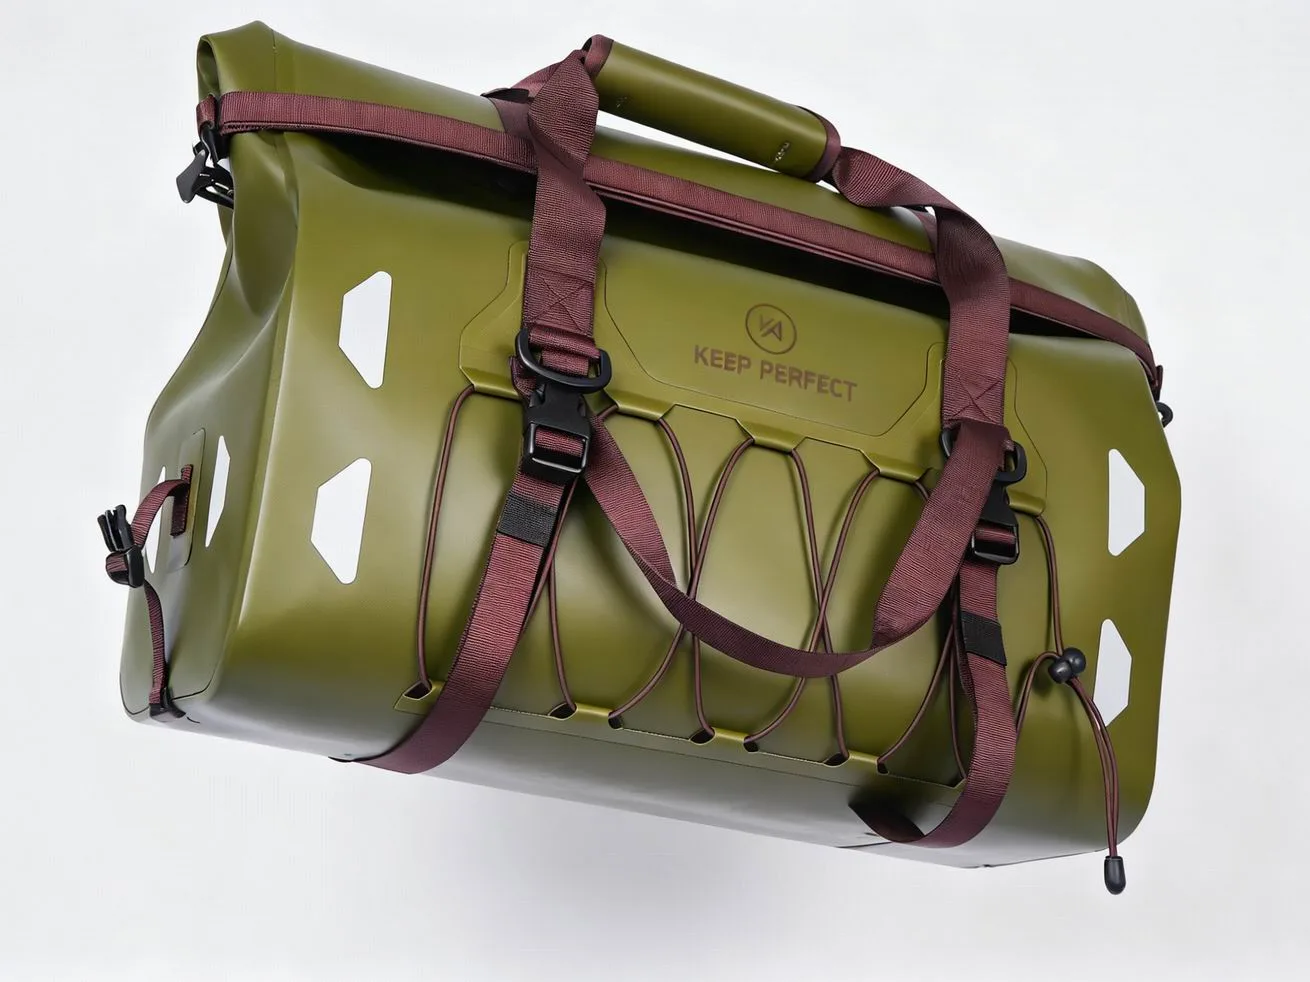
Format follows the bike. A tail roll strapped across a pillion seat suits a naked bike or a sport tourer with no rack, and it carries 20 to 30 litres if the strap path runs through four hard points rather than two. A saddle roll thrown over the rear of the seat works on an enduro or an adventure bike and stays narrow enough for filter lanes, but it limits you to roughly 15 to 20 litres before it starts to foul the rider.
A rack-mounted duffel is the stable option for a tourer with a top box plate, because the load sits low, wide and supported rather than cantilevered off the seat. The trade-off is width: anything beyond 45 cm starts catching mirrors in traffic. Whichever format you choose, the mounting rule is the same: two independent strap paths, each capable of holding the load alone, so a single failed strap does not put 12 kg on the road behind you.
Strapping geometry that holds at 130 km/h
A tail pack at highway speed is not held by friction, it is held by strap geometry. The load tries to move backward under acceleration, upward over bumps and sideways in crosswind, so a strap path that only pulls down leaves the bag free to rotate. Four straps in two crossing paths, each tensioned to 15 to 20 kg, resist all three directions and keep the load from walking across the seat over a 400 km day.
| Failure direction | What causes it | Strap path that resists | Tension | Symptom when wrong |
|---|---|---|---|---|
| Rearward shift | Acceleration and slipstream | Longitudinal path to a frame point | 15-20 kg | Bag creeps back 2-3 cm per hour |
| Upward lift | Bumps and slipstream over the top | Top compression strap over the load | 10-15 kg | Bag drumming on the seat |
| Sideways drift | Crosswind and cornering | Crossed lateral path to both sides | 15-20 kg | Bike feels unstable in gusts |
| Rotation | Single-point mounting | Two independent full loops | 15-20 kg | Bag ends up under the rider |
| Vibration wear | Resonance on coarse chip | Rubber pad under the base | n/a | Abraded base after 3,000 km |
Re-tension after the first 30 minutes and then at every fuel stop. Nylon webbing stretches, and a strap set at 20 kg in a cold garage will read closer to 14 kg after an hour of sun and vibration. A luggage scale costs very little and removes the guesswork entirely, which is worth it when the alternative is a load parting company with the bike at speed.
Add a non-slip pad under the base. Coarse chip seal vibrates a bag against the seat at perhaps 20 to 40 Hz for hours, and that contact is what produces the abraded, grey base seen on bags after a couple of seasons. A 3 mm closed-cell pad under the bag costs 60 g and doubles the life of the base film, and it also stops the drumming noise that makes riders think a strap has failed when it has not.
Heat clearance and the melt points nobody checks
Exhaust proximity is the failure mode unique to motorcycles. A canister near the tail can run at 300 to 500 °C at the shield, and radiated heat at 150 mm can push a bag surface well past what a TPU film tolerates. Keep a minimum of 150 mm between any part of the bag and the exhaust or its shield, and 250 mm where the pipe is unshielded, then verify by feeling the bag surface after a 60 km run: warm is acceptable, too hot to hold a palm on for five seconds is not.
Heat also comes from the engine case and the rear cylinder on some layouts, and from the sun on a black bag parked at midday. A dark bag in direct sun at 32 °C can reach 60 to 65 °C on its upper surface, which is below the deformation point of a quality TPU laminate but enough to accelerate plasticiser movement in a PVC coated fabric. Choose a lighter colourway for desert touring and park in shade where you can.
Highway rain: the rating that actually covers it
Rain at touring speed is not rain, it is a pressure washer. Riding at 110 km/h into a 30 km/h headwind exposes the front of the load to an apparent wind near 140 km/h, and water driven at that speed finds any gap, any stitch hole and any fold that is not fully compressed. A bag rated IPX5 for light jets will pass a motorway shower test in a showroom and wet through in the first hour of real touring.
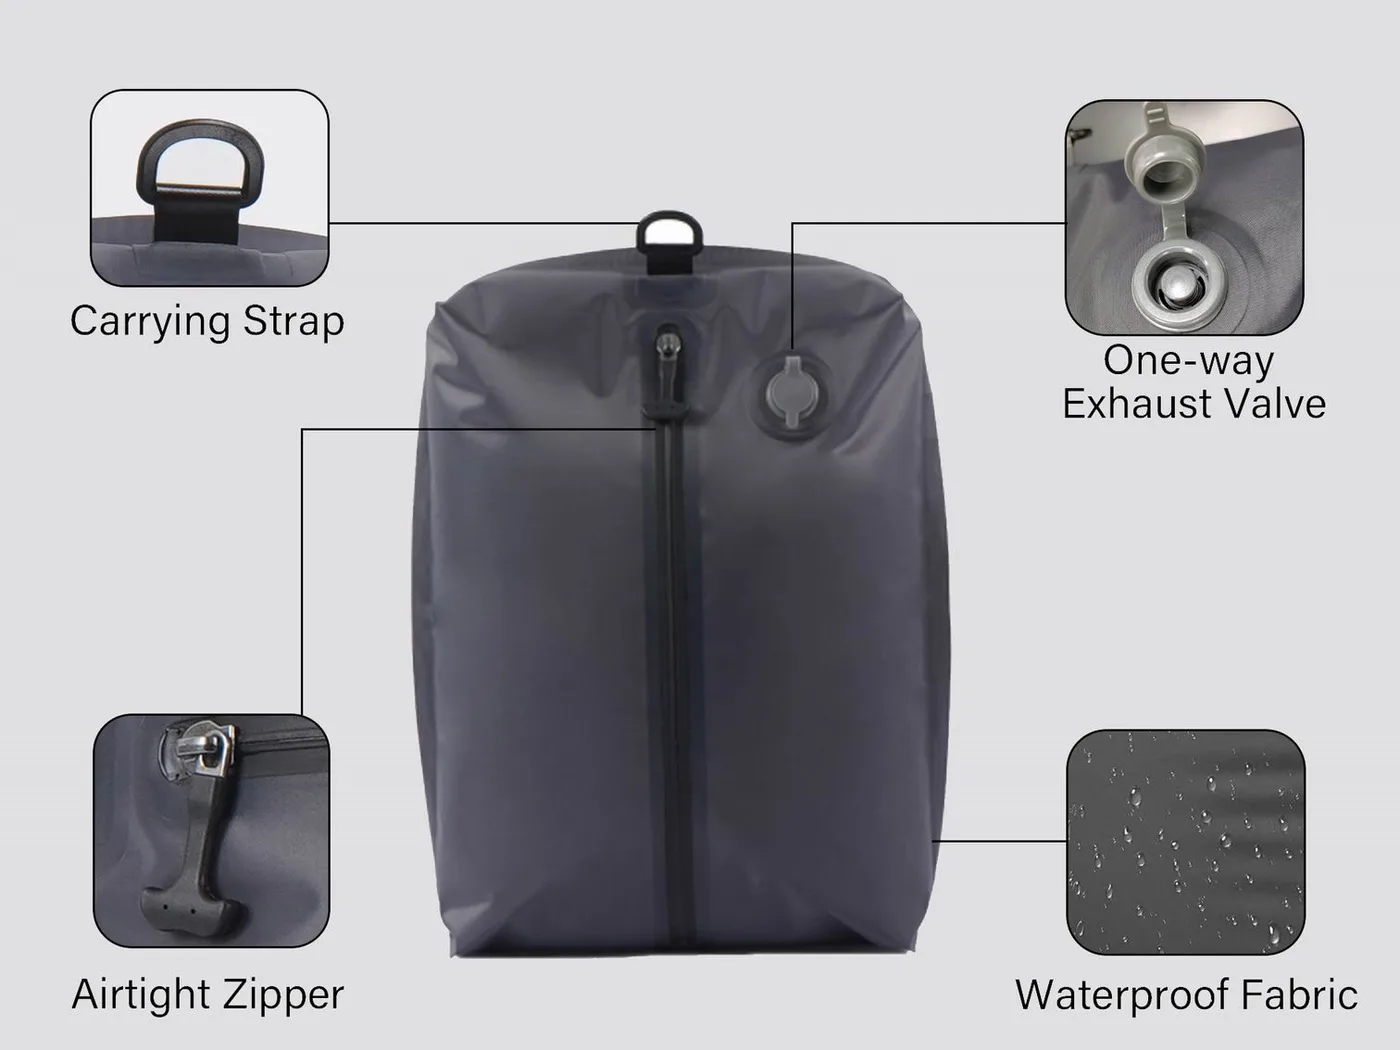
Specify IPX7 with welded seams for any bag that sits outside a hard pannier. The rating is defined by immersion testing in the IEC 60529 framework published by the IEC, and fabric and seam performance is documented in the test methods catalogue maintained by ISO. Together they give you something to audit rather than a marketing adjective.
| Condition | Apparent wind | What the bag sees | Rating needed | Seam requirement |
|---|---|---|---|---|
| Light shower, 80 km/h | 80-100 km/h | Fine driven mist | IPX5 | Welded preferred |
| Steady rain, 110 km/h | 120-140 km/h | Water pushed into every gap | IPX6 | Welded |
| Autumn squall on an exposed road | 140-160 km/h | Sustained driven water | IPX6 plus a rain cover | Welded |
| Deep standing water at 90 km/h | Impact plus spray | Brief immersion at the base | IPX7 | Welded, continuous |
| Overnight on the bike, heavy dew | Near zero | Condensation, not ingress | Any sealed bag | Any |
| Ferry or river crossing spray | Variable | Salt-laden jets | IPX6 plus rinse | Welded |
A rain cover is not a substitute for a sealed bag, but it is a useful second layer on a long wet day. It keeps the driven water off the closure entirely, which means the roll only has to deal with what gets past the cover, and it reduces the amount of grit that lands on the fold at a fuel stop. Carry one sized to the loaded bag rather than the empty one.
Access discipline and the two-sealed-volume rule
Plan the load around what you reach for. Toll cards, sunglasses, a layer and a water bottle belong in a 5 to 10 litre accessory bag mounted where it can be opened without unstrapping anything else. Everything else stays sealed for the whole day. Riders who unstrap the main roll twice a day to find a phone end up with a bag that is closed in a hurry at the third attempt, and that is where the water gets in.
The rule is one opening per bag per day, with a hard exception for weather. If you expect to need something mid-morning, it goes in the top accessory bag; if you expect to need it at the hotel, it goes deep. Write the order down for the first tour and you will find the packing plan settles into a routine that takes five minutes each morning.
Never let one bag hold both your only dry layer set and anything that might be wet. Two sealed volumes mean a failed roll costs comfort rather than safety, and on a motorcycle the stakes are higher than on a bike because a soaked rider at 6 °C loses heat rapidly in the slipstream. Split by temperature criticality: insulation and electronics in one bag, everything tolerable in the other.
The second reason to split is mounting. Two 25 litre rolls placed symmetrically keep the centre of mass low and central, where a single 50 litre bag has to sit high and narrow and makes the bike wander in crosswinds. Riders consistently report better handling with the split arrangement even at identical total mass, and the difference is most obvious in truck overtakes on an open motorway.
Dust, insects and grit at the fold line
A touring day deposits a surprising amount of contaminant on a bag: silica dust from roadworks, dead insects after a warm afternoon, and salt spray near a coast. All of it ends up at the fold, and all of it breaks the seal in the same way, by holding the two film faces apart so capillary action can pull water in. A 50 micron particle is enough, and it is invisible at a fuel stop in the rain.
Carry a small soft brush and a cloth in the accessory bag and wipe both fold faces before every closure. It takes ten seconds. Rinsing the closure with a water bottle works too, provided you dry it before rolling, since water in the fold is its own problem. The mechanism is the same one described for gravel in our mistake list, and the remedy is identical.
Electronics, documents and the top-of-bag rule
Everything small, valuable and frequently needed goes at the top of the smallest bag, inside its own pouch. That position does three things: it keeps the item away from any water that collects at the base, it makes the item reachable without unpacking, and it gives electronics a second independent seal inside the main one. A phone, a passport, a spare battery and a charging cable fit comfortably in a 2 litre pouch that weighs almost nothing.
Heat is the other consideration for electronics in a tail bag. A dark bag in summer sun reaching 60 °C is above the recommended storage range for lithium cells, so keep batteries in an inside pocket near the rider or in a tank bag rather than on the tail. Our notes on protecting electronics in a dry bag and on documents and passports cover the packing detail for both.
Overnight: detach, drain and dry
Take the bags off the bike every night. It takes two minutes and it does three useful things: it lets you check strap wear and weld corners properly, it stops the load sitting on a hot exhaust shield in a hotel car park, and it removes the temptation for theft. Carry the bags in with you; a detachable harness or a simple carry handle makes that realistic rather than a chore.
| Overnight action | Time | What it prevents | Notes |
|---|---|---|---|
| Detach and carry in | 2 min | Theft, heat soak, strap wear | Use a detachable harness |
| Open and air the bags | 3 min | Mildew and odour | Mouth propped open, shade |
| Wipe the fold line | 1 min | Next-day leak | Brush out insects and grit |
| Check the base for abrasion | 1 min | Through-wear after 3,000 km | Look for grey scuffing |
| Hang damp layers outside | 5 min | Damp accumulating over days | Airflow beats heat |
| Re-tension straps cold | 2 min | Load shift next morning | 15-20 kg on a luggage scale |
Drying is the hardest part of a wet tour, and hotels are the opportunity. Use a radiator for base layers turned inside out, hang the shell in the bathroom doorway, and never leave a bag closed with damp kit inside overnight. If you camp, there is no realistic drying option in persistent rain, so the strategy shifts entirely to keeping things dry in the first place, which is what the split-volume rule is for.
A six-minute daily inspection
- Feel the bag surface near the exhaust after the first 60 km; it must never be too hot to hold.
- Check all four strap tensions with a luggage scale and re-tension to 15-20 kg.
- Confirm the load has not walked rearward; mark the seat with tape as a reference.
- Wipe the fold line, brush out insects, and re-roll with three folds.
- Inspect the base for scuffing where it contacts the seat or rack.
- Open the accessory bag, check the pouch seal, and confirm documents are dry.
Do it at the first fuel stop of the day rather than the last, because a problem found in the morning can be fixed properly at a service station, while a problem found at dusk gets a temporary repair in the dark. Keep a short repair kit in the accessory bag: a patch, a spare buckle and 2 m of webbing cover almost everything that can go wrong on a tour.
Weight, handling and the 15 kg ceiling
Above roughly 15 kg of luggage, most motorcycles start to feel vague at the front and slow to turn, and the effect is worse the higher the load sits. Keep dense items low and close to the bike, put bulky light items on top, and never mount a heavy bag more than 300 mm above the seat. If a tour needs more than 15 kg, the answer is usually a second small bag placed lower rather than one bigger bag placed higher.
Tyre pressure and suspension matter more with a load too. Add 0.2 to 0.3 bar to the rear tyre and one or two clicks of preload for a fully loaded bike, and check both again when the load comes off at the end of the tour. Riders who skip this notice a vague front end and blame the luggage when the real cause is a squatted rear.
Pre-tour checklist
- Size for the wettest day, then pack to about 70 percent and leave headroom for the roll.
- Split into at least two sealed volumes by temperature criticality, not by category.
- Run two independent strap paths, each tensioned to 15-20 kg and re-checked daily.
- Keep 150 mm from a shielded exhaust and 250 mm from an unshielded pipe.
- Put a 3 mm non-slip pad under the base to stop vibration abrasion.
- Specify welded seams and IPX7 for every externally mounted bag.
- Wipe both fold faces before every closure; carry a brush in the accessory bag.
- Detach the bags nightly, air them open, and re-tension cold in the morning.
- Keep documents and batteries in a pouch at the top of the smallest bag.
- Compare the sizes across the full dry bag range before the trip.
Touring groups, rental fleets and clubs specifying bags for a season face the same list multiplied across every bike, and the useful adaptation is standardisation: one closure type, one roll count, one colour per job, so the briefing given once applies to every rider.
Weather planning is the last piece and it is worth doing properly for a tour that crosses mountain passes. Check forecasts by region rather than by destination, since a 200 km day can cross three climate zones, and read the guidance published by NOAA before committing to an exposed route. The weekend sizing guide covers the shorter end of the same maths, and our motorcycle luggage setup notes go deeper into mounting hardware.
Finally, treat the plan as a system rather than a list. Volume, mounting geometry, heat clearance and closure discipline all interact, and improving the weakest of them does more for a dry tour than upgrading the strongest. Start with the split into two sealed volumes, since that is the change that turns a potential disaster into a minor inconvenience.
Frequently asked questions
Q1. How much waterproof capacity do I need for a multi-day motorcycle tour?
Plan 12 to 15 litres per day on a summer tour and 16 to 20 litres per day when wet-weather gear comes along. A five-day tour lands at 45 to 70 litres and 9 to 14 kg, split across two 25 litre rolls plus a 10 litre accessory bag.
Q2. Should I use one big tail bag or two smaller ones?
Two smaller ones. Symmetrical 25 litre rolls keep the load low and central, while a single large bag sits high and makes the bike wander in crosswinds. Two volumes also mean one failed roll is survivable.
Q3. How tight should motorcycle luggage straps be?
15 to 20 kg per strap path, checked with a luggage scale. Re-tension after the first 30 minutes and at every fuel stop, because nylon webbing relaxes as it warms and vibrates.
Q4. How far should a dry bag sit from the exhaust?
At least 150 mm from a shielded exhaust and 250 mm from an unshielded pipe. After the first 60 km, feel the bag surface: if it is too hot to hold a palm on for five seconds, remount it.
Q5. What waterproof rating do I need for highway touring?
IPX7 with welded seams. At 110 km/h into a headwind the load sees an apparent wind near 140 km/h, and water at that speed defeats any splash rating and any stitched seam.
Q6. Do I need a rain cover over a dry bag?
Not as a substitute, but yes as a second layer on a long wet day. It keeps driven water off the closure entirely and reduces grit landing on the fold at fuel stops.
Q7. How heavy can my luggage be before handling suffers?
About 15 kg, and less if it sits high. Above that most bikes feel vague at the front; the fix is a second small bag placed lower rather than one bigger bag placed higher.
Q8. What should go in the small accessory bag?
Toll cards, sunglasses, a layer, water and the documents pouch. Keeping everyday items in a separate small bag means the main roll is opened once per day rather than five times.
Q9. How do I stop my bag walking backward on the seat?
Use a longitudinal strap path to a frame point at 15 to 20 kg, plus a crossed lateral path. Mark the seat with tape so you can see even a 2 cm shift at the next stop.
Q10. Should I take the bags off the bike overnight?
Yes, every night. It prevents heat soak from a hot shield, lets you check strap wear and weld corners, and removes the theft temptation. A detachable harness makes it a two-minute job.
Q11. How do I dry kit on a wet multi-day tour?
Use hotel radiators for base layers turned inside out and hang shells in a bathroom doorway. Camping in persistent rain offers no real drying, so the strategy shifts to keeping things dry rather than drying them.
Q12. Can I leave lithium batteries in a tail bag in summer?
Avoid it. A dark bag in direct sun can reach 60 to 65 °C, above the recommended storage range for lithium cells. Keep batteries in a tank bag or an inside pocket near the rider.
Q13. What causes most motorcycle dry bag leaks?
Grit or insects in the fold line, and closures rolled in a hurry at a roadside stop. Both are solved by wiping the fold and by packing so the main bag only has to be opened once a day.
Q14. How much does a non-slip pad under the bag help?
A great deal. Vibration on coarse chip abrades the base at 20 to 40 Hz for hours; a 3 mm closed-cell pad costs 60 g and roughly doubles the life of the base film.
Q15. Do I need to change tyre pressures with a full load?
Yes. Add 0.2 to 0.3 bar to the rear and one or two clicks of preload for a loaded bike, then reset both when the luggage comes off. A squatted rear feels like a vague front end.
Q16. What is the best split for a seven-day tour?
Two 25 litre rolls plus a 10 litre and a 5 litre accessory bag, totalling 55 to 75 litres. A laundry stop midway resets clothing volume and keeps the total close to a five-day load.
People also ask
How do you pack a motorcycle for a multi-day tour?
Split the load into two sealed volumes by temperature criticality, mount them symmetrically and low, and keep everyday items in a small accessory bag. Pack to about 70 percent so the roll closes cleanly.
What size dry bag do you need for five days on a motorcycle?
45 to 70 litres totalling 9 to 14 kg, typically two 25 litre rolls plus a 10 litre accessory bag. Camping adds 8 to 12 litres and 1.5 to 2.5 kg for a tent and sleep system.
How do you stop a tail bag moving at speed?
Use two independent strap paths, each tensioned to 15-20 kg: one longitudinal to a frame point and one crossed lateral. Re-tension at every fuel stop and check against a tape mark on the seat.
Are dry bags safe near a motorcycle exhaust?
Only with clearance. Keep 150 mm from a shielded pipe and 250 mm from an unshielded one, and verify by feeling the bag surface after an hour; too hot to hold means remount.
What makes a dry bag waterproof at highway speed?
Welded seams and an IPX7 rating. Apparent wind of 140 km/h drives water into any gap, so splash ratings and stitched seams that pass static tests still wet through in real touring rain.
How often should you check luggage straps on a tour?
After the first 30 minutes of day one, then at every fuel stop, roughly every 200 to 300 km. Webbing relaxes by several kilograms as it warms, so a morning setting rarely holds all day.
Need this in production volume?
QUANZHOU JUNYUAN BAGS has produced waterproof bags since 2014 in an SGS-verified 4,950 m2 facility in Fujian, China. Minimum order 500 pieces, sampling in 6–10 working days, bulk in 35–50 days, FOB Xiamen — write to service@junyuanbags.com with your spec and target market.