Dry Bag Care After Snowmobiling
A snowmobile leaves a dry bag carrying three problems that a summer trip never produces: ice inside the hardware, a film of exhaust and two-stroke residue on the shell, and condensation that forms the moment the bag is brought into a heated garage at 20 °C from minus 18 °C air. Handled correctly, all three are thirty minutes of work; handled badly, they produce a stiff crease, a slipping buckle and a mildew smell by February. The critical window is the first hour indoors.
This guide sets out that first hour step by step, then covers thawing without crease damage, freeing iced hardware safely, why the warm garage is the real risk, how to remove fuel film without solvents, what changes in the film below freezing, and how to store the bag through a seven-month off-season. Each step carries a number: thaw temperatures in degrees, drying times in hours, storage humidity in percent, and service-life hours per season.
- What a snowmobile ride actually leaves behind
- The first thirty minutes indoors
- Thawing a frozen bag without setting a crease
- Ice in buckles and how to free them safely
- The warm-garage condensation trap
- Fuel, exhaust and two-stroke residue
- What changes in the film below freezing
- Drying a bag that cannot be dried today
- Washing: temperature, soap and what to avoid
- Inspecting after a cold season
- Storing through a seven-month off-season
- When a cold-season bag should be retired
- Care checklist for the rest of the season
What a snowmobile ride actually leaves behind
Start with the obvious: snow. Powder packs into the closure, melts against a warm tunnel or exhaust area, and refreezes into ice that holds the fold open by a millimetre or two. A bag that arrives looking clean can be carrying ice inside the roll, which is why the first inspection should always happen indoors rather than on the trailer.
Then there is the chemical load. Two-stroke exhaust residue, fuel splash from a refill and chaincase oil all leave a thin film on the shell. TPU tolerates short contact with all three, but the film attracts dust and grit during storage, and that grit becomes an abrasive paste the next time the bag is folded. Removing it promptly is far easier than removing it in March.
The third and least obvious problem is thermal. A bag that has been at minus 18 °C for six hours, then carried into a 20 °C garage, will condense water on every surface, inside and out. That moisture is pure, it is not a leak, and it is the single most common reason owners believe a sound bag has failed. Understanding it prevents a lot of unnecessary replacements.
The first thirty minutes indoors
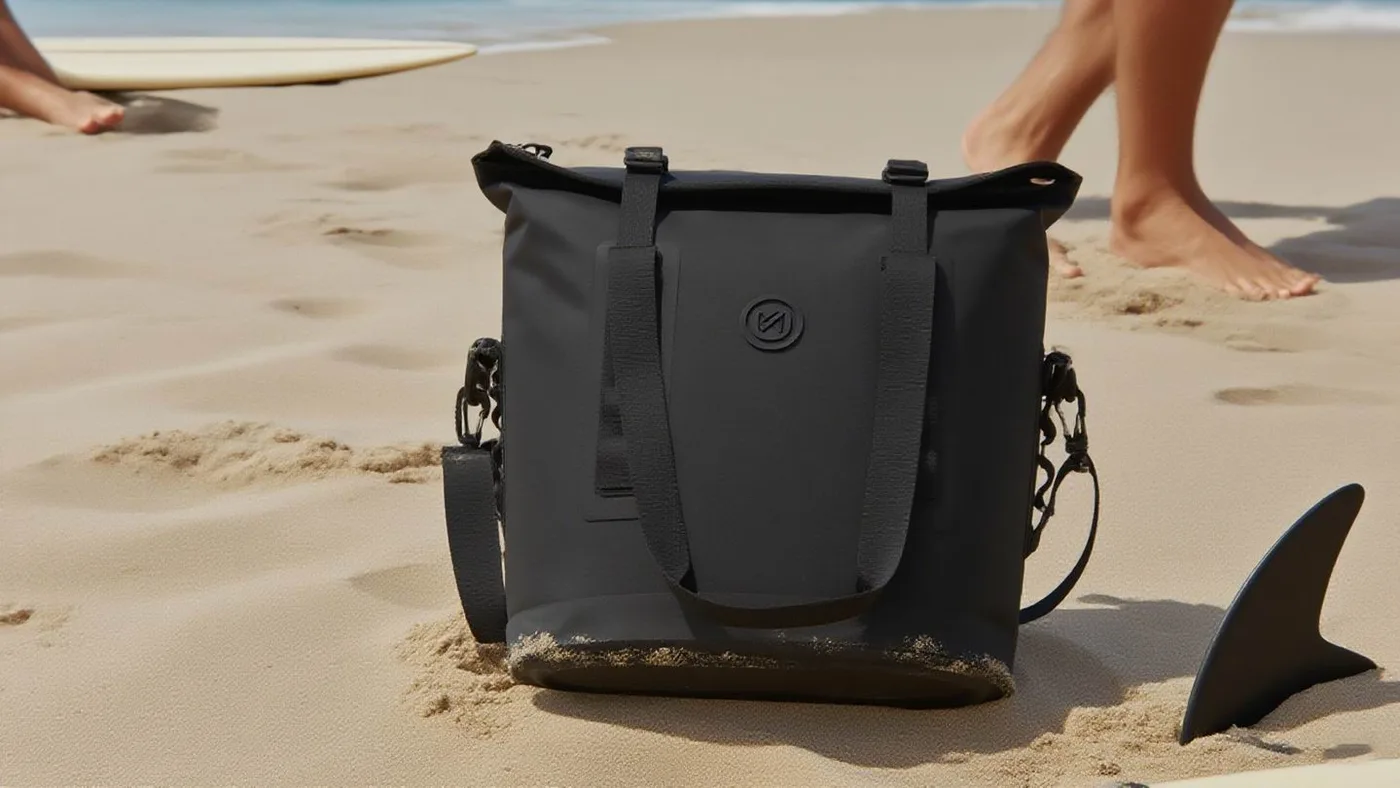
- Bring the bags inside and leave them closed for 15 minutes so the shell warms evenly.
- Open the closure and tip out any snow or ice before it melts into the bag.
- Shake the bag out fully and prop the mouth open on a drying rack.
- Wipe the shell with a damp cloth to lift exhaust film while it is still soft.
- Work every buckle through full travel and listen for grit in the cam.
- Leave the bag open in a ventilated room overnight before storing it.
The order matters more than it looks. Wiping a frozen bag does nothing except smear residue, because the film is brittle and the contamination is locked into the surface. Waiting fifteen minutes brings the shell into a range where a damp cloth lifts everything in one pass, and it also lets you see ice in the fold rather than water, which are two different problems with two different fixes.
Do not put the bag on a radiator, in front of a heater or into a boot dryer. Rapid, uneven heating is what sets a crease into film that is already stiff from cold, and a crease is permanent. Room temperature and airflow are all you need; the goal is gentle and even, not fast.
Thawing a frozen bag without setting a crease
Film that has been cold for hours is stiff, and folding or compressing it in that state produces a crease line where the polymer chains have been forced into a new position. The crease does not disappear when the bag warms; it becomes the place where the film whitens, stiffens and eventually cracks. Thawing correctly is therefore a durability decision, not a comfort one.
| Starting temperature | Safe thaw setting | Time to flexible | Risk if rushed | Notes |
|---|---|---|---|---|
| -5 °C | Room temperature, 18-20 °C | 20-30 min | Low | Safe to handle after warming |
| -15 °C | Room temperature, ventilated | 45-60 min | Medium, crease | Leave closed while warming |
| -25 °C | Cool room first, then 18-20 °C | 90-120 min | High, film cracking | No folding for two hours |
| -30 °C and below | Two-stage thaw, unheated room first | 2-3 h | Severe | Do not handle until pliable |
| Frozen with ice in the fold | Room temperature, mouth propped | 60-90 min | Ice expansion splits the weld | Never force the closure |
The last row is the one that causes real damage. Ice expands as it warms, and forcing a buckle closed over an iced fold puts pressure directly on the weld at the mouth. If you find ice, leave the bag open, let it melt completely, dry the fold with a cloth, and only then roll it. Forcing it is how a repairable problem becomes a retired bag.
A two-stage thaw is worth adopting as a habit in deep cold. Move the bag from the sled into an unheated porch or garage for an hour, then into the house. The smaller temperature step keeps condensation to a thin, manageable film instead of a soaking, and it takes the stiffness out of the film before anyone handles it.
Ice in buckles and how to free them safely
Acetal and nylon buckles survive cold well, but ice inside the cam mechanism will stop them releasing, and the temptation is to lever them open with a screwdriver or a knife. That is how buckles crack and how film gets cut. Warm water is the correct tool: a cup of water at 30 to 40 °C poured over the buckle frees ice in under a minute without heating the surrounding film enough to matter.
Afterwards, dry the buckle thoroughly and work it through full travel ten times while it is still warm, so any remaining moisture is expelled from the cam. Then leave it unclipped. A buckle stored clipped with residual moisture inside will freeze again on the next ride, and this time it will be frozen in the closed position, which is considerably more annoying.
Check the webbing at the same time. Ice crystals abrade webbing fibres from the inside, and a strap that has been frozen repeatedly shows a fuzzy, lifted surface long before it loses strength. If more than about 30 percent of the visible fibres are damaged, replace the strap or the bag rather than trusting it for another season; replacement hardware is covered in our buckle replacement notes.
The warm-garage condensation trap
Condensation is physics, not failure. Air at minus 18 °C holds very little moisture; warm it to 20 °C and its capacity rises severalfold, so any moisture present inside the bag condenses onto the coldest surface available, which is the inner film. A perfectly sealed bag moved from cold to warm will produce visible droplets inside, and owners regularly mistake that for a leak.
| Situation | Air temperature change | Moisture source | Result inside the bag | Prevention |
|---|---|---|---|---|
| Sled to heated garage | -18 °C to +20 °C | Humidity in trapped air | Film of droplets on the inner wall | Thaw in two stages |
| Bag packed with snow in the fold | -15 °C to +18 °C | Melted snow | Pooled water at the base | Open and tip out first |
| Damp gloves stored inside | -10 °C to +20 °C | Wet kit | Saturated liner and odour | Never store damp kit inside |
| Bag left closed overnight | -20 °C to +20 °C | Trapped humidity | Mildew risk within 48 h | Dry open before storing |
| Tunnel-side storage on the sled | -25 °C, engine heat | Exhaust-side warmth | Localised melt and refreeze | Move bags off the tunnel |
The fifth row catches riders who strap a bag over the tunnel where engine heat reaches it. That area cycles above and below freezing repeatedly during a ride, so snow melts, runs into the closure and refreezes. Keep bags off warm machine surfaces entirely, and use a rack or a rear bag position instead. The mechanism is explained in more detail in our condensation guide.
Fuel, exhaust and two-stroke residue
A thin grey film on the shell after a long ride is usually exhaust residue mixed with dust, and it should come off within a day. Use mild dish soap diluted in warm water and a soft cloth, working in straight lines rather than circles, then rinse with clean water. Solvents, degreasers and fuel itself are all worse than the residue: they attack the TPU surface, leave it dull and make it more prone to abrasion.
Fuel splash is more urgent. Petrol softens the film surface while it is in contact, so a spill left overnight can leave a permanently tacky patch that collects grit for the rest of the season. Wipe spills immediately with a dry cloth, wash with soap and water at the end of the day, and keep fuel containers in a separate mount rather than strapped against a bag.
Odour is the last residue problem, and it is best handled with airflow rather than perfume. Prop the bag open in a ventilated room for 24 hours; exhaust smell dissipates almost completely in that time. If it persists, a wipe with a diluted white vinegar solution followed by a full airing works, and our deodorising notes cover the safe options for stubborn cases.
What changes in the film below freezing
Cold changes handling before it changes performance. A 0.5 mm TPU laminate stays functional well past minus 30 °C, but it becomes noticeably firmer, and a firm fold rolled with cold hands is the most common cause of a closure that looks correct and leaks anyway. The material has not failed; the roll has. Understanding the difference saves a lot of unnecessary warranty claims.
| Temperature | Film behaviour | Roll quality achievable | Handling advice |
|---|---|---|---|
| +20 °C | Soft and supple | Excellent, three clean folds | Normal handling |
| 0 °C | Slightly firmer | Good | Roll on a flat surface |
| -10 °C | Firm, slow to relax | Fair | Warm the fold with a hand first |
| -20 °C | Stiff, holds a fold | Poor without warming | Roll once, check, re-roll |
| -30 °C | Near the service limit | Unreliable | Avoid opening outdoors |
Two practical rules follow from that table. Pack and roll the bag indoors before a ride and leave it alone on the trail, and if you must open it in deep cold, warm the fold with a bare hand for twenty seconds, make the first fold wide, and pull the buckle with the heel of the hand rather than fingertips. Both are standard practice in our freezing conditions guide.
Drying a bag that cannot be dried today
Back-to-back riding days are normal, and a bag that is still damp at 7 am has to be managed rather than dried. The priority is airflow, not heat. Hang the bag upside down with the mouth fully open so water runs out rather than pooling, place it in the warmest ventilated spot available, and aim a fan at the opening if one is available. A bag treated this way is usually usable, though not bone dry, in four to six hours.
If it is still damp, do not seal damp kit inside it. Put wet gloves and neck gaiters in a mesh bag outside the dry bag, and accept that they will freeze; frozen gear is inconvenient, whereas damp gear sealed in a warm bag produces mildew within 48 hours. The layout of a drying space matters more than its temperature, and our drying rack guide covers how to arrange it.
Washing: temperature, soap and what to avoid
Wash at the end of the season and whenever residue appears, using water at 20 to 30 °C and a small amount of mild dish soap. Hot water is not needed and is actively harmful: above roughly 40 °C a TPU laminate starts to relax, and a relaxed film creases more easily while it is being handled. Cold water, on the other hand, will not lift exhaust film, so aim for lukewarm.
Avoid four things: solvents, abrasive pads, machine washing and pressure washers. The first attacks the surface, the second thins it, the third twists welded seams, and the fourth can lift a weld edge in a single pass. A soft cloth and patience is the entire toolkit. Full steps are in the roll-top cleaning guide, which applies unchanged in winter.
Inspecting after a cold season
- Lay the bag flat at room temperature and run a thumb along every weld, corners first.
- Look for whitening at the fold line, which indicates crease damage rather than dirt.
- Flex the base gently and check for stiffness that suggests film fatigue.
- Close with three folds, squeeze for 30 seconds, and listen for a hiss.
- Work every buckle ten times and confirm it holds at least 8 kg.
- Inspect webbing for lifted fibres and retire anything past 30 percent wear.
- Log the season’s riding hours against the 500 to 800 hour weld interval.
That last step is what turns inspection into planning. A bag with 600 logged hours is in the window where corner welds begin to show fatigue, and knowing that before the season rather than during it means you carry a patch kit or a spare. Records kept next to sled service hours are easy to maintain because the two correlate closely.
Storing through a seven-month off-season
Summer storage is where most cold-weather bags are quietly ruined. The three enemies are heat, compression and residual moisture, and all three are avoidable. Store at a stable temperature below 30 °C, out of direct sun, with the bag loosely rolled rather than folded flat, and with the buckle unclipped. A folded, clipped, slightly damp bag stored in a hot garage is a mildew problem waiting for next winter.
| Storage condition | Temperature | Humidity | Expected outcome | Verdict |
|---|---|---|---|---|
| Loose roll, dark cupboard | 15-22 °C | Under 60 percent | Film unchanged after 7 months | Ideal |
| Loose roll, garage shelf | 5-35 °C swing | 40-80 percent | Slight stiffness, no damage | Acceptable |
| Folded flat under weight | 15-25 °C | Any | Permanent crease at the fold | Avoid |
| Clipped closed and damp | 15-25 °C | Above 70 percent | Mildew within 2-4 weeks | Never |
| Hung in direct sun | Up to 55 °C | Any | UV chalking, stiffening | Avoid |
| In a hot vehicle boot | Up to 70 °C | Any | Film distortion, weld softening | Never |
If you only have a garage, prioritise airflow and shade over temperature control. Hang the bag from a rafter by its handle with the mouth open, away from any window that gets afternoon sun, and check it once a month. That arrangement is unglamorous and it works; the failure cases in the table are all about trapped moisture and compression rather than cold.
Crease discipline belongs in storage too. If a bag must be rolled for space, roll it loosely around a soft item such as a towel, and shift the fold line by a couple of centimetres each time you handle it, so the same line is not repeatedly stressed. Our crease damage guide and the off-season storage notes both go deeper on this point.
When a cold-season bag should be retired
Retire a bag when the film shows a white crease that does not relax at room temperature, when a corner weld has separated or lifted, or when a buckle slips below 8 kg after cleaning. Those three are structural rather than cosmetic, and none of them improves. A bag retired from snowmobile duty can still serve for summer storage or as a liner, which is a better outcome than discovering the failure on a remote trail.
Everything else is repairable. A scuff, a pinhole or a small corner stress line can be patched with a TPU patch applied with heat and 25 mm of overlap, restoring most of the strength of the surrounding material. Keep a patch kit in the sled, and patch at the end of the day rather than at the start of the next one, because a warm, dry bag takes a patch properly and a frozen one does not. The judgement calls are set out in our retirement guide.
Care checklist for the rest of the season
- Tip out snow and ice indoors before it melts, and never force an iced closure.
- Thaw in two stages: unheated space first, then a ventilated room at 18-20 °C.
- Free iced buckles with warm water at 30-40 °C, never with a lever or knife.
- Wipe exhaust film with mild soap and water within a day; avoid all solvents.
- Dry open with the mouth propped and airflow aimed at the opening.
- Store buckles unclipped and webbing dry to prevent refreezing.
- Keep bags off warm tunnel surfaces where melt and refreeze cycles occur.
- Patch scuffs the same day, with 25 mm overlap, on a warm dry bag.
- Log riding hours and inspect welds thoroughly every 50 hours.
- Store loosely rolled, dark and dry, and check monthly through summer.
- Compare replacements against the full dry bag range before next season.
Clubs, rental fleets and backcountry operations running a dozen bags face the same list multiplied, and the useful adaptation is a shared routine: one thawing area, one drying rack, one logbook. Standardising the process matters more than standardising the product, because almost every winter failure in this guide is a handling failure rather than a materials failure.
Cold exposure is worth taking seriously at the same time as kit care. Wind chill on a sled at 60 km/h in minus 20 °C air is severe, and the guidance published by NOAA and the cold-weather health information from the CDC are both worth reading before a long remote day. A well-maintained bag keeps kit dry; it does nothing to keep a rider warm.
For programmes that need bags specified rather than bought one at a time, the same care logic becomes a purchasing brief: film thickness for cold, welded seams, acetal hardware that survives icing, and a patch kit included with every unit.
Frequently asked questions
Q1. How do I care for a dry bag after snowmobiling?
Tip out snow and ice indoors, thaw the bag in two stages at room temperature, wipe exhaust film with mild soap, dry with the mouth propped open, and store it loosely rolled with the buckle unclipped. The first hour indoors decides whether the bag survives the season.
Q2. Why is my dry bag wet inside after a cold ride?
Condensation, not leakage. Air warmed from minus 18 °C to 20 °C holds far more moisture, so humidity inside the bag condenses on the cold inner film. Thaw in two stages and dry open to avoid it.
Q3. How do I thaw a frozen dry bag safely?
Leave it closed for 15 minutes, then let it warm at 18-20 °C for 45 to 120 minutes depending on how cold it was. Never use a heater, radiator or boot dryer, and never fold film that is still stiff from cold.
Q4. Can I use hot water to free an iced buckle?
Yes, at 30 to 40 °C poured over the buckle only. Do not use a screwdriver or knife to lever it, and afterwards dry it and work it through full travel ten times while warm.
Q5. What temperature damages a dry bag?
Film handling changes below freezing and hot water above about 40 °C relaxes the laminate. Storage above 55 °C, such as a vehicle boot in summer, can distort the film and soften welds.
Q6. How do I remove exhaust film from a TPU bag?
Wipe with mild dish soap in water at 20-30 °C using a soft cloth, then rinse. Avoid solvents, degreasers and fuel, all of which dull the surface and make the film more prone to abrasion.
Q7. Can I put a snowmobile dry bag in the washing machine?
No. Machine washing twists welded seams and abrades the film against the drum. Wash by hand at 20-30 °C with mild soap, rinse, and dry in shade with the mouth open.
Q8. How long does it take to dry a bag between rides?
Four to six hours with the mouth propped open and a fan aimed at the opening. Airflow matters more than heat; if it is still damp, keep wet kit out of the bag rather than sealing it in.
Q9. How should I store a dry bag over summer?
Loosely rolled, buckle unclipped, below 30 °C and out of direct sun, in a space under 60 percent humidity. Never store it folded flat under weight or sealed closed while damp, which produces mildew within weeks.
Q10. Does snowmobiling shorten a dry bag’s life?
It shortens it relative to summer use, mainly through handling in cold: forced iced closures and creases formed while the film is stiff. Expect 500 to 800 riding hours before weld inspection becomes critical.
Q11. Can a creased or scuffed bag be repaired?
A scuff or pinhole can be heat-patched with 25 mm of overlap in all directions. A white crease that does not relax at room temperature is permanent damage and the bag should be retired from load duty.
Q12. Should I strap a bag over the snowmobile tunnel?
No. Tunnel areas cycle above and below freezing during a ride, so snow melts, runs into the closure and refreezes. Use a rack or rear position away from any warm machine surface.
Q13. What should I do if fuel spills on the bag?
Wipe it off immediately with a dry cloth and wash with mild soap and water the same day. Petrol left in contact overnight can leave a permanently tacky patch that collects grit all season.
Q14. How often should I inspect a winter dry bag?
Rinse and check after every ride, and inspect welds thoroughly every 50 riding hours. A bag with 600 logged hours is in the window where corner welds start to show fatigue.
Q15. Is a duffel or a roll-top better for snowmobiling?
A roll-top seals more reliably with ice and snow around the mouth, while a duffel dries faster because the long opening moves more air. Many riders carry one of each for those two reasons.
Q16. Does cold make the waterproof rating worse?
The rating is unchanged, but roll quality suffers because stiff film does not fold cleanly. Warm the fold with a hand, make the first fold wide, and close with the heel of the hand rather than fingertips.
People also ask
How do you dry a dry bag after snowmobiling?
Tip out snow indoors, thaw at room temperature, then hang it upside down with the mouth fully open and a fan aimed at the opening. Airflow beats heat, and most bags are usable in four to six hours.
Why does a dry bag get wet inside in winter?
Condensation. Cold air holds little moisture, so warming a sealed bag to 20 °C makes trapped humidity condense on the inner film. It is not a leak, and a two-stage thaw prevents it.
Can you leave a dry bag in a freezing garage?
Yes, once it is fully dry and stored loosely rolled with the buckle unclipped. Damp or clipped bags should not be frozen, because ice in the cam can lock the buckle closed.
How do you clean exhaust residue off a TPU bag?
Use mild dish soap in lukewarm water with a soft cloth, working in straight lines, then rinse. Solvents and degreasers dull the surface and increase abrasion, so they should be avoided entirely.
When should you retire a winter dry bag?
When a crease stays white at room temperature, when a corner weld has lifted, or when a cleaned buckle slips below 8 kg. Scuffs and pinholes are patchable; those three are not.
Do dry bags still work at minus 30 °C?
A 0.5 mm TPU bag remains functional, but the film stiffens and roll quality suffers. Pack indoors, avoid opening in deep cold, and warm the fold with a hand before rolling.
Need this in production volume?
QUANZHOU JUNYUAN BAGS has produced waterproof bags since 2014 in an SGS-verified 4,950 m2 facility in Fujian, China. Minimum order 500 pieces, sampling in 6–10 working days, bulk in 35–50 days, FOB Xiamen — write to service@junyuanbags.com with your spec and target market.