Choosing a Dry Bag for Thru-Hiking
A thru-hiker needs 30 to 45 litres of waterproof capacity for a system weighing 250 to 400 grams, split across a pack liner plus two or three small roll-top bags rather than one large one. On a five-month walk of 3,500 km with resupply every three to five days, the waterproof system is opened twice a day for five hundred days, so the decision is less about peak protection than about how much weight and fumbling you tolerate per opening. A 45 gram liner plus a 90 gram 10L bag and a 55 gram 5L bag covers a 55 litre pack and a five-day food carry for about 190 grams.
This guide compares the three waterproof strategies side by side, gives the weight cost of each film thickness at each size, and maps bag sizes to the zones inside a 55 to 65 litre pack. It also covers the failure data that matters over a long walk: what actually wears out by mile 700, how to repair it on the trail, and where the weight saving stops being worth it. Every figure assumes a twenty-five to thirty-five kilometre day with a 6 to 9 kg total pack weight.
- What a thru-hike asks of a waterproof system
- Pack liner, pack cover or roll-top bags: the honest trade-off
- Film thickness versus grams: where the weight goes
- Mapping bag sizes to a 55 to 65 litre pack
- The sleep system and the compression question
- Food, smell and the resupply box
- Water crossings and real submersion
- Six hours of drizzle versus a twenty-minute downpour
- Cold mornings, altitude and freezing
- What fails by mile 700
- The trail repair kit
- Washing and drying on a zero day
- Choosing your three bags: a decision rule
What a thru-hike asks of a waterproof system
A thru-hike is not a weekend in heavier form; it is a different problem. The walk lasts months, resupply happens every three to five days, and the same bag is opened and closed several hundred times. Weight is the first constraint because it is paid back with every step, but access frequency is the second and it is rarely discussed: a system that takes forty seconds to open gets opened less carefully, and careless openings are how gear gets wet.
Rain patterns matter as much as totals. A thru-hiker walking through a temperate spring will meet drizzle that lasts six hours rather than a tropical downpour that lasts twenty minutes, and long low-intensity rain defeats different things than short heavy rain. Fabric coating, pack cover seams and roll-top closures each fail at a different point on that spectrum.
The third constraint is repair. Three hundred miles from the nearest outfitter, a punctured liner has to be fixed with tape and a patch, and the system has to keep working with one component missing. Anything whose failure disables the whole kit is a bad choice regardless of how light it is.
Pack liner, pack cover or roll-top bags: the honest trade-off
There are three real strategies and most experienced walkers end up with a hybrid. A liner protects everything with the least weight and the worst access. A pack cover protects the outside of the pack well and the contents not at all, because water runs down your back and into the pack body. Roll-top bags protect specific zones, cost the most per litre and give the best access.
| Strategy | Weight | Protection | Access | Best for |
|---|---|---|---|---|
| Pack liner only | 45-70 g | High if intact | Poor, unpack to reach | Gram counters, dry climates |
| Pack cover only | 80-140 g | Moderate, misses the back panel | Good | Short showers, moderate climates |
| Liner plus one roll-top | 135-190 g | High | Good | Most thru-hikes |
| Roll-top bags only | 260-420 g | High, zoned | Best | Wet ranges, river fords |
| Liner, cover and two bags | 300-480 g | Highest | Good | Shoulder seasons, alpine |
The hybrid of a liner plus one roll-top bag is where most long-distance walkers settle. The liner handles the general soak, the roll-top holds the sleep system and the down layer, and everything else lives loose in the pack where it can be reached in seconds. It costs about 170 grams and it survives a week of continuous rain.
Pack covers deserve a specific warning. They shed rain from the pack body but they do nothing about water running between your back and the pack, and they are useless in wind above about 40 km/h because they lift and flap. On an exposed ridge in a squall a cover can end up wetter than the pack it is protecting. Details on the format choice are in the liner comparison.
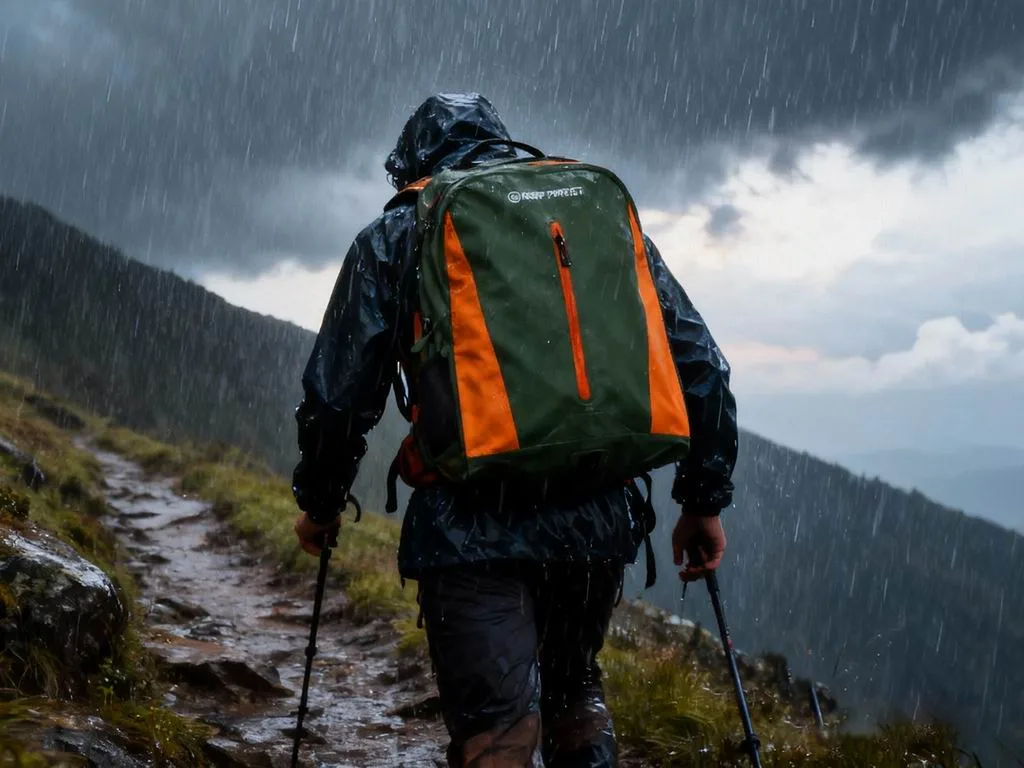
Film thickness versus grams: where the weight goes
Weight in a dry bag is mostly film. A 0.25 mm TPU laminate on a 210D face weighs around 265 grams per square metre, while a 0.55 mm film on 500D weighs around 620, so the same bag built heavy costs more than twice as much to carry. The question is not which is better but how much abrasion your particular walk generates.
| Build | Film | Total gsm | Weight of a 10L bag | Abrasion life |
|---|---|---|---|---|
| Ultralight liner film | 0.15 mm | 180 gsm | 55 g | 2,000-4,000 cycles |
| Light roll-top | 0.25 mm TPU + 210D | 265 gsm | 105 g | 8,000-12,000 cycles |
| General roll-top | 0.40 mm TPU + 420D | 430 gsm | 180 g | 20,000+ cycles |
| Heavy duty | 0.55 mm TPU + 500D | 620 gsm | 265 g | 40,000+ cycles |
Abrasion inside a pack is real but it is not extreme. Fabric rubbing against fabric in a loaded pack generates far less wear than a bag dragged across rock or sand, which is why light film survives surprisingly well as a liner and poorly as an external bag. Match the film to the position: thin inside the pack, thicker for anything carried outside or used as a food bag that gets stuffed into a bear box.
The ASTM Martindale and Taber methods are how abrasion claims are measured, and a film rated at 20,000 Martindale cycles will outlast a thru-hike comfortably when used inside a pack. What kills thin film is not rubbing; it is a sharp corner on a stove, a tent pole end, or a single careless packing of a trekking pole tip. Puncture resistance is discussed further in the puncture testing guide.
Mapping bag sizes to a 55 to 65 litre pack
Think in zones rather than in one big volume. A 55 litre pack loaded with a five-day food carry has roughly four zones that each need a different level of protection: the sleep system, the insulation layer, the food, and the electronics and documents. Giving each zone its own bag or its own position inside the liner is what keeps a wet morning from becoming a wet week.
| Zone | Volume | Bag size | Bag weight | Protection needed |
|---|---|---|---|---|
| Sleep system | 12-18 L | 20L, compressed | 260 g | Absolute, never wet |
| Insulation layer | 4-8 L | 10L | 180 g | Absolute |
| Food and cooking | 8-14 L | 10L or 15L | 180-220 g | High, smell containment |
| Electronics, documents | 1-3 L | 2L or 5L | 60-105 g | Absolute, double bagged |
| Map, snacks, daily items | 2-4 L | loose or 5L | 0-105 g | Moderate |
Note that only three of the five zones need to be absolutely dry. Carrying a 20L, a 10L and a 2L covers everything that matters at about 500 grams, and leaving the map case and snacks loose saves another hundred. Hikers who put every item into its own bag end up carrying 800 grams of dry bags and a pack full of small hard lumps that pack badly.
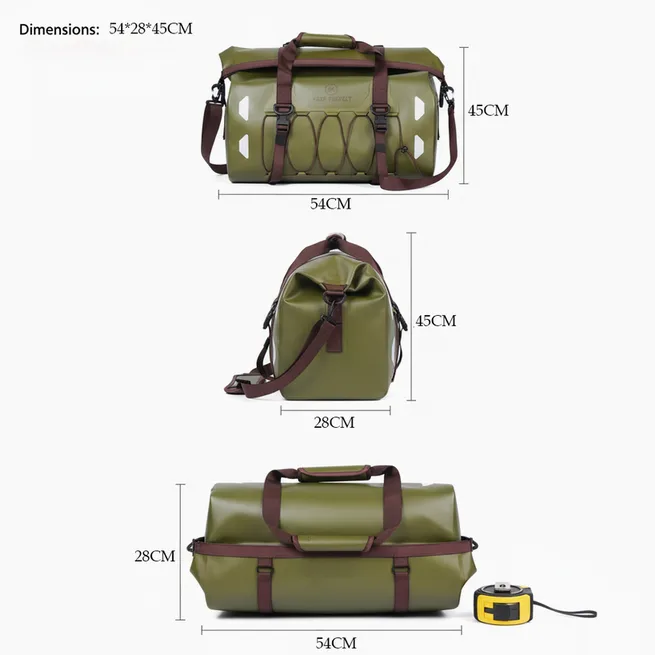
Volume planning needs the usable figure, not the nominal one. A 20L roll-top loses about 3.5 litres to three folds, so if your quilt and liner really measure 17 litres compressed you need a 20L, not a 15L. The arithmetic is set out in the capacity loss guide, and expedition-scale planning is in the seven-day sizing guide.
The sleep system and the compression question
A sleeping quilt or bag is the single item that must never get wet and the one that is hardest to compress into a dry bag. A summer quilt rated to 5 °C packs to about 10 to 14 litres uncompressed and 7 to 9 litres with a compression strap; a three-season bag rated to -5 °C packs to 14 to 20 litres. The dry bag has to be big enough for the uncompressed figure because you will not always have the patience to compress it in the rain.
Compression and waterproofing pull in opposite directions. Squeezing a roll-top bag to half its volume puts the closure folds under tension and makes a clean three-fold roll impossible, so a compression system and a roll-top closure do not combine well. The practical answer is a slightly larger bag rolled correctly rather than a tight bag rolled badly, because a roll that is under tension leaks at the fold.
Food, smell and the resupply box
Food is the heaviest and smelliest part of a thru-hike load and it deserves its own bag. Five days of food at roughly 700 grams per day is 3.5 kg occupying 8 to 14 litres, and it needs to be contained for two reasons: smell management in camp, and the fact that a burst oil sachet or a leaking honey packet inside a liner ruins everything it touches.
A 10L or 15L roll-top bag with welded seams is the right container because it can be wiped out at resupply and it actually holds smell back, unlike a stuff sack. Pack the heaviest items at the bottom, keep anything oily double-bagged, and close the bag before cooking rather than after, so the evening smell does not set up camp for you. Where a hard-sided container is required, the same bag still works as an inner liner.
Water crossings and real submersion
Some walks involve fords deep enough to swim, and a fall in a fast creek puts the whole pack underwater for a few seconds. A roll-top bag rated IPX7 handles that without drama; a pack liner twisted shut and tucked inside does not, because the twist is not a seal under pressure. This is the one situation where the extra weight of proper roll-top bags is not a luxury.
Plan the crossing itself. Release the hip belt and one shoulder strap so you can shed the pack in water, keep the electronics bag high in the pack rather than at the bottom, and accept that the pack body will get wet. What you are protecting is the sleep system and the insulation layer, and they are protected by the bags rather than by the pack.
Six hours of drizzle versus a twenty-minute downpour
The two rain types fail different things. Drizzle at 1 to 3 mm per hour wets everything slowly, and what fails is the pack body and the cover, because fabric has hours to soak through. A downpour at 25 to 50 mm per hour overwhelms closures and gaps, and what fails is anything that relies on a flap or a cover rather than a seal.
| Rain intensity | Duration | What fails first | What holds |
|---|---|---|---|
| 1-3 mm/h drizzle | 6 h | Pack body soaks through | Liner and roll-top bags |
| 5-10 mm/h steady rain | 3 h | Pack cover seams | Welded bags, liner intact |
| 25-50 mm/h downpour | 20 min | Cover lifting in wind | Roll-top with three folds |
| Wind-driven rain at 40 km/h | 1 h | Back panel wetting | Liner, bags inside the pack |
| Full immersion in a fall | 10 s | Twisted liner closure | IPX7 roll-top bags |
For weather planning on a long walk, the NOAA publishes precipitation climatology and forecast guidance that is worth checking before committing to a high pass or an exposed section. Knowing whether the next three days are drizzle or downpour changes what you pack at the top of the pack rather than the bottom.
Cold mornings, altitude and freezing
Cold changes the handling properties of the film rather than its waterproofing. A PVC-coated bag stiffens noticeably below about 5 °C and becomes unpleasant to roll at dawn, while TPU stays workable well below freezing, which is the practical reason long-distance walkers prefer it. Rolling a stiff film at 6 am with cold hands is when closures get done badly.
Condensation is the cold-weather trap. A sealed bag holding a slightly damp quilt in a 2 °C morning will collect moisture on the inside of the film, and over a week of cold nights that moisture accumulates. Air the sleep system on every sunny break and do not seal a damp quilt into a bag for days at a time. The mechanism is explained in the condensation guide.
What fails by mile 700
Field data from long walks is consistent about failure order. Thin liners puncture, usually at the bottom corner where a stove or a tent pole sits. Closures wear where the buckle has been clipped and unclipped a thousand times. Handles and attachment points part company with the body. Film itself almost never wears through from rubbing alone.
| Failure | Typical distance | Cause | Prevention |
|---|---|---|---|
| Liner puncture at a corner | 300-600 km | Stove or pole tip | Pad sharp items, heavier film |
| Buckle cracking | 800-1,200 km | Cold plus repeated load | Spare buckle in the repair kit |
| Fold line creasing | 1,000-1,500 km | Always folding in the same place | Vary the fold depth |
| Weld peel at a handle | 700-1,000 km | Lifting a loaded bag by one handle | Lift the body, not the handle |
| Odour build-up | 400-800 km | Food residue, no drying | Wipe at resupply, air daily |
The pattern is encouraging: almost nothing fails without a specific cause, and almost every cause is a habit rather than a defect. Vary the fold depth so the crease does not work-hardening in one place, lift loaded bags by the body, and pad anything with a corner. Those three habits remove most of the table.
The trail repair kit
- Five self-adhesive TPU patches, 60 mm square, weighing about 12 grams in total.
- One metre of repair tape matched to the film, wrapped around a pen barrel so it does not curl.
- A spare 25 mm buckle of the same type as the bag closure, around 14 grams.
- A small tube of sealant for pinholes, used sparingly because it adds weight and mess.
- Two cable ties, which fix a broken ladderlock better than anything else at 2 grams.
- A needle and 2 metres of thread for webbing, not for the film itself.
Total kit weight is about 45 grams and it covers every failure in the table above except a full seam peel. Patches work on clean, dry film; they work badly on a wet, sandy surface, which means the repair is done in camp at night rather than in the rain on the trail. Full patch technique is in the patch kit guide.
Washing and drying on a zero day
A zero day in town is the moment to reset the kit. Wash bags by hand in warm water with a small amount of mild soap, paying attention to the fold line where grit and food residue collect, then rinse twice. Do not put them in a machine: the agitation abrades the film and a spin cycle twists welded seams in a way no repair fixes neatly.
Dry them mouth-open over a shower rail or a chair back, out of direct sun. Two hours of strong sun on a drying bag is a measurable slice of its UV budget, and hostel balconies at altitude deliver more UV per hour than a lowland beach. Once dry, roll loosely and store with the buckle undone so the fold does not take a permanent set. More detail in the care after backpacking guide.
Choosing your three bags: a decision rule
- Weigh your sleep system compressed and add 3 litres; that is your large bag size.
- Put the insulation layer in the second bag, sized to fit it uncompressed.
- Electronics, passport and documents go in one small bag, double-bagged inside the liner.
- Add the weights; if the total exceeds 400 grams, drop the cover before dropping a bag.
- Choose TPU over PVC if you expect morning temperatures below 5 °C.
- Check every closure with an air squeeze before the first day, then weekly.
Two numbers decide the whole system: the compressed volume of your sleep system and the coldest morning you expect. Everything else is preference. A hiker on a dry desert route can run a 55 gram liner and nothing else; a hiker crossing a wet range in shoulder season wants two roll-top bags and a liner, and will carry the extra 250 grams without regret on the first six-hour soaking.
Our bags have been produced since 2014 in an SGS-verified 4,950 m2 facility, and the light roll-top sizes used for long-distance walking build on a 0.25 mm TPU film over a 210D face at 265 grams per square metre, which is the point where weight and field life balance for this kind of use. Weight against durability across the whole range is compared in the light versus heavy-duty guide, format choice is covered in the backpack versus duffel guide, and climate matching in the climate guide. The TPU backpack range and the roll-top sizes cover both ends of the system, and capacity detail sits in the 20L guide.
Frequently asked questions
Q1. What size dry bag do I need for thru-hiking?
Three bags totalling 30 to 45 litres: a 20L for the sleep system, a 10L for the insulation layer, and a 2L or 5L for electronics and documents, plus a pack liner if you want full coverage.
Q2. Is a pack liner better than dry bags for thru-hiking?
A liner is lighter at 45 to 70 grams and protects everything, but access is poor because you unpack to reach anything. The common answer is a liner plus one or two roll-top bags, around 170 to 250 grams total.
Q3. Do I need a pack cover as well?
Only in moderate climates with short showers. A cover does nothing about water running between your back and the pack, and it lifts in wind above about 40 km/h. Drop the cover before you drop a dry bag.
Q4. How much should a thru-hiking waterproof system weigh?
250 to 400 grams for a full system. A 45 gram liner plus a 90 gram 10L bag and a 55 gram 5L bag is about 190 grams and covers a 55 litre pack.
Q5. Should I choose TPU or PVC for a long walk?
TPU. It stays workable below freezing while PVC-coated fabric stiffens below about 5 °C, and rolling a stiff film at dawn with cold hands is when closures are done badly.
Q6. What film thickness is right for a pack liner?
About 0.15 mm is enough inside a pack, where abrasion is low. Use 0.25 mm or thicker for anything carried outside the pack or used as a food bag that gets stuffed into a hard container.
Q7. How do I stop my dry bag puncturing?
Pad sharp corners: stove bodies, tent pole ends and trekking pole tips cause almost every liner puncture, usually at the bottom corner between 300 and 600 km.
Q8. Can I use a compression sack instead of a dry bag?
Not for waterproofing. Compression puts the roll-top folds under tension so a clean three-fold seal is impossible. Use a slightly larger bag rolled correctly rather than a tight one rolled badly.
Q9. How do I keep food smell contained?
Use a welded 10L or 15L roll-top bag rather than a stuff sack, double-bag anything oily, and close it before cooking. Wipe the bag out at each resupply.
Q10. Will my quilt get damp inside a sealed bag?
It can, from condensation. A slightly damp quilt sealed in a cold morning accumulates moisture over a week, so air the sleep system at every sunny break rather than leaving it sealed.
Q11. What fails first on a thru-hike?
Thin liners puncture at a corner, usually from a stove or pole tip between 300 and 600 km. Buckles crack around 800 to 1,200 km and fold lines crease where the same fold depth is used every day.
Q12. What should be in a trail repair kit for dry bags?
Five self-adhesive TPU patches, a metre of matched repair tape, a spare 25 mm buckle, sealant for pinholes and two cable ties, about 45 grams in total.
Q13. Can I wash my dry bags in town?
Yes, by hand in warm water with mild soap, rinsed twice and dried mouth-open out of direct sun. Machine washing abrades the film and a spin cycle twists welded seams.
Q14. How often should I test my closures?
Before day one and then weekly. Roll the bag empty, squeeze it and listen for a hiss; a bag that fails the squeeze test will fail in the first long rain.
Q15. Does a dry bag protect gear during a river crossing?
Yes if it is rated IPX7 and rolled properly. A twisted liner closure is not a seal under pressure, so crossings are the one situation where the extra weight of real roll-top bags is justified.
Q16. Should every item go in its own dry bag?
No. Only three zones need to be absolutely dry: sleep system, insulation and electronics. Bagging everything costs around 800 grams and packs badly, because the pack fills with small hard lumps.
People also ask
How do you pack a backpack for thru-hiking in the rain?
Use a pack liner for general soak, a 20L roll-top for the sleep system, a 10L for the insulation layer and a small bag for electronics. Keep daily items loose so they can be reached in seconds.
Are dry bags worth the weight on a long hike?
Yes for three zones: sleep system, insulation and electronics. Around 190 grams protects everything that would end a trip if it got wet, which is cheaper insurance than a warmer bag.
What is the lightest waterproof system for a thru-hike?
A 45 to 55 gram liner plus one 90 gram 10L roll-top bag, about 140 grams total. Add a 55 gram 5L bag for electronics and the system is complete at under 200 grams.
Why does my pack liner keep getting holes?
Sharp corners inside the pack, usually a stove body, tent pole end or trekking pole tip. Pad those items or move to a heavier film, and expect punctures at the bottom corner first.
Do thru-hikers use pack covers?
Some do, but a cover misses the back panel where water runs between pack and back, and it lifts in wind above 40 km/h. It is the first item to drop when cutting weight.
How do you dry gear on a long trail?
Air the sleep system at every break, wipe the food bag at each resupply, and on a zero day wash bags by hand and dry them mouth-open out of direct sun.
Need this in production volume?
QUANZHOU JUNYUAN BAGS has produced waterproof bags since 2014 in an SGS-verified 4,950 m2 facility in Fujian, China. Minimum order 500 pieces, sampling in 6–10 working days, bulk in 35–50 days, FOB Xiamen — write to service@junyuanbags.com with your spec and target market.